crwdns2915892:0crwdne2915892:0
This guide will show you the steps required to replace the screen on your HP Envy x2 13-j002dx Detachable PC.
The display of this detachable PC also doubles as a touchscreen, so there may be more issues that appear unrelated to the display properties. The screen may need to be replaced if it begins to malfunction due to everyday wear, damage done by dropping the PC or objects hitting the screen. Apparent issues may include: unresponsiveness to tactile input, a cracked screen, black spots, and/or vertical lines along the entire screen. Issues not caused by physical damage may be resolved by updating the graphics driver.
crwdns2942213:0crwdne2942213:0
-
-
Remove five 4mm Phillips #0 screws securing the lower case to the HP Envy x2 13-j002dx.
-
-
-
Use a Phillips #00 screwdriver to remove the two 3.5 mm screws from the bottom of the device—one on each side of the keyboard dock.
-
-
crwdns2935267:0crwdne2935267:0Tweezers$4.99
-
Use a pair of tweezers to remove the screw covers on the bottom of the device.
-
Use a Phillips #0 screwdriver to remove the two 4mm screws.
-
-
-
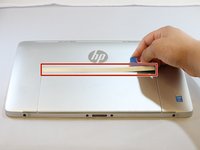
Use an opening pick to remove the plastic cover above the back stand.
-
Pry the cover off.
-
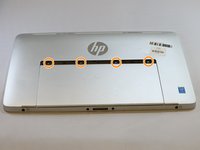
Use a Phillips #0 screwdriver to remove the four 4 mm screws.
-
-
-
Use an opening pick and a prying tool, and go around the device to remove the back cover from the rest of the assembly.
-
-
-
-
Unplug the battery from the motherboard.
-
-
-
Carefully pull up on the battery connector from the speaker.
-
Use a pair of tweezers and remove the taped down wire for the speaker.
-
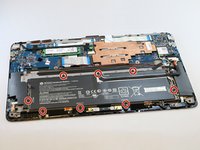
Use a Phillips #00 screwdriver to remove the seven 3mm screws around the battery.
-
-
-
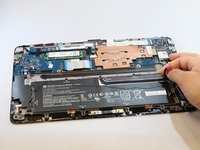
Carefully lift up and remove the battery.
-
-
-
Before removing the motherboard, clear away any dust, and ensure that the battery is already removed.
-
-
-
Using a Phillips #0 screwdriver, remove the three 3.8 mm screws along the edge of the motherboard.
-
-
crwdns2935267:0crwdne2935267:0Tweezers$4.99
-
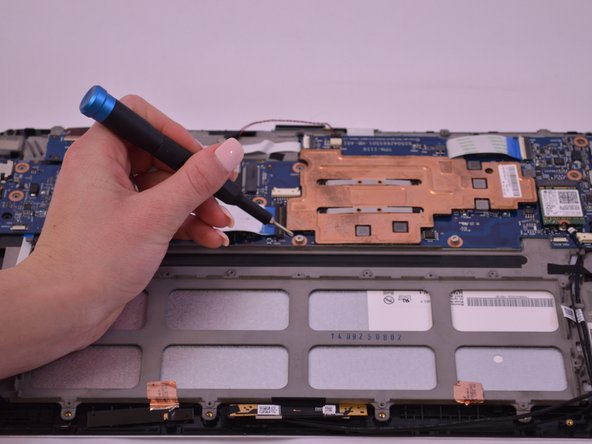
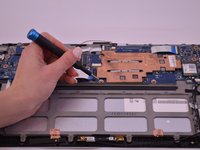
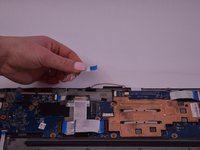
Disconnect the cable connectors from the motherboard. This can be done with either tweezers or with your fingers.
-
-
-
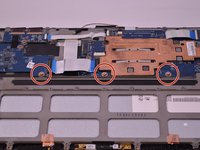
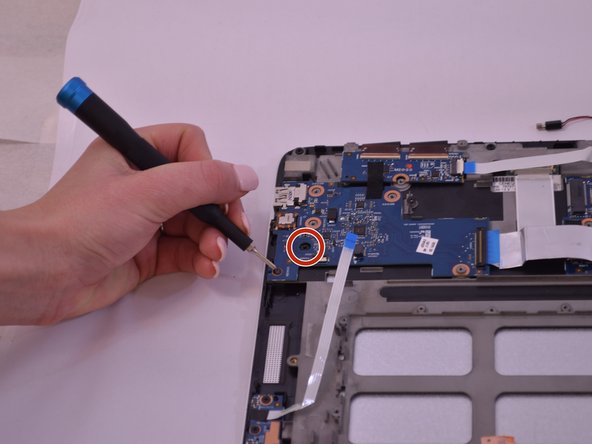
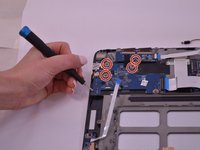
Using the Phillips #0 screwdriver, remove the 3.2mm screws within the copper rings in the circuit board.
-
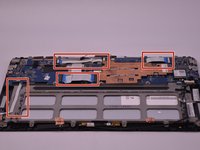
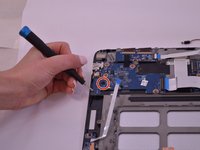
Using the Phillips #0 screwdriver, remove the 2.5mm and 4.25mm black screws on the motherboard.
-
-
-
Once the screws and cables are disconnected and removed, remove the motherboard from the frame.
-
-
-
Once the battery and motherboard are removed, the screen unit should offer little resistance. Remove the screen from the base.
-


To reassemble your device, follow these instructions in reverse order.
To reassemble your device, follow these instructions in reverse order.
crwdns2935221:0crwdne2935221:0
crwdns2935229:02crwdne2935229:0

crwdns2915084:0crwdne2915084:0

Idaho State University, Team S1-G3, Watkins Fall 2019 crwdns2935289:0Idaho State University, Team S1-G3, Watkins Fall 2019crwdne2935289:0
ISU-WATKINS-F19S1G3
crwdns2931471:03crwdne2931471:0
crwdns2935297:02crwdne2935297:0