crwdns2915892:0crwdne2915892:0
In this repair guide, you will be learning how to replace the WLAN (Wi-Fi) card on your HP Envy m6-1105dx. For this repair, you will need a JIS #0 screwdriver. You will have to loosen a screw to be able to remove the main service panel on the case of your HP Envy m6-1105dx. Once this is removed, you can access the screw holding the cover for the WLAN card in place, and remove both parts. You will then have to gently (using a plastic tool) pry up the antenna connected to the WLAN card. This will allow you to reach the screws holding the WLAN card in place. Then, gently pull out the WLAN card.
crwdns2942213:0crwdne2942213:0
-
-
Turn the computer completely off.
-
Disconnect any devices you have on it.
-
Turn the computer upside down on a flat surface.
-
-
-
Push the battery release latch with one hand.
-
Grab the battery with the other hand.
-
Lift out on an angle.
-
-
-
-
Release the screw in the center of the service cover.
-
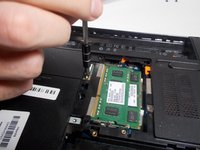
Slide the battery release latch and pull cover towards you.
-
Lift cover off.
-
-
-
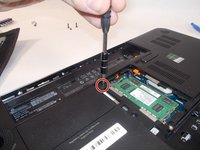
Use a JIS #0 screwdriver to unscrew the small cover where the WLAN card is.
-
-
-
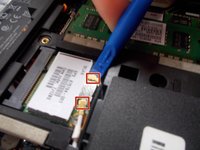
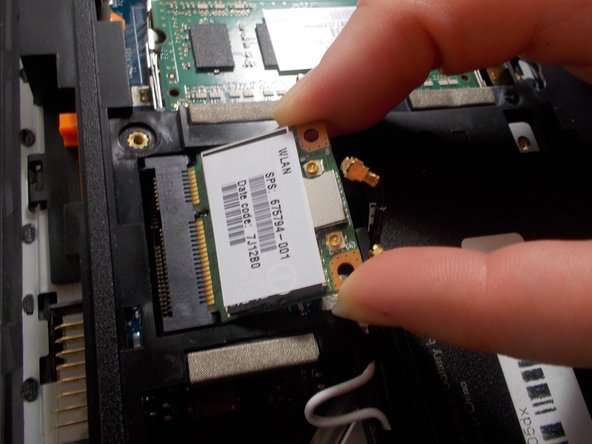
Use a plastic opening tool to gently disconnect the WLAN antenna cables.
-
-
-
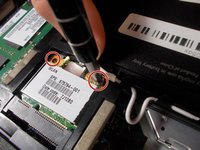
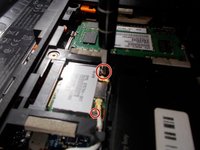
Remove the two PM2.0×3.0 screws that secure the WLAN module to the base using the JIS #0 screwdriver.
-
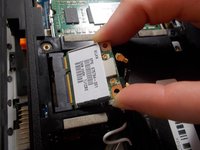
Using two fingers, grab the sides of the WLAN card and slowly pull it out.
-


To reassemble your device, follow these instructions in reverse order.
To reassemble your device, follow these instructions in reverse order.
crwdns2915084:0crwdne2915084:0

UMass Dartmouth, Team S1-G5, Valliere Fall 2018 crwdns2935289:0UMass Dartmouth, Team S1-G5, Valliere Fall 2018crwdne2935289:0
UMASSD-VALLIERE-F18S1G5
crwdns2931471:05crwdne2931471:0
crwdns2935297:04crwdne2935297:0