crwdns2915892:0crwdne2915892:0
The guide gives a step by step process of disassembling the HP Envy X2-15-C001Dx (Model number: J9J38UA), so that you can access all the components that may be causing issues for the laptop’s functionality. When using a prying tool, be careful not to damage the laptop by using too much force or putting the pry tool too far in. If done incorrectly you may bend the laptop, break the screen, or damage the internals.
crwdns2942213:0crwdne2942213:0
-
-
Place the laptop face down on a table.
-
-
-
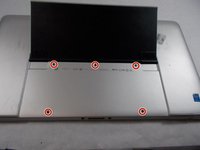
Remove the five screws from the bottom of the back plate using a Phillips #1 screwdriver.
-
-
-
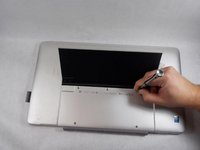
Remove four screws from the back stand hinges using a Phillips #1 screwdriver.
-
-
-
-
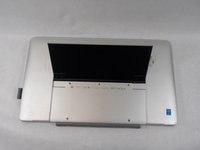
Remove the hinges and the back stand from the laptop.
-
-
-
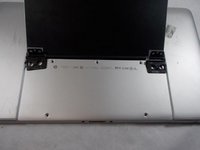
Use a spudger to remove the thin panel where the back stand was.
-
-
-
Remove the screws from the back panel using a Phillips #1 screwdriver.
-
-
-
Remove two side screws using a Phillips #1 screwdriver.
-
-
-
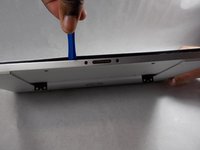
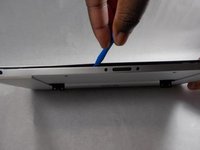
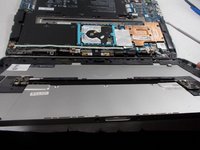
Pry apart the base from the screen by going around the entire perimeter with an opening tool.
-
-
-
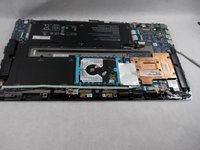
Remove the back panel from the laptop.
-


To reassemble your device, follow these instructions in reverse order.
To reassemble your device, follow these instructions in reverse order.
crwdns2935221:0crwdne2935221:0
crwdns2935227:0crwdne2935227:0
crwdns2915084:0crwdne2915084:0

UMass Dartmouth, Team 2-6, Sinclaire Fall 2021 crwdns2935289:0UMass Dartmouth, Team 2-6, Sinclaire Fall 2021crwdne2935289:0
UMASSD-SINCLAIRE-F21S2G6
crwdns2931471:03crwdne2931471:0
crwdns2935297:06crwdne2935297:0