crwdns2915892:0crwdne2915892:0
In this guide, you will learn how to safely replace the motherboard on the HP Envy m6-1205dx. Some reasons to do this may be, to fix damaged components, improve performance, stability, reliability, and make future upgrades easier. A few problems can be solved with a replacement motherboard such as hardware incompatibility, motherboard failure, and outdated technology. Before attempting to replace the motherboard be sure to have fully powered off the computer and disconnected the computer from any external power source. This is not a simple task as you will need to disassemble a lot of the laptop.
crwdns2942213:0crwdne2942213:0
-
-
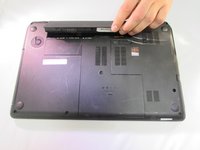
Lay the device face down to begin.
-
-
-
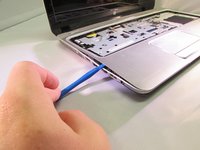
Slide the release mechanism to the left to release the battery.
-
-
-
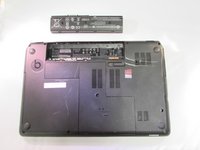
Using a Phillips #1, remove the 8 10.6mm screws.
-
Also using a Phillips #1, remove the 8.6mm screw.
-
-
-
Slide the center panel down to remove it.
-
-
-
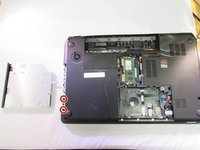
Using a Phillips #1, remove the 3.5mm screw.
-
Using a Phillips #1, remove the four 10.6mm screws.
-
-
-
Pull the disk drive out to remove it.
-
-
-
-
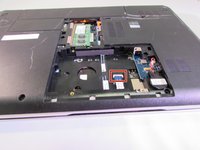
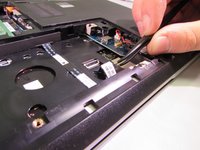
Using a Phillips #1, remove the two 2.4mm screws.
-
-
crwdns2935267:0crwdne2935267:0Tweezers$4.99
-
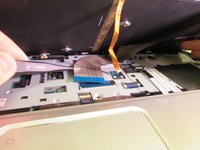
Flip the black tab up on the clamp that holds the ribbon cable in place.
-
Pull the cable back with your fingers or a pair of tweezers.
-
-
-
Flip the computer back over
-
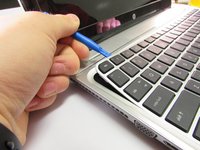
Use the plastic opening tool to pry the keyboard up .
-
-
-
Carefully lift the keyboard up.
-
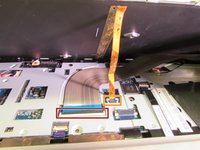
Flip up the black tab holding the large ribbon cable down.
-
Push both sides of the small white tab forward to release the small ribbon cable.
-
Pull both the cables out to remove them.
-
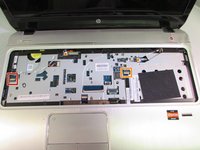
Remove the keyboard.
-
-
-
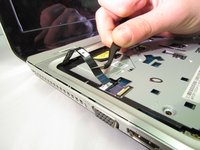
Flip the small white tab up to release the ribbon cable.
-
Pull to remove.
-
Repeat the same steps for the other cable.
-
-
-
Using a Phillips #1, remove the four 5.6mm silver screws.
-
-
-
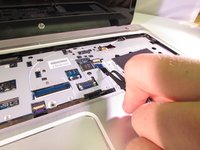
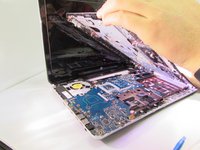
Use the plastic opening tool to pry the face plate off the rest of the frame.
-
Once you pry all of the snaps up lift the face plate off.
-
-
-
Using a Phillips #1, remove the two 10.6 mm screws.
-
Gently pull back on on the cable to unplug it.
-
-
-
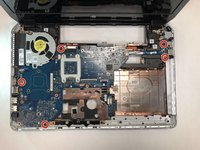
Using a Philips #1, remove the five 5.0 mm screws.
-
Gently pull the mini power connectors to remove them.
-
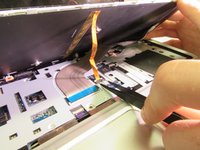
Gently pull the two ribbon cables to remove them.
-
Pull the black tab to remove the LCD screen connector.
-
-
-
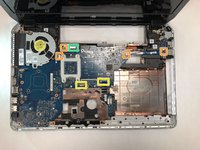
Gently pull the motherboard away from the case on the lower left-hand corner.
-
-
-
Gently pull the case away from the motherboard on the upper right-hand corner.
-
-
-
Pull the motherboard out of the laptop, taking care to detach the cable on the underside as you do so.
-


To reassemble your device, follow these instructions in reverse order.
To reassemble your device, follow these instructions in reverse order.
crwdns2935221:0crwdne2935221:0
crwdns2935229:03crwdne2935229:0
crwdns2915084:0crwdne2915084:0

IUPUI, Team S2-G2, Wilson Fall 2019 crwdns2935289:0IUPUI, Team S2-G2, Wilson Fall 2019crwdne2935289:0
IUPUI-WILSON-F19S2G2
crwdns2931471:04crwdne2931471:0
crwdns2935297:05crwdne2935297:0