crwdns2915892:0crwdne2915892:0
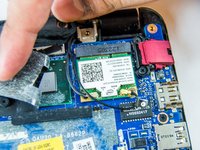
Replacing the wireless (WLAN) card may be necessary for resolving wireless network issues. The card is small with delicate wires clipped to it. Be gentle when wiggling the wires and card free from the system since the contacts are delicate and can affect wireless performance.
When working with electronic components, we recommend wearing an electrostatic wristband, it is possible for the static electricity present on you to discharge onto one of the components, wearing one of these wristbands and clipping it to a piece of metal will prevent this from happening.
crwdns2942213:0crwdne2942213:0
-
-
Using the Philips #0 screwdriver, remove the 12 7.5mm screws from the bottom cover.
-
-
-
Using the plastic opening tool, carefully work the tool between the bottom cover and bottom chassis to loosen the connection.
-
Lift the bottom cover off of the system.
-
-
-
-
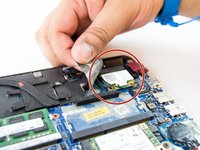
After removing the bottom cover, the wireless card is accessible toward the rear of the system.
-
-
-
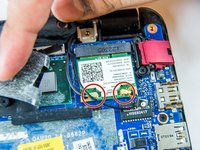
Disconnect the wires from the wireless card by lifting them up from the metal studs they are set on.
-
-
-
Using the Phillips #0 screwdriver unscrew the single 2.5mm screw holding the card to the motherboard.
-
-
-
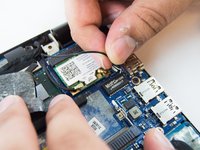
Slide the card out of it's connector.
-


To reassemble your device, follow these instructions in reverse order.
To reassemble your device, follow these instructions in reverse order.
crwdns2935221:0crwdne2935221:0
crwdns2935227:0crwdne2935227:0
crwdns2915084:0crwdne2915084:0

USF Tampa, Team S1-G1, Thompson Fall 2017 crwdns2935289:0USF Tampa, Team S1-G1, Thompson Fall 2017crwdne2935289:0
USFT-THOMPSON-F17S1G1
crwdns2931471:04crwdne2931471:0
crwdns2935297:06crwdne2935297:0