crwdns2915892:0crwdne2915892:0
This replacement guide will show you how to disconnect the display from your HP EliteBook 8570w. It consists of 7 moderately difficult steps that should guide you successfully.
crwdns2942213:0crwdne2942213:0
-
-
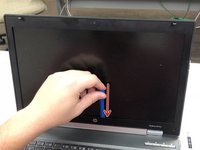
With the computer opened, locate the square buttons on both bottom corners of the display.
-
Using a tool or finger, wedge the squares off revealing a screw on each corner.
-
-
-
Use a T9 screwdriver to unscrew both 0.4mm Torx screws.
-
-
-
Use an opening tool or spudger to peel back the outer rim of the display.
-
Continue to peel back the entire rim.
-
-
-
-
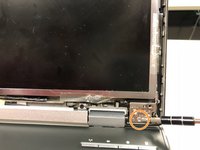
Unscrew ONLY the bottom 0.8mm T9 Torx screw on both sides of the display.
-
-
-
Now locate the two screws on each side at the bottom of the display.
-
TOP screw: unscrew partially.
-
BOTTOM screw: completely unscrew and set to the side.
-
Complete on both sides of display.
-
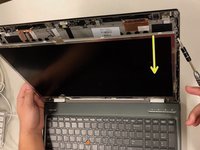
Carefully separate the display from the top cover.
-
-
-
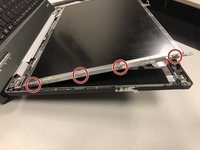
Use a Phillips #00 screwdriver to unscrew all four 0.8 mm screws from the left side of the display frame. Repeat for the right side.
-
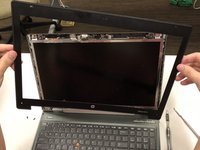
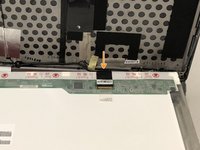
Push the metal plates/rods that were attached to the display towards the top cover.
-
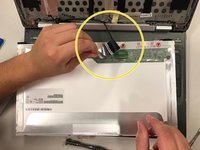
The display should be completely free of the top cover and able to lay flat on the keyboard (refer to photo #2).
-
-
-
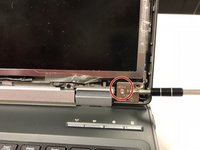
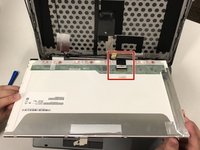
With the display laying on the keyboard, locate the black square panel marked in the photo.
-
Grab the side marked in photo #2 and pull it towards you peeling off the surrounding tape and releasing it from the actual display board.
-
This will then remove the connection between the display and the top cover.
-


To reassemble your device, follow these instructions in reverse order.
To reassemble your device, follow these instructions in reverse order.
crwdns2935221:0crwdne2935221:0
crwdns2935229:04crwdne2935229:0
crwdns2915084:0crwdne2915084:0

Baylor, Team S8-G5, Johnson Fall 2017 crwdns2935289:0Baylor, Team S8-G5, Johnson Fall 2017crwdne2935289:0
BU-JOHNSON-F17S8G5
crwdns2931471:03crwdne2931471:0
crwdns2935297:05crwdne2935297:0
crwdns2947412:02crwdne2947412:0
this guide is really bad, dangerous and should be removed !
at step 3 you crack and kill the existing display. If it was still somewhat working before now you are assured it is completely dead !
agreed, step 3 should use the opening tool on a top corner of the bezel, not against the screen. you just screwed up the screen if it worked at all