crwdns2915892:0crwdne2915892:0
This guide provides instructions on how to remove and replace the thumb scanner for the HP EliteBook x360 1030 G3.
The thumb scanner allows you to lock and unlock your computer using your thumb print. A failing thumb scanner simply does not read your thumb print, which may pose a problem in unlocking or locking your computer.
Before removing the thumb scanner, check to see if there happens to be any debris or contaminants on it. Cleaning the thumb scanner can be a simple solution to fixing the component. If cleaning it does not work, make sure to power off the laptop before attempting to replace.
crwdns2942213:0crwdne2942213:0
-
-
Close the laptop and flip it so that the screen is on the surface of the table and the back plate is facing you.
-
Remove the 3.3 mm screw near the top of the hinge using a T5 Torx screwdriver.
-
Remove the remaining four 7.3 mm screws using the same screwdriver.
-
-
-
Separate the bottom cover from the laptop, starting from the upper corner and working your way around the edge.
-
-
-
Remove the five 3.7 mm screws that are holding the battery in place using a Phillips #00 screwdriver.
-
-
-
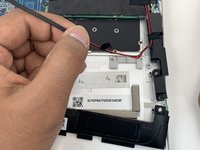
Carefully pull the white plastic battery connector towards you until it is removed from the port.
-
-
-
Gently lift the battery out of its place.
-
-
-
Remove the six 1.95 mm JIS #000 screws that secure the metal frame of the touchpad.
-
-
-
-
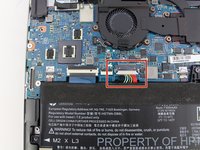
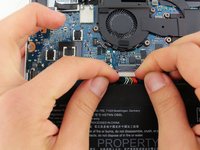
Lift the small white ZIF connector from the front using a spudger tool or your finger.
-
-
-
Pull the yellow and orange striped ribbon away.
-
-
-
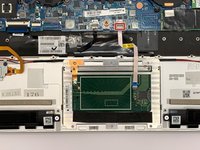
Lift the touchpad up from the computer board by the metal frame.
-
-
-
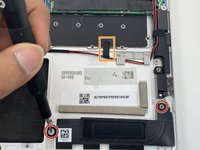
Remove the two 3.52 mm JIS #000 screws from the left speaker.
-
-
-
Follow the red and black wire and you will see the two wire brackets.
-
Use the spudger to slide it and push the wire out of the brackets, then take it out.
-
-
-
Remove the two 3.52 mm JIS #000 screws from the right speaker and carefully remove from its magnetic place.
-
Remove the black tape with your hand that is around wire.
-
Use the spudger to slide it and push the wire out of the brackets, then take it out.
-
-
-
Remove the black tape from the mother board with your hand.
-
Unplug the green and white wire plug gently, and the red and black wire plug gently with your hand.
-
-
crwdns2935267:0crwdne2935267:0Halberd Spudger$2.99
-
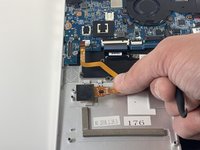
Use the Halberd Spudger to lift the ZIF connector tab and free the thumbprint ribbon cable.
-
-
-
Remove the two 2.39 mm JIS #000 screws in a counter-clockwise motion.
-
-
-
Lift the metal cover, and then pull it out of its plastic bracket towards the motherboard.
-
-
-
Lift the whole component from the board.
-


To reassemble your device, follow these instructions in reverse order.
To reassemble your device, follow these instructions in reverse order.
crwdns2915084:0crwdne2915084:0

Embry-Riddle Aeronautical University, Team 1-3, Rauch Summer 2022 crwdns2935289:0Embry-Riddle Aeronautical University, Team 1-3, Rauch Summer 2022crwdne2935289:0
ERAU-RAUCH-SU22S1G3
crwdns2931471:03crwdne2931471:0
crwdns2935297:06crwdne2935297:0