crwdns2933423:0crwdne2933423:0

HP EliteBook x360 1030 G3 Fan Replacement

crwdns2942213:0crwdne2942213:0

  1. HP EliteBook x360 1030 G3 Fan Replacement, Bottom Cover: crwdns2935265:01crwdnd2935265:01crwdnd2935265:01crwdne2935265:0
    • Be sure to power off and unplug your device before you begin your repair.

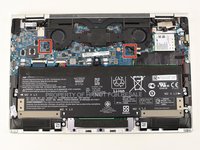
    • Close the laptop and flip it so that the screen is on the surface of the table and the back plate is facing you.

    • Remove the 3.3 mm screw near the top of the hinge using a T5 Torx screwdriver.

    • Remove the remaining four 7.3 mm screws using the same screwdriver.

  2. HP EliteBook x360 1030 G3 Fan Replacement: crwdns2935265:02crwdnd2935265:01crwdnd2935265:01crwdne2935265:0
    • Separate the bottom cover from the laptop, starting from the upper corner and working your way around the edge.

    • The plastic fastening may make cracking sounds when separating, but this is normal.

  3. HP EliteBook x360 1030 G3 Fan Replacement, Fan: crwdns2935265:03crwdnd2935265:01crwdnd2935265:01crwdne2935265:0
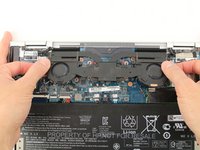
    • Use a Phillips #1 screwdriver to remove the four 3.5 mm screws near the middle of the fan assembly.

    • Use the same screwdriver to remove the remaining five 3.9 mm screws.

  4. HP EliteBook x360 1030 G3 Fan Replacement: crwdns2935265:04crwdnd2935265:01crwdnd2935265:03crwdne2935265:0 HP EliteBook x360 1030 G3 Fan Replacement: crwdns2935265:04crwdnd2935265:02crwdnd2935265:03crwdne2935265:0 HP EliteBook x360 1030 G3 Fan Replacement: crwdns2935265:04crwdnd2935265:03crwdnd2935265:03crwdne2935265:0
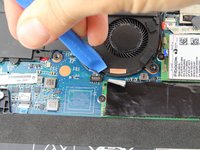
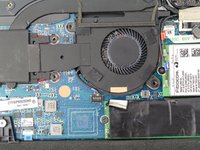
    • Before pulling the fan out, identify the two wires that are connected to the fan and to the motherboard.

    • For each, use plastic opening tool to lift the black wire housing upward out of its port.

    • Be sure not to pull the wires; doing so may cause damage.

  5. HP EliteBook x360 1030 G3 Fan Replacement: crwdns2935265:05crwdnd2935265:01crwdnd2935265:02crwdne2935265:0 HP EliteBook x360 1030 G3 Fan Replacement: crwdns2935265:05crwdnd2935265:02crwdnd2935265:02crwdne2935265:0
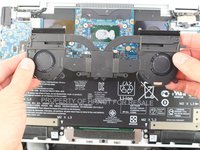
    • Slide the fan assembly toward you, and when the top edge of the fan is out of the vent grill, the fan is completely removed.

crwdns2915888:0crwdne2915888:0

To reassemble your device, follow these instructions in reverse order.

crwdns2935229:04crwdne2935229:0
Pablo Arriola

crwdns2935283:004/22/19crwdne2935283:0

504 crwdns2915208:0crwdne2915208:0

crwdns2935297:03crwdne2935297:0

crwdns2915084:0crwdne2915084:0

Cal Poly, Team S2-G9, Maness Spring 2019 crwdns2935289:0Cal Poly, Team S2-G9, Maness Spring 2019crwdne2935289:0

CPSU-MANESS-S19S2G9

crwdns2931471:04crwdne2931471:0

crwdns2935297:016crwdne2935297:0

crwdns2944067:00crwdne2944067:0

crwdns2917038:0crwdne2917038:0

crwdns2936625:0crwdne2936625:0:

crwdns2936751:024crwdne2936751:0 1

crwdns2936753:07crwdne2936753:0 9

crwdns2936753:030crwdne2936753:0 42

crwdns2942667:0crwdne2942667:0 4,246