crwdns2915892:0crwdne2915892:0
This guide provides detailed instructions for replacing the display on the HP Elite x2 1012 G1. A damaged or malfunctioning display can affect visibility, touch responsiveness, and overall device performance. Replacing the screen will help restore full functionality and visual clarity. Before beginning, power off the device completely and disconnected from all cables and accessories. Follow each of these steps carefully to ensure a safe and successful replacement.
crwdns2942213:0crwdne2942213:0
-
-
With the screen face down, lift up the stand as far as it goes.
-
-
-
Use a T5 driver to remove the six screws on the back of the tablet.
-
-
-
After removing the screws, delicately close the stand.
-
Flip the tablet on its back so that the screen is facing up.
-
-
-
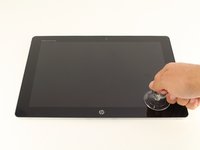
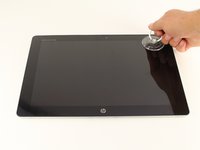
Use the suction cup to carefully separate the screen from the device. Pull upwards with a fluid and smooth motion.
-
-
-
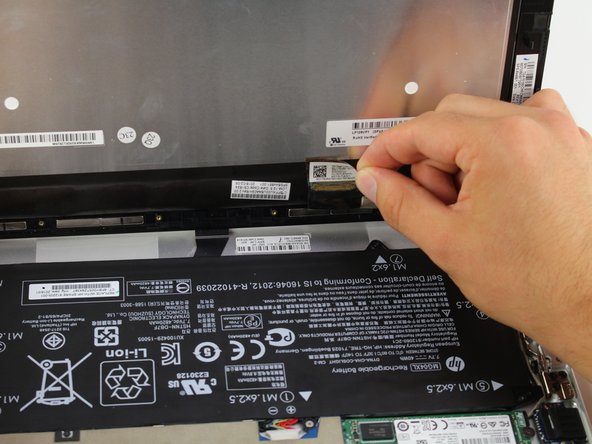
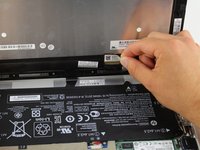
Remove the tape on the lower left side of the screen.
-
Underneath the tape, disconnect the LCM cable, the larger wire that was underneath the tape, from the back of the tablet screen.
-
-
-
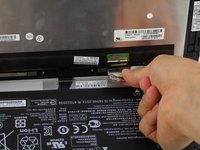
Disconnect the flex cable from the device using the spudger.
-
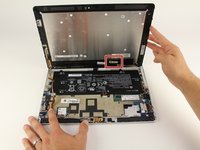
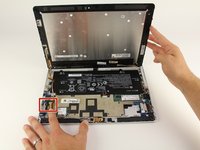
Remove the Display Assembly from the device.
-


To reassemble your device, follow these instructions in reverse order.
To reassemble your device, follow these instructions in reverse order.
crwdns2935221:0crwdne2935221:0
crwdns2935229:04crwdne2935229:0
crwdns2915084:0crwdne2915084:0

Cal Poly, Team S24-G7, Maness Spring 2018 crwdns2935289:0Cal Poly, Team S24-G7, Maness Spring 2018crwdne2935289:0
CPSU-MANESS-S18S24G7
crwdns2931471:04crwdne2931471:0
crwdns2935297:06crwdne2935297:0