crwdns2942213:0crwdne2942213:0
-
-
Orient the device so the back is facing you, with the kickstand up.
-
-
-
Remove the six 3mm Torx T5 screws underneath the kickstand.
-
-
-
Turn the device over so the screen is facing you.
-
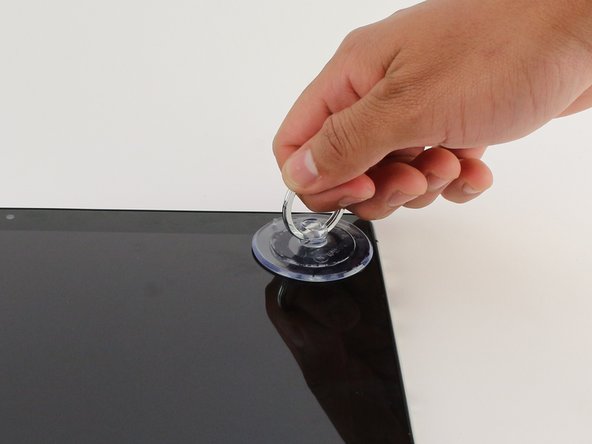
Place a suction cup firmly onto a corner of the screen.
-
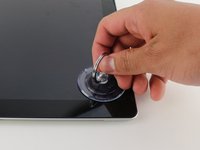
Lift up gently until you see the screen separate from the casing.
-
Repeat this process for all four corners.
-
-
-
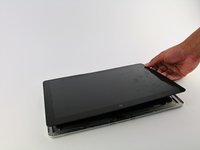
Lift the screen up and off of the device.
-
-
-
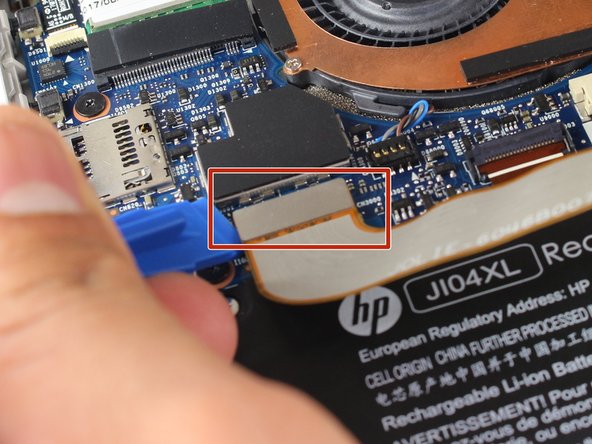
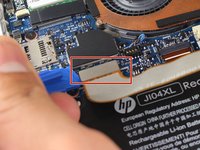
Remove the two connectors on the back of the screen by lifting the connector tabs on the motherboard with a plastic opening tool and pulling gently.
-
-
-
Remove the screen by gently lifting it off of the device.
-
-
-
-
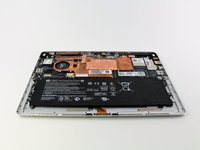
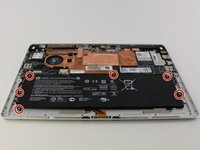
Orient the device so that the battery is closest to you.
-
-
-
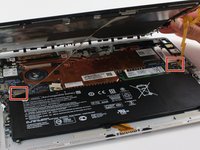
Remove all six Phillips 3 mm screws around the battery by rotating in the counterclockwise direction with a Phillips screwdriver.
-
-
-
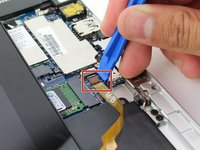
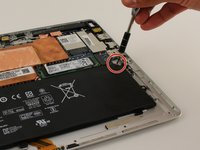
Remove the battery's connector by pushing both sides of the tab towards yourself with a plastic opening tool.
-
-
-
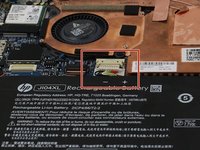
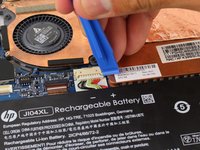
Use the spudger tools to lift the copper tape and expose the screws.
-
-
-
Use Phillips #00 screwdriver to remove seven 3 mm screws.
-
-
-
Lift the heatsink off the motherboard.
-
-
-
Use a Phillips #00 screwdriver to remove the final two 3 mm screws that secure the fan.
-
-
-
Use a spudger to lift the fan from the main unit.
-
-
-
Use a spudger to lift the connection for the fan and disconnect the plug from the motherboard.
-


To reassemble your device, follow these instructions in reverse order.
To reassemble your device, follow these instructions in reverse order.
crwdns2935221:0crwdne2935221:0
crwdns2935229:03crwdne2935229:0
crwdns2915084:0crwdne2915084:0

IUPUI, Team S13-G13, Wilson Spring 2019 crwdns2935289:0IUPUI, Team S13-G13, Wilson Spring 2019crwdne2935289:0
IUPUI-WILSON-S19S13G13
crwdns2931471:04crwdne2931471:0
crwdns2935297:04crwdne2935297:0