crwdns2933423:0crwdne2933423:0

HP Elite X2 1013 G3 Solid State Drive Replacement

crwdns2942213:0crwdne2942213:0

  1. HP Elite X2 1013 G3 Solid State Drive Replacement, Screen: crwdns2935265:01crwdnd2935265:01crwdnd2935265:01crwdne2935265:0
    • Flip the device over so the base is facing the ceiling.

    • Lift up the tablet stand.

    • Remove the four 2 mm screws from the tablet using a T5 Torx screwdriver.

  2. HP Elite X2 1013 G3 Solid State Drive Replacement: crwdns2935265:02crwdnd2935265:01crwdnd2935265:02crwdne2935265:0 HP Elite X2 1013 G3 Solid State Drive Replacement: crwdns2935265:02crwdnd2935265:02crwdnd2935265:02crwdne2935265:0
    • Flip the tablet over with the screen facing upwards.

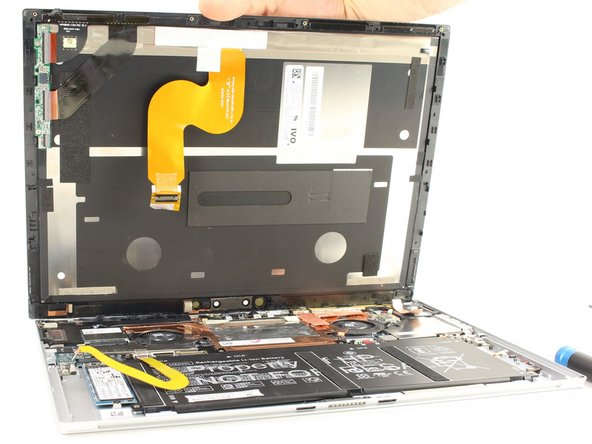
    • Place the suction handle in the center of the screen and slowly lift off the screen until it is at a 30 degree angle, starting by gently prying up the bottom.

    • Do not pull the screen beyond a 30 degree angle. Additional internal components must be disconnected first.

  3. HP Elite X2 1013 G3 Solid State Drive Replacement: crwdns2935265:03crwdnd2935265:01crwdnd2935265:02crwdne2935265:0 HP Elite X2 1013 G3 Solid State Drive Replacement: crwdns2935265:03crwdnd2935265:02crwdnd2935265:02crwdne2935265:0
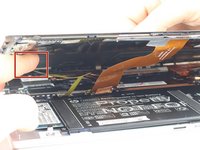
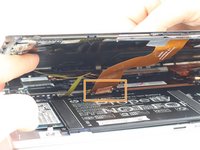
    • With the screen lifted at a 30 degree angle, gently disconnect the yellow ribbon cable at the end connected to the screen.

    • Gently disconnect the orange ribbon cable at the end connected to the bottom plate.

  4. HP Elite X2 1013 G3 Solid State Drive Replacement: crwdns2935265:04crwdnd2935265:01crwdnd2935265:02crwdne2935265:0 HP Elite X2 1013 G3 Solid State Drive Replacement: crwdns2935265:04crwdnd2935265:02crwdnd2935265:02crwdne2935265:0
    • Remove the screen from the tablet.

  5. HP Elite X2 1013 G3 Solid State Drive Replacement, Battery: crwdns2935265:05crwdnd2935265:01crwdnd2935265:01crwdne2935265:0
    • Use the Phillips #00 screwdriver to remove the six 2 mm screws.

    • Gently disconnect the two connectors.

  6. HP Elite X2 1013 G3 Solid State Drive Replacement: crwdns2935265:06crwdnd2935265:01crwdnd2935265:01crwdne2935265:0
    • Lift the battery out of the housing.

  7. HP Elite X2 1013 G3 Solid State Drive Replacement, Solid State Drive: crwdns2935265:07crwdnd2935265:01crwdnd2935265:01crwdne2935265:0
    • Make sure the device is powered off and the battery is removed before continuing!

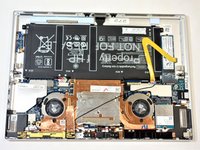
    • Using the Phillips #00 Screwdriver, remove the single indicated screw.

  8. HP Elite X2 1013 G3 Solid State Drive Replacement: crwdns2935265:08crwdnd2935265:01crwdnd2935265:01crwdne2935265:0
    • Gently tilt the drive upward, then firmly pull it out from the motherboard.

    • Pay attention to the orientation of the SSD. Trying to put your replacement SSD in the wrong way could damage the part or the connector.

crwdns2915888:0crwdne2915888:0

To reassemble your device, follow these instructions in reverse order.

crwdns2935227:0crwdne2935227:0

Kory Haydon

crwdns2935283:004/18/19crwdne2935283:0

259 crwdns2915208:0crwdne2915208:0

crwdns2935297:02crwdne2935297:0

crwdns2915084:0crwdne2915084:0

Cal Poly, Team S9-G12, Maness Spring 2019 crwdns2935289:0Cal Poly, Team S9-G12, Maness Spring 2019crwdne2935289:0

CPSU-MANESS-S19S9G12

crwdns2931471:04crwdne2931471:0

crwdns2935297:05crwdne2935297:0

crwdns2944067:00crwdne2944067:0

crwdns2917038:0crwdne2917038:0

crwdns2936625:0crwdne2936625:0:

crwdns2936751:024crwdne2936751:0 1

crwdns2936753:07crwdne2936753:0 10

crwdns2936753:030crwdne2936753:0 74

crwdns2942667:0crwdne2942667:0 2,727