crwdns2915892:0crwdne2915892:0
Paper trays help align papers once printed. Over time, the paper tray may lock itself or break. Ensure you have unplugged your device before you begin this repair.
crwdns2942213:0crwdne2942213:0
-
-
Grab both sides of the printer and flip it away from you so the bottom is facing up.
-
-
-
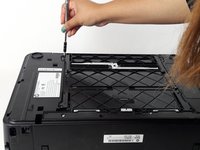
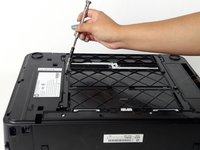
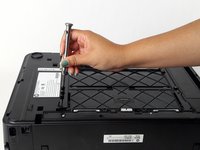
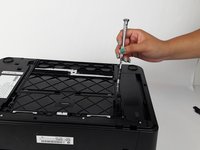
Locate the 13mm TR10 Torx screws on the left side of the paper tray.
-
-
-
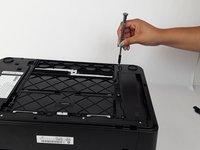
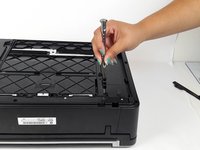
Unscrew and remove the 13mm TR10 Torx Security screw, starting with the farthest screw on the left
-
-
-
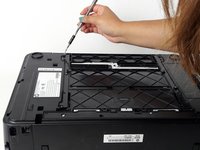
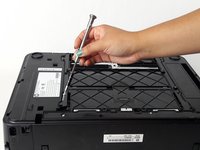
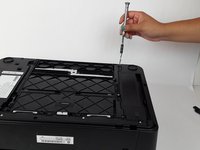
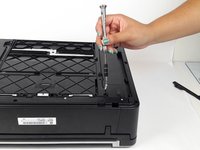
Locate and remove middle 13mm TR10 Torx Security screw using a Torx screwdriver.
-
-
-
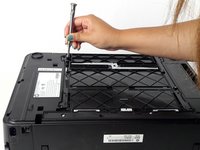
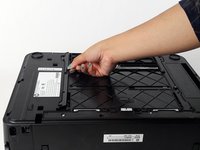
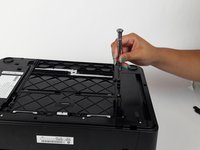
Locate and remove the last 13mm TR10 Torx Security screw.
-
-
-
-
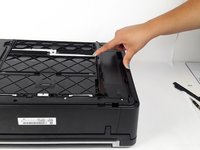
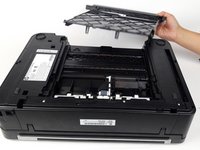
Locate the side tab and lift up to remove.
-
-
-
Locate the three 13mm TR10 Torx Security screws on the right side panel.
-
-
-
Locate and remove the farthest 13mm TR10 Torx Security screw.
-
-
-
Locate middle 13mm TR10 Torx Security screw and remove it.
-
-
-
Locate last 13mm TR10 Torx Security screw and remove it.
-
-
-
Locate tab on the right side panel and lift to remove it.
-
-
-
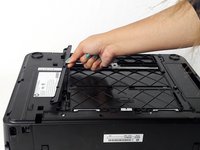
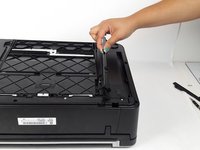
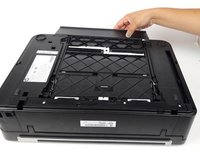
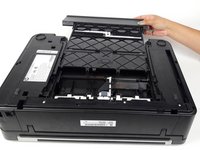
Remove paper tray by pulling it out and away from the printer.
-


To reassemble your device, follow these instructions in reverse order.
To reassemble your device, follow these instructions in reverse order.
crwdns2935221:0crwdne2935221:0
crwdns2935229:02crwdne2935229:0
crwdns2915084:0crwdne2915084:0

USF Tampa, Team 4-6, Meier Fall 2015 crwdns2935289:0USF Tampa, Team 4-6, Meier Fall 2015crwdne2935289:0
USFT-MEIER-F15S4G6
crwdns2931471:04crwdne2931471:0
crwdns2935297:018crwdne2935297:0