crwdns2915892:0crwdne2915892:0
If the WLAN Module of your HP Chromebox is damaged, it is easy to replace. This guide will take you through the steps of replacing the WLAN module. For this guide, you will need the Philips #1 screwdriver.
crwdns2942213:0crwdne2942213:0
-
-
Position the device upside-down on a flat, level surface with the USB ports facing you.
-
-
-
Using your metal spudger, lift and remove the 4 rubber “feet” from each corner.
-
-
-
Using your Phillips head screwdriver, remove the four Phillips M2.5×4.0 screws that secure the bottom cover to the computer. In this step the usage of the magnetic mat will be helpful to keep up with the screws.
-
-
-
Insert the flat end of your metal spudger under the bottom cover near the USB ports, then pry the bottom cover off the computer.
-
-
-
-
Lift the two pieces of mylar tape from the bracket.
-
-
-
Using your Phillips #1 screwdriver, remove the four Phillips M2.5×4.0 screws that hold the shield in place.
-
-
-
Insert your spudger into the gap between the bottom shield and the ports and gently pry to lift and remove the shield.
-
-
-
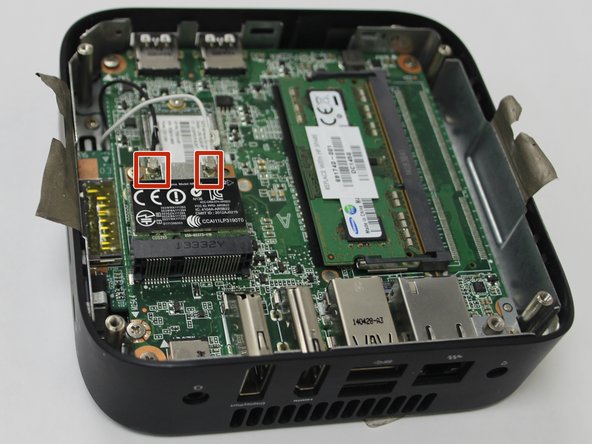
Disconnect the white and black antenna cables from the module.
-
-
-
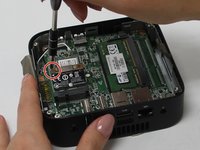
Using your Phillips #1 screwdriver, remove the M2.0×3.0 screw from the upper left corner of the module.
-
-
-
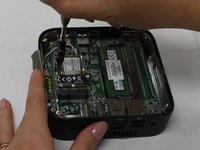
Remove the WLAN module by pulling it away from the slot at an angle.
-


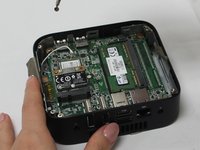


To reassemble your device, follow these instructions in reverse order.
To reassemble your device, follow these instructions in reverse order.
crwdns2915084:0crwdne2915084:0

Ohio State, Team S1-G3, Whitney Fall 2018 crwdns2935289:0Ohio State, Team S1-G3, Whitney Fall 2018crwdne2935289:0
OSU-WHITNEY-F18S1G3
crwdns2931471:02crwdne2931471:0
crwdns2935297:05crwdne2935297:0
crwdns2947410:01crwdne2947410:0
Please indicate brand/model/type of WLAN card, so we can know if we’re replacing with same/better upgrade.