crwdns2915892:0crwdne2915892:0
The screen is one of the most important elements of a laptop since it displays text, images, and other information, allowing the user to interact with the device. If a laptop screen isn't functioning properly, it can render the computer unusable.
If your HP Chromebook 14a-nf009nr's screen is damaged or malfunctioning, you may need to replace it. This guide provides step-by-step instructions to help you make the repair. No specialized skills are needed.
crwdns2942213:0crwdne2942213:0
-
-
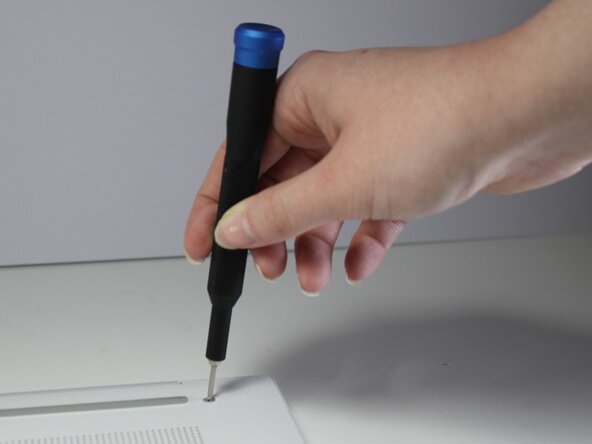
Remove the two 13 mm screws with a Phillips #00 screwdriver.
-
Remove the two 6.6 mm screws with the Phillips #00 screwdriver.
-
-
-
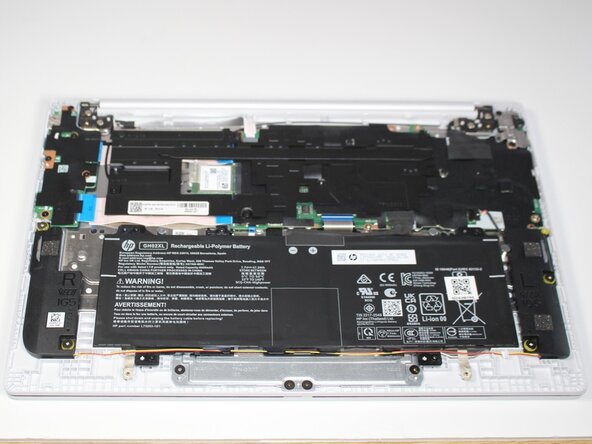
Slide an opening tool along the edges of the back cover to remove it, revealing the components of the laptop underneath.
-
-
-
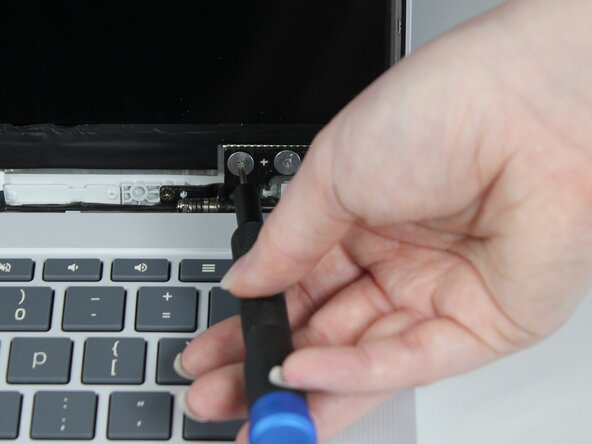
Use a Phillips #1 screwdriver to remove the four 5 mm screws securing the hinges.
-
-
-
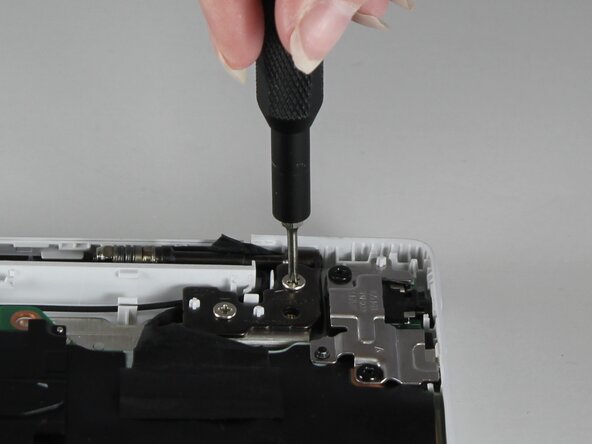
Unscrew the six 2.5 mm screws with a Phillips #1 screwdriver to remove the motherboard's cover.
-
-
-
-
Remove the SSD wires from the SSD card.
-
-
-
Disconnect the webcam cable from the motherboard.
-
-
-
Use the Phillips #1 screwdriver to remove the six 5 mm screws securing the hinges.
-
Use the Phillips #1 screwdriver to remove the 2.5 mm screws securing the hinges.
-
-
-
Gently lift the fabric tape to reveal the display cable attachment.
-
Lift the lock bar to remove the display cable.
-
-
-
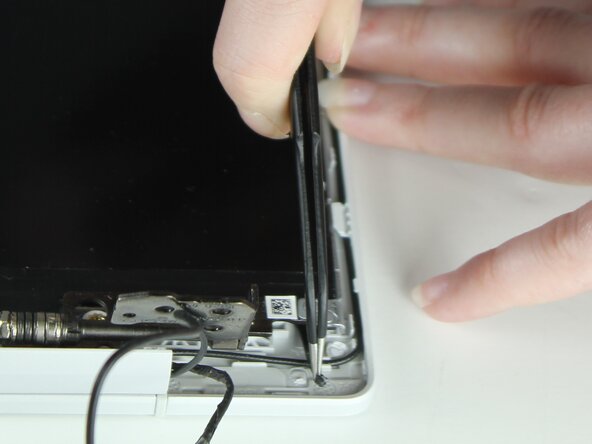
Use the iFixit opening tool to remove the display bezel screen frame.
-
-
-
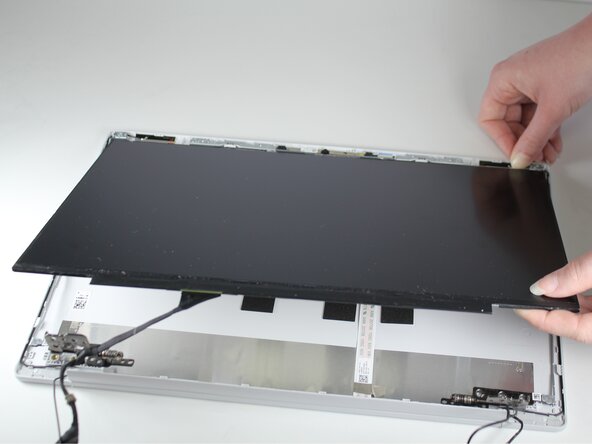
Carefully pull the stretch release tape until it is completely removed from the display panel.
-
Lift the left hinge to remove the stretch-release tape on the left side of the display panel using the same method.
-
Slightly lift the top of the right hinge to allow access to the stretch-release tape.
-


To reassemble your device, follow these instructions in reverse order.
To reassemble your device, follow these instructions in reverse order.
crwdns2915084:0crwdne2915084:0

Carson-Newman University, Team 1-1, Sobiech Spring 2025 crwdns2935289:0Carson-Newman University, Team 1-1, Sobiech Spring 2025crwdne2935289:0
CNU-SOBIECH-S25S1G1
crwdns2931471:03crwdne2931471:0
crwdns2935297:06crwdne2935297:0