crwdns2915892:0crwdne2915892:0
The speakers are an essential component to the HP Chromebook 14a-ne0013dx that provide audio when using the device. If there are indicators that the speakers have become damaged in any way, such as muffled or distorted sounds or audio that cuts in and out, then it may be time to replace them. This procedure should only be followed if altering device sound settings (increasing/decreasing volume, changing audio output) have failed to restore quality sound to the device.
crwdns2942213:0crwdne2942213:0
-
-
Remove two 8 mm screws from the bottom panel of the laptop using a Phillips #0 screwdriver.
-
Remove six 6 mm screws from the bottom panel of the laptop using a Phillips #0 screwdriver.
-
-
-
Flip the device over so it is right side up and open it.
-
Use a Jimmy to gently pry between the keyboard and case.
-
Pry gently to pop open the plastic tabs holding the top panel in. A clicking noise will occur during this step
-
Continue prying, moving around all sides of the panel until it is loose.
-
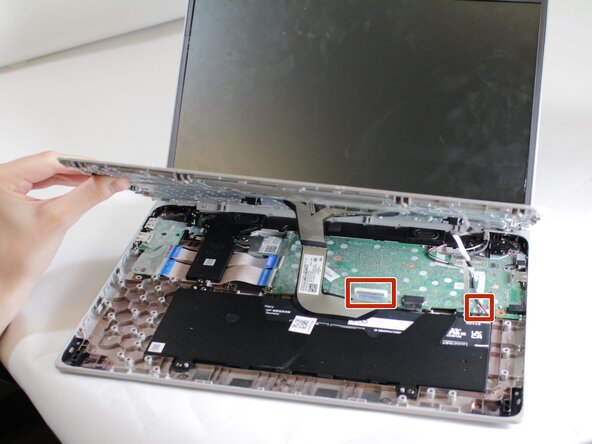
Carefully lift the top panel from the device body.
-
-
-
Lift the top piece of the display cable's housing until it is loose. Gently pull it free.
-
Lift the top piece of the touchpad cable's housing until it is loose. Gently pull it free.
-
With the cables detached, lift the front panel away from the device.
-
-
-
-
Peel the tape off of the cable connecting the battery to the motherboard.
-
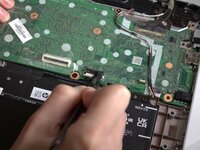
Grasp the connector and tug until loose.
-
-
-
Remove the four 3 mm screws from the battery casing using a Phillips #0 screwdriver.
-
Gently peel the tape pieces connecting the battery to cables on the bottom panel.
-
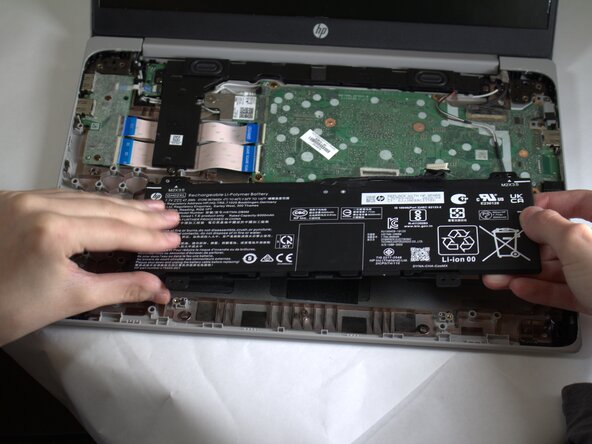
Lift the top panel off, then lift the battery out of the casing.
-
-
-
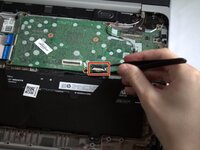
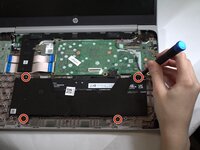
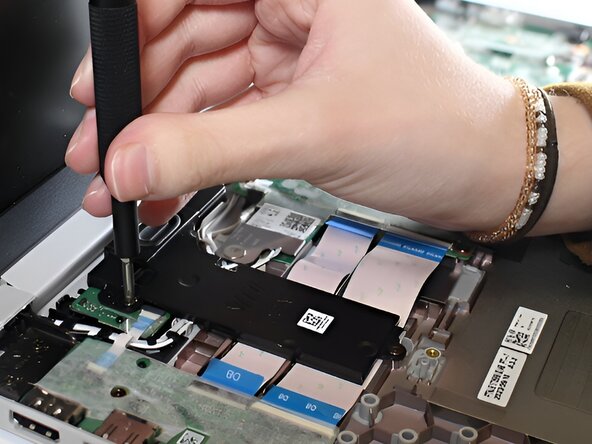
Remove the three 3 mm screws with a Phillips #0 screwdriver.
-
-
-
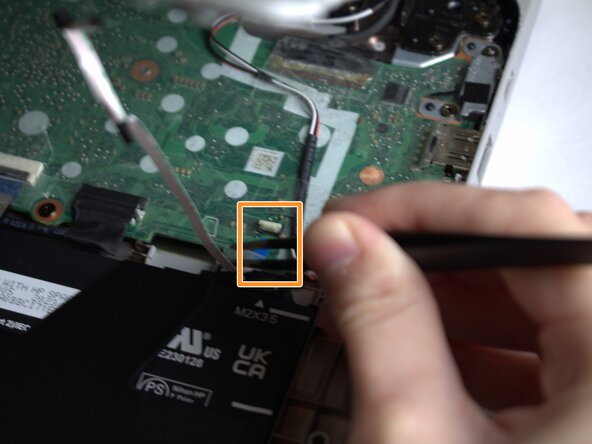
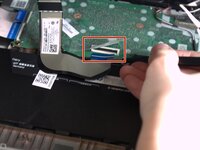
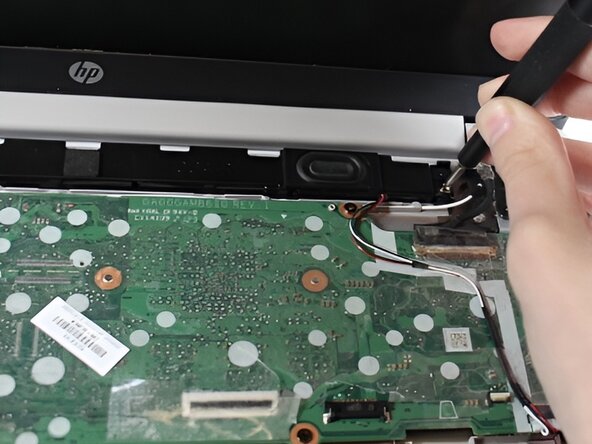
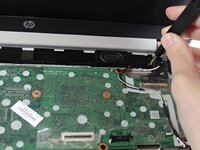
Locate the wire connecting the speaker to the motherboard. Lift up the tape that is blocking the wire from the motherboard.
-
Gently grab and pull the wires out of the connecting socket to detach the speaker bar fully.
-
-
-
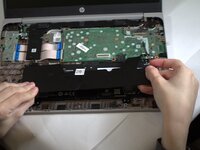
Lift the speaker bar out of the device.
-


To reassemble your device, follow these instructions in reverse order.
To reassemble your device, follow these instructions in reverse order.
crwdns2935221:0crwdne2935221:0
crwdns2935227:0crwdne2935227:0

crwdns2915084:0crwdne2915084:0

Colorado Mesa University, Team 1-2, Kinney Spring 2025 crwdns2935289:0Colorado Mesa University, Team 1-2, Kinney Spring 2025crwdne2935289:0
CMU-KINNEY-S25S1G2
crwdns2931471:04crwdne2931471:0
crwdns2935297:06crwdne2935297:0