crwdns2915892:0crwdne2915892:0
This guide will walk you through the replacement of a RAM that doesn’t hold enough storage in your HP Chromebook 14-ak041dx. The RAM is located inside the motherboard, so to replace the RAM, you will need to desolder it from the motherboard..
crwdns2942213:0crwdne2942213:0
-
crwdns2935267:0crwdne2935267:0Tweezers$4.99
-
You will need a pair of tweezers and a Phillips screwdriver.
-
Remove eight 5mm Phillips #0 screws from the back cover of the laptop.
-
-
-
Using a pair of tweezers, remove the five grey silicone covers.
-
Remove the five 5mm Phillips #0 screws beneath the grey silicone covers.
-
Place them aside where they will not be lost.
-
-
-
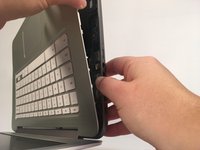
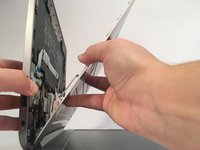
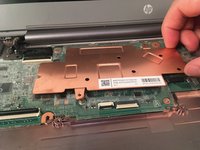
Carefully open your Chromebook case and gently pull the keyboard away from the back panel.
-
Place the keyboard aside. Inspect for any visual damage or marks.
-
-
-
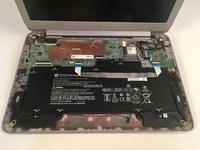
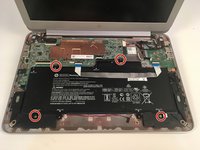
Remove the four 3mm Phillips #000 screws holding the battery in place.
-
-
-
crwdns2935267:0crwdne2935267:0Tweezers$4.99
-
Slide a spudger underneath the white strip over the battery to gently pull the strip away from the adhesive sticking to the battery.
-
Using a pair of tweezers, grip the black tape connected to the battery, and gently pull back to unplug the battery.
-
-
-
Carefully lift the battery out of the laptop.
-
-
-
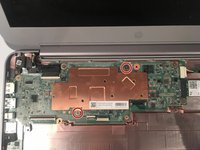
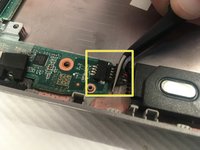
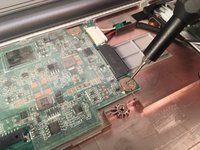
Remove the two 1.5mm Phillips #000 from the copper heat sink on top of the motherboard.
-
Remove the heat sink from the laptop.
-
-
-
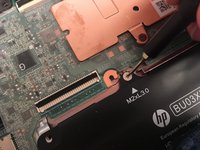
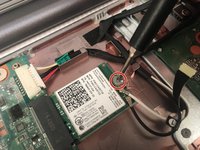
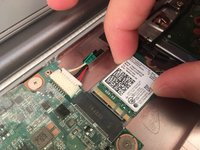
Remove the single 2.5mm Phillips #00 screw from the wireless card.
-
Gently pull the wireless card from the motherboard to remove it.
-
-
crwdns2935267:0crwdne2935267:0Tweezers$4.99
-
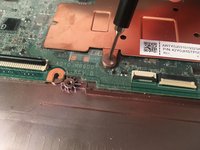
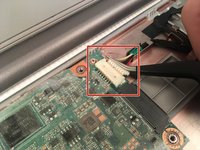
Gently pull the wire connector with a pair of tweezers to free it from the motherboard.
-
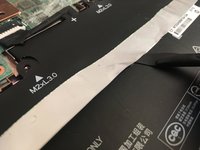
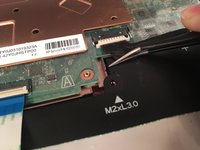
Use a pair of tweezers to remove the black ribbon cable from its connector.
-
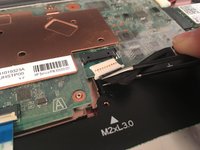
Use the tweezers to detach the wire connector from the bottom left corner of the motherboard.
-
-
-
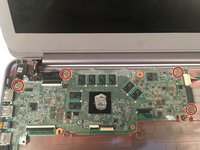
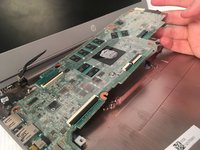
Remove the four Phillips #000 screws holding the motherboard in place.
-
Remove the motherboard from the laptop.
-
-
-
Carefully desolder the RAM using a soldering iron.
-
For soldering help, visit iFixit's How to Solder and Desolder Connections guide.
-


To reassemble your device, follow these instructions in reverse order.
To reassemble your device, follow these instructions in reverse order.
crwdns2935221:0crwdne2935221:0
crwdns2935227:0crwdne2935227:0

crwdns2915084:0crwdne2915084:0

Grand Valley State University, Team S1-G2, DeVasto Fall 2019 crwdns2935289:0Grand Valley State University, Team S1-G2, DeVasto Fall 2019crwdne2935289:0
GVSU-DEVASTO-F19S1G2
crwdns2931471:04crwdne2931471:0
crwdns2935297:04crwdne2935297:0