crwdns2915892:0crwdne2915892:0
This guide walks through replacing a faulty SD card reader module. It requires removing the keyboard mount. Afterwards, it is relatively simple and requires only a Phillips head screwdriver and a spudger to finish removal.
crwdns2942213:0crwdne2942213:0
-
-
Flip the laptop upside down so that the lid lies flat on the table.
-
Remove the nine 6mm Phillips #00 screws that line the border.
-
-
crwdns2935267:0crwdne2935267:0Tweezers$4.99
-
Remove the two rubber feet closest to the hinge using tweezers.
-
Remove the two 6mm Phillips #00 screws revealed under these rubber feet.
-
-
-
Flip the laptop so it is in the upright position.
-
Open the lid.
-
Unsnap the keyboard mount along the border of the laptop using a plastic opening tool.
-
-
-
-
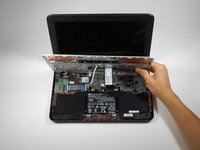
Tilt the keyboard mount up.
-
Use a spudger to flip up the two ZIF connector retaining flaps for the ribbon cables that connect the keyboard mount to the motherboard.
-
Gently remove both ribbon cables.
-
-
-
Lift the keyboard mount out of the laptop.
-
-
-
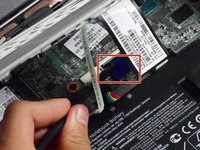
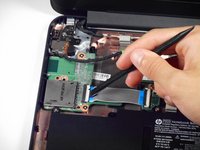
On the module, use a spudger to lift the small ZIF retaining flap for the ribbon cable connecting the SD card reader to the motherboard.
-
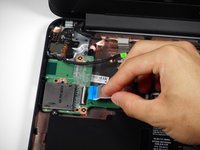
Gently pull the ribbon cable out of its socket.
-
-
-
Remove the two Phillips #00 6mm screws that attach the module to the laptop.
-
-
-
Lift the module up and out of the laptop.
-


To reassemble your device, follow these instructions in reverse order.
To reassemble your device, follow these instructions in reverse order.
crwdns2935221:0crwdne2935221:0
crwdns2935227:0crwdne2935227:0

crwdns2915084:0crwdne2915084:0

Cal Poly, Team S23-G3, Livingston Spring 2017 crwdns2935289:0Cal Poly, Team S23-G3, Livingston Spring 2017crwdne2935289:0
CPSU-LIVINGSTON-S17S23G3
crwdns2931471:04crwdne2931471:0
crwdns2935297:012crwdne2935297:0