crwdns2933423:0crwdne2933423:0
crwdns2947577:0crwdnd2947577:0crwdne2947577:0

HP 2000 - 2D22DX Hard Drive Replacement

crwdns2869540:0crwdne2869540:0: 1.6万

crwdns2959988:0crwdne2959988:0

crwdns2959990:0crwdne2959990:0
2
crwdns2959992:0crwdne2959992:0
28
crwdns2959994:0crwdne2959994:0
107
crwdns2959996:0crwdne2959996:0
16,064
crwdns2955950:0crwdne2955950:0: 1

crwdns2960002:01crwdne2960002:0.

crwdns2959984:0crwdne2959984:0: 28

crwdns2959974:028crwdne2959974:0

crwdns2959986:0crwdne2959986:0: 7

crwdns2959982:07crwdne2959982:0

crwdns2955944:0crwdne2955944:0: 5 - 10 crwdns2931279:0crwdne2931279:0
crwdns2955970:0crwdne2955970:0: crwdns2937799:0crwdne2937799:0
HP 2000 - 2D22DX Hard Drive Replacement

crwdns2915892:0crwdne2915892:0

crwdns2959928:0crwdne2959928:0 ↓

A good hard drive is essential to an optimally performing computer. If your computer is slowing down, a new hard drive may be exactly what your device needs to start functioning at its maximum potential.

crwdns2959930:0crwdne2959930:0

crwdns2959950:0crwdne2959950:0

crwdns2959954:0crwdne2959954:0

crwdns2943213:0crwdne2943213:0

crwdns2943215:0crwdne2943215:0

    1. HP 2000 - 2D22DX Hard Drive Replacement, Battery: crwdns2935265:01crwdnd2935265:01crwdnd2935265:02crwdne2935265:0 HP 2000 - 2D22DX Hard Drive Replacement, Battery: crwdns2935265:01crwdnd2935265:02crwdnd2935265:02crwdne2935265:0
      • Flip the device over and locate the battery compartment.

      • Slide the battery release latch to the left until the battery is detached from its slot.

      • A distinguishable pop will be heard when the battery is fully released.

      crwdns2952109:0crwdne2952109:0

      crwdns2917038:0crwdne2917038:0

    2. HP 2000 - 2D22DX Hard Drive Replacement: crwdns2935265:02crwdnd2935265:01crwdnd2935265:02crwdne2935265:0 HP 2000 - 2D22DX Hard Drive Replacement: crwdns2935265:02crwdnd2935265:02crwdnd2935265:02crwdne2935265:0
      • Slowly pull the battery out of its slot, being careful not to damage any of the connectors in the process.

      crwdns2952109:0crwdne2952109:0

      crwdns2917038:0crwdne2917038:0

    1. HP 2000 - 2D22DX Hard Drive Replacement, Hard Drive: crwdns2935265:03crwdnd2935265:01crwdnd2935265:02crwdne2935265:0 HP 2000 - 2D22DX Hard Drive Replacement, Hard Drive: crwdns2935265:03crwdnd2935265:02crwdnd2935265:02crwdne2935265:0
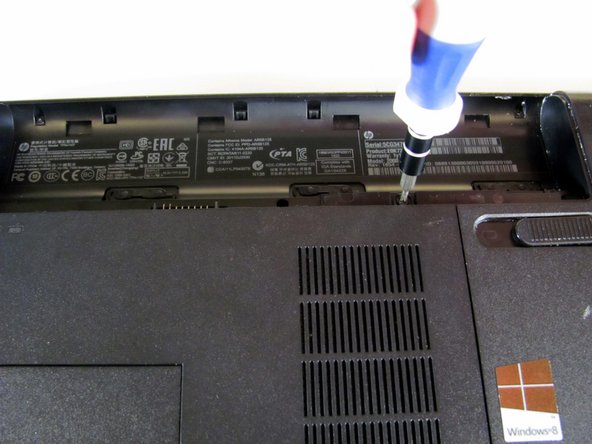
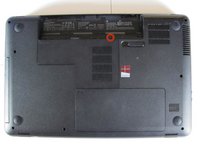
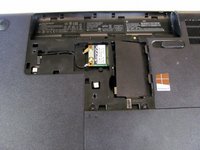
      • Loosen the Phillips #00 screw securing the RAM compartment cover.

      • The screw is permanently attached to the RAM compartment cover. Do not try to remove it completely.

      crwdns2952109:0crwdne2952109:0

      crwdns2917038:0crwdne2917038:0

    2. HP 2000 - 2D22DX Hard Drive Replacement: crwdns2935265:04crwdnd2935265:01crwdnd2935265:02crwdne2935265:0 HP 2000 - 2D22DX Hard Drive Replacement: crwdns2935265:04crwdnd2935265:02crwdnd2935265:02crwdne2935265:0
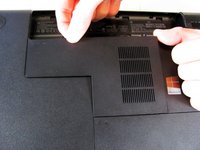
      • Once the screw is sufficiently loosened, slowly unclip the RAM compartment cover from its slots in the plastic chassis.

      • When unclipped completely, pull the compartment door out and away from the chassis.

      crwdns2952109:0crwdne2952109:0

      crwdns2917038:0crwdne2917038:0

    3. HP 2000 - 2D22DX Hard Drive Replacement: crwdns2935265:05crwdnd2935265:01crwdnd2935265:03crwdne2935265:0 HP 2000 - 2D22DX Hard Drive Replacement: crwdns2935265:05crwdnd2935265:02crwdnd2935265:03crwdne2935265:0 HP 2000 - 2D22DX Hard Drive Replacement: crwdns2935265:05crwdnd2935265:03crwdnd2935265:03crwdne2935265:0
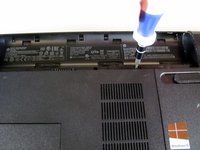
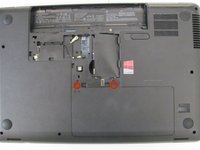
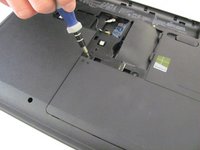
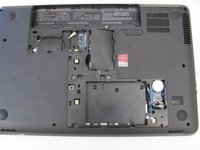
      • Loosen the two Phillips #00 screws that are securing the hard drive compartment.

      • The screws are permanently attached to the hard drive compartment cover. Do not try to remove them completely.

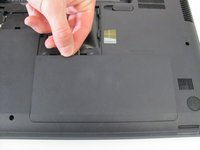
      • Once the screws are sufficiently loosened, disconnect the clips holding the cover in place and slowly pull the cover away from the plastic chassis.

      crwdns2952109:0crwdne2952109:0

      crwdns2917038:0crwdne2917038:0

    4. HP 2000 - 2D22DX Hard Drive Replacement: crwdns2935265:06crwdnd2935265:01crwdnd2935265:03crwdne2935265:0 HP 2000 - 2D22DX Hard Drive Replacement: crwdns2935265:06crwdnd2935265:02crwdnd2935265:03crwdne2935265:0 HP 2000 - 2D22DX Hard Drive Replacement: crwdns2935265:06crwdnd2935265:03crwdnd2935265:03crwdne2935265:0
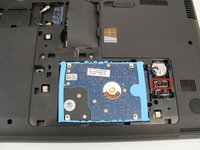
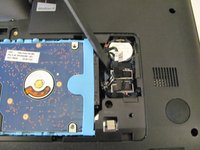
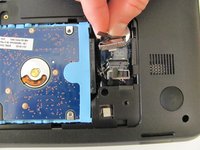
      • Using a spudger, disconnect the hard drive connecting cable. Use a slow, prying motion as if pulling a nail out of wood.

      • Be very gentle with the connecting cable and its respective port on the logic board. Both are very fragile and can be easily damaged.

      crwdns2952109:0crwdne2952109:0

      crwdns2917038:0crwdne2917038:0

    5. HP 2000 - 2D22DX Hard Drive Replacement: crwdns2935265:07crwdnd2935265:01crwdnd2935265:03crwdne2935265:0 HP 2000 - 2D22DX Hard Drive Replacement: crwdns2935265:07crwdnd2935265:02crwdnd2935265:03crwdne2935265:0 HP 2000 - 2D22DX Hard Drive Replacement: crwdns2935265:07crwdnd2935265:03crwdnd2935265:03crwdne2935265:0
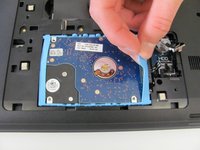
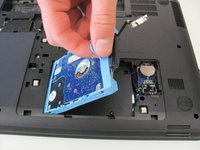
      • Using your fingers, grab the blue tab on the right side of the hard drive and slowly pull upwards.

      • Lift the hard drive out and away from its socket in the plastic chassis.

      crwdns2952109:0crwdne2952109:0

      crwdns2917038:0crwdne2917038:0

crwdns2915888:0crwdne2915888:0

To reassemble your device, follow these instructions in reverse order.

crwdns2935221:0crwdne2935221:0

crwdns2935229:028crwdne2935229:0

crwdns2862417:0crwdne2862417:0

crwdns2935293:0crwdne2935293:0

Conor Most

crwdns2935283:004/14/14crwdne2935283:0

2,799 crwdns2915208:0crwdne2915208:0

crwdns2935297:06crwdne2935297:0

crwdns2935287:0crwdne2935287:0

Cal Poly, Team 3-40, Maness Spring 2014 crwdns2935289:0Cal Poly, Team 3-40, Maness Spring 2014crwdne2935289:0

CPSU-MANESS-S14S3G40

crwdns2931471:04crwdne2931471:0

crwdns2935297:072crwdne2935297:0

crwdns2947412:00crwdne2947412:0

crwdns2917038:0crwdne2917038:0

crwdns2936625:0crwdne2936625:0:

crwdns2936751:024crwdne2936751:0 2

crwdns2936753:07crwdne2936753:0 28

crwdns2936753:030crwdne2936753:0 107

crwdns2959996:0crwdne2959996:0 16,064