crwdns2933423:0crwdne2933423:0

HP 17-bs049dx USB Port Replacement

crwdns2942213:0crwdne2942213:0

  1. HP 17-bs049dx USB Port Replacement, Battery: crwdns2935265:01crwdnd2935265:01crwdnd2935265:01crwdne2935265:0
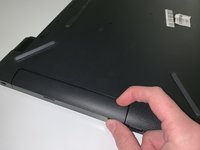
    • To remove the battery, simply push the tabs towards each other.

    • The battery will come out with force, be sure to keep anything fragile away from the laptop during this process.

  2. HP 17-bs049dx USB Port Replacement, Back Panel: crwdns2935265:02crwdnd2935265:01crwdnd2935265:01crwdne2935265:0
    • Remove the four screws (13.7mm) with a Phillips #0 screwdriver.

    • Be sure to lift all four rubber tabs to access screws (7.51mm) underneath.

    • Rubber tabs will require force to access screws.

  3. HP 17-bs049dx USB Port Replacement: crwdns2935265:03crwdnd2935265:01crwdnd2935265:01crwdne2935265:0
    • Use the Philips 0 screwdriver to unscrew the screws (7.51mm) that were underneath the battery.

  4. HP 17-bs049dx USB Port Replacement: crwdns2935265:04crwdnd2935265:01crwdnd2935265:02crwdne2935265:0 HP 17-bs049dx USB Port Replacement: crwdns2935265:04crwdnd2935265:02crwdnd2935265:02crwdne2935265:0
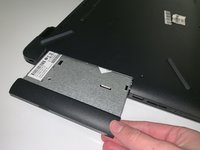
    • Pull outwards on the disk reader to remove from main frame.

    • This removal will require force.

    • All screws must be removed before removing disk reader.

  5. HP 17-bs049dx USB Port Replacement: crwdns2935265:05crwdnd2935265:01crwdnd2935265:01crwdne2935265:0
    • Lift back panel to access internal components.

    • You will need to use force to pry it open.

  6. HP 17-bs049dx USB Port Replacement, USB Port: crwdns2935265:06crwdnd2935265:01crwdnd2935265:02crwdne2935265:0 HP 17-bs049dx USB Port Replacement, USB Port: crwdns2935265:06crwdnd2935265:02crwdnd2935265:02crwdne2935265:0
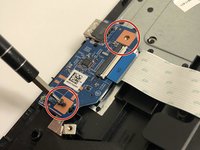
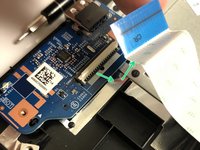
    • Remove the two screws using a Phillips #0 screwdriver.

  7. HP 17-bs049dx USB Port Replacement: crwdns2935265:07crwdnd2935265:01crwdnd2935265:03crwdne2935265:0 HP 17-bs049dx USB Port Replacement: crwdns2935265:07crwdnd2935265:02crwdnd2935265:03crwdne2935265:0 HP 17-bs049dx USB Port Replacement: crwdns2935265:07crwdnd2935265:03crwdnd2935265:03crwdne2935265:0
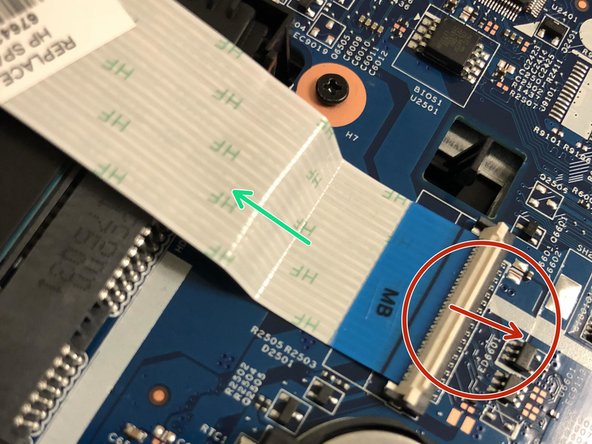
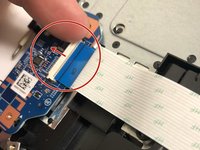
    • At both ends of the connector ribbon, unclip both connectors.

    • Gently remove the ribbon from the unlatched area.

crwdns2915888:0crwdne2915888:0

To reassemble your device, follow these instructions in reverse order.

Logan McCarty

crwdns2935283:010/01/18crwdne2935283:0

307 crwdns2915208:0crwdne2915208:0

crwdns2935297:02crwdne2935297:0

crwdns2915084:0crwdne2915084:0

University of North Texas, Team S7-G2, Thompson Fall 2018 crwdns2935289:0University of North Texas, Team S7-G2, Thompson Fall 2018crwdne2935289:0

UNT-THOMPSON-F18S7G2

crwdns2931471:06crwdne2931471:0

crwdns2935297:07crwdne2935297:0

crwdns2944067:00crwdne2944067:0

crwdns2917038:0crwdne2917038:0

crwdns2936625:0crwdne2936625:0:

crwdns2936751:024crwdne2936751:0 0

crwdns2936753:07crwdne2936753:0 0

crwdns2936753:030crwdne2936753:0 0

crwdns2942667:0crwdne2942667:0 234