crwdns2933423:0crwdne2933423:0

HP 15-dw Rubber Feet Replacement

crwdns2942213:0crwdne2942213:0

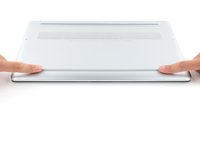
  1. HP 15-dw Rubber Feet Replacement, Flip your laptop over: crwdns2935265:01crwdnd2935265:01crwdnd2935265:01crwdne2935265:0
    • Flip your laptop over so the rubber feet are facing up.

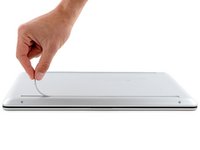
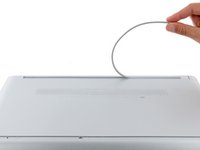
  2. HP 15-dw Rubber Feet Replacement, Peel up an end of the front foot: crwdns2935265:02crwdnd2935265:01crwdnd2935265:03crwdne2935265:0 HP 15-dw Rubber Feet Replacement, Peel up an end of the front foot: crwdns2935265:02crwdnd2935265:02crwdnd2935265:03crwdne2935265:0 HP 15-dw Rubber Feet Replacement, Peel up an end of the front foot: crwdns2935265:02crwdnd2935265:03crwdnd2935265:03crwdne2935265:0
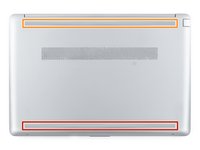
    • The rubber feet cover a total of five back cover screws.

    • Use an opening pick to peel up an end of the front rubber foot until you can grip it with your fingers.

    • Make sure both the foot and its adhesive peel up together, as they need to be removed as one piece.

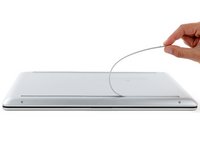
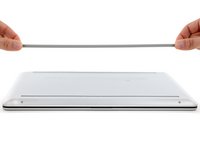
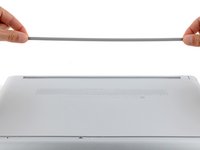
  3. HP 15-dw Rubber Feet Replacement, Remove the front foot: crwdns2935265:03crwdnd2935265:01crwdnd2935265:03crwdne2935265:0 HP 15-dw Rubber Feet Replacement, Remove the front foot: crwdns2935265:03crwdnd2935265:02crwdnd2935265:03crwdne2935265:0 HP 15-dw Rubber Feet Replacement, Remove the front foot: crwdns2935265:03crwdnd2935265:03crwdnd2935265:03crwdne2935265:0
    • Peel the front foot away from the back cover and remove it.

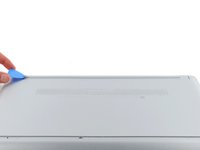
  4. HP 15-dw Rubber Feet Replacement, Remove the rear foot: crwdns2935265:04crwdnd2935265:01crwdnd2935265:03crwdne2935265:0 HP 15-dw Rubber Feet Replacement, Remove the rear foot: crwdns2935265:04crwdnd2935265:02crwdnd2935265:03crwdne2935265:0 HP 15-dw Rubber Feet Replacement, Remove the rear foot: crwdns2935265:04crwdnd2935265:03crwdnd2935265:03crwdne2935265:0
    • Use an opening pick to peel up an end of the rear rubber foot until you can grip it with your fingers.

    • Peel the rear foot away from the back cover and remove it.

  5. HP 15-dw Rubber Feet Replacement, Reassembly information: crwdns2935265:05crwdnd2935265:01crwdnd2935265:03crwdne2935265:0 HP 15-dw Rubber Feet Replacement, Reassembly information: crwdns2935265:05crwdnd2935265:02crwdnd2935265:03crwdne2935265:0 HP 15-dw Rubber Feet Replacement, Reassembly information: crwdns2935265:05crwdnd2935265:03crwdnd2935265:03crwdne2935265:0
    crwdns2935267:0crwdne2935267:0
    Tesa 61395 Tape
    $5.99
    crwdns2942207:0crwdne2942207:0
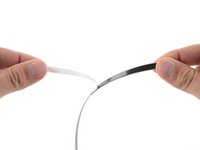
    • Note that the rubber feet are different:

    • The front foot is thicker, with a deeper recess.

    • The rear foot is thinner, with a shallower recess.

    • During reassembly:

    • If you're reusing the rubber feet, the leftover adhesive should be tacky enough to reuse.

    • If the leftover adhesive isn't sticky enough or your replacement feet didn't come with adhesive, you can use double-sided tape such as Tesa Tape to secure the feet.

    • Make sure the strips of tape aren't wider than 6 mm, otherwise they may not fit.

    • To install a foot, remove its adhesive liner, lay the foot into its matching recess, and press down firmly along the entire length of the foot to secure it.

crwdns2915888:0crwdne2915888:0

To reassemble your device, follow these instructions in reverse order.

Repair didn’t go as planned? Try some basic troubleshooting, or ask our Answers community for help.

Spencer Day

crwdns2935283:009/14/22crwdne2935283:0

55,203 crwdns2915208:0crwdne2915208:0

crwdns2935297:0408crwdne2935297:0

crwdns2915084:0crwdne2915084:0

iFixit crwdns2935289:0iFixitcrwdne2935289:0

Staff

crwdns2931471:0136crwdne2931471:0

crwdns2935297:017,430crwdne2935297:0

crwdns2944067:00crwdne2944067:0

crwdns2917038:0crwdne2917038:0

crwdns2936625:0crwdne2936625:0:

crwdns2936751:024crwdne2936751:0 0

crwdns2936753:07crwdne2936753:0 3

crwdns2936753:030crwdne2936753:0 16

crwdns2942667:0crwdne2942667:0 260