crwdns2915892:0crwdne2915892:0
This is a guide on how to replace the Fan and Heat Sink in the HP 15-db0015dx laptop. Use this guide to replace or upgrade the fan and heat sink. You may need to upgrade or replace the fan and heat sink if the computer is running too hot, smoking, making excessive noise during compute-intensive operations, or under-performing.
In replacing the heatsink, you will need to separate it from the CPU, which will require a cleaning and reapplication of the thermal paste. See this Thermal Paste Application guide for details on how to replace your thermal paste correctly to maintain proper thermal conductivity. Old thermal paste can cause issues with heat uptake by the heatsink, so just by replacing this thermal paste, you may notice better heat mitigation performance from your device.
crwdns2942213:0crwdne2942213:0
-
-
Power off the device before starting.
-
Remove the rubber strips that hide the screws using the spudger.
-
Flip the device and unscrew the eleven screws with a Phillips #0 screwdriver.
-
-
-
Use the spudger tool to pry open the back cover.
-
Lift the back panel to access the inside.
-
Slide the CD drive to the left, and remove.
The top of what? Note that iFixit does not like arrows, and this arrow doesn’t seem to make sense here when you’re lifting up. Instead, use a flipbook style shot to show this action. I would also separate out the yellow bullet to a new step so you have three images to show this process, and also, so you can add more details to the description of what to do.
I believe the tool here is the spudger, which you have in the tool list as well. Make sure to correctly identify tools.
I suggest that you remove the CD-DVD drive BEFORE removing the back cover.
-
-
-
-
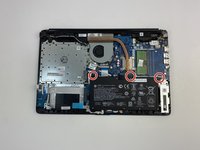
Unscrew the three battery screws with a Phillips #0 screwdriver.
-
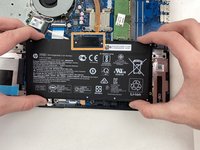
Lift the battery up, disconnecting the connector first.
-
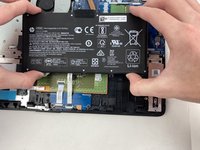
Push forward and remove the battery.
What is the orange highlighted section? You want the text and images to work independently. The picture also seems to contradict what you say, since your hands are on the sides. Reminder: remove arrows in all pictures in favor of action shots.
Add warning and info bullets to let the audience know that they may damage other sections of this computer by pulling pieces off.
-
-
-
Remove the screw on the fan with a Phillips #0 screwdriver.
-
-
-
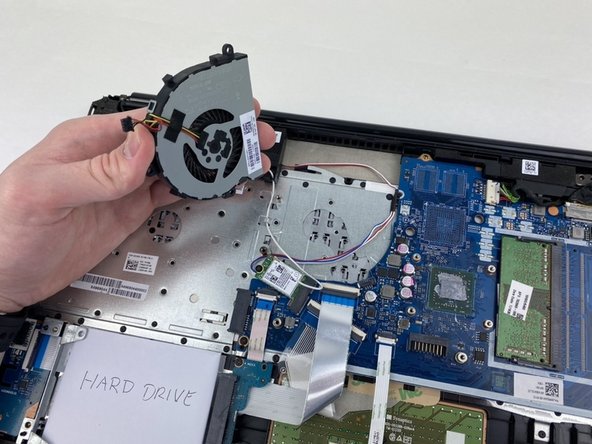
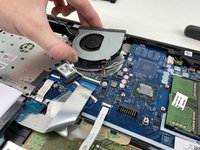
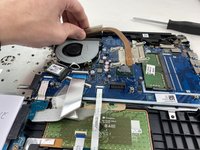
Lift the fan upward slightly.
-
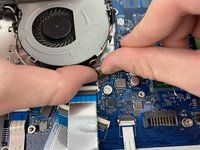
Disconnect the fan cable by pinching on the sides of the connectors and sliding it out.
-
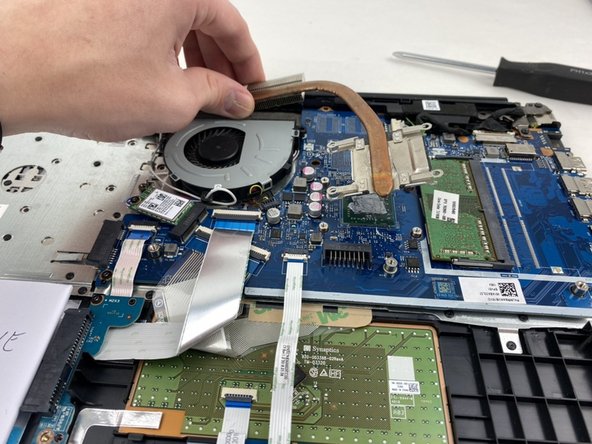
Lift the rest of the way to remove the fan.
All subsequent steps in this heat sink need additional detail in directions and images.
-
-
-
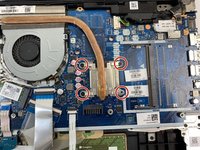
Remove the four screws with a Phillips #00 screwdriver.
-
Lift and remove the heat sink.
-


To reassemble your device, follow these instructions in reverse order.
To reassemble your device, follow these instructions in reverse order.
crwdns2935221:0crwdne2935221:0
crwdns2935227:0crwdne2935227:0

crwdns2915084:0crwdne2915084:0

Embry-Riddle Aeronautical University, Team S2-G5, Watkins Spring 2020 crwdns2935289:0Embry-Riddle Aeronautical University, Team S2-G5, Watkins Spring 2020crwdne2935289:0
ERAU-WATKINS-S20S2G5
crwdns2931471:05crwdne2931471:0
crwdns2935297:09crwdne2935297:0
crwdns2947412:03crwdne2947412:0
Hey great guide! Just a quick question: is the material directly under the copper pipe (on the CPU side) also thermal paste which needs to be swapped out? Or is ist a static part of the fan/pipe/CPU cover? Thanks in advance!
It's best to remove the material on both the CPU side and the attached fan side.
did the fan replacement, want to do thermal paste replacement now. 3 of the 4 screws holding the heat sink bracket are stripped on mine... I need to know what size they are for replacement... any help there?
How can I remove the rubber strips? Which screwdriver head should I use?
Alex Watkins - crwdns2934203:0crwdne2934203:0