crwdns2933423:0crwdne2933423:0

HP 15-ay103dx Motherboard Replacement

crwdns2942213:0crwdne2942213:0

  1. HP 15-ay103dx Motherboard  Replacement, Battery: crwdns2935265:01crwdnd2935265:01crwdnd2935265:01crwdne2935265:0
    • Slide the two battery lock latches on the back of the device to the “unlock” position.

  2. HP 15-ay103dx Motherboard  Replacement: crwdns2935265:02crwdnd2935265:01crwdnd2935265:01crwdne2935265:0
    • Lift the battery upward to remove it from the device.

  3. HP 15-ay103dx Motherboard  Replacement, Back Panel: crwdns2935265:03crwdnd2935265:01crwdnd2935265:01crwdne2935265:0
    • Using the PH1 phillips-head screwdriver, remove all the 5/16 in. screws from the back of the device.

    • There should be 10 in total, be sure to keep them together!

  4. HP 15-ay103dx Motherboard  Replacement: crwdns2935265:04crwdnd2935265:01crwdnd2935265:01crwdne2935265:0
    • Locate the optical disc drive and remove it from the device by sliding it straight of the device.

  5. HP 15-ay103dx Motherboard  Replacement: crwdns2935265:05crwdnd2935265:01crwdnd2935265:02crwdne2935265:0 HP 15-ay103dx Motherboard  Replacement: crwdns2935265:05crwdnd2935265:02crwdnd2935265:02crwdne2935265:0
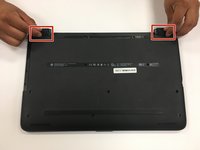
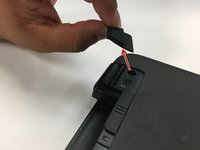
    • Covering the hinges of the device are rubber bumpers secured to the device using adhesive. Remove them carefully.

    • Place the adhesive side up as you will need to place them back after your replacement is complete.

  6. HP 15-ay103dx Motherboard  Replacement: crwdns2935265:06crwdnd2935265:01crwdnd2935265:02crwdne2935265:0 HP 15-ay103dx Motherboard  Replacement: crwdns2935265:06crwdnd2935265:02crwdnd2935265:02crwdne2935265:0
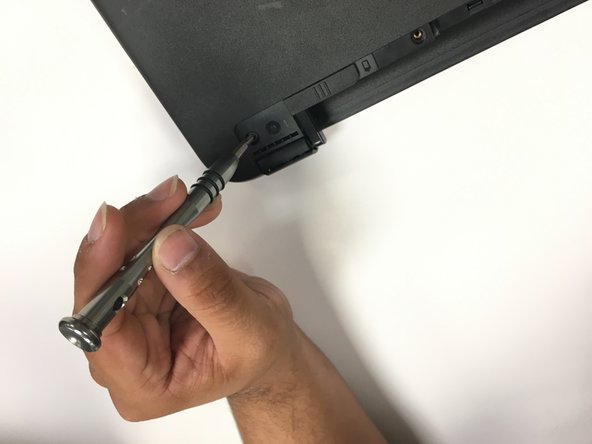
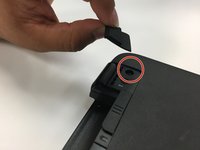
    • In the same spot you’ve just removed the bumpers from, you will find two 5/16 in. screws. Using the same Phillips-head screwdriver used in step 2, remove the screws

    • Be sure to keep the screws together!

  7. HP 15-ay103dx Motherboard  Replacement: crwdns2935265:07crwdnd2935265:01crwdnd2935265:01crwdne2935265:0
    • Carefully remove the back panel from the device.

    • If you are unable to do this with your hands, you can use a thin prying tool of your choice to make it easier!

  8. HP 15-ay103dx Motherboard  Replacement, Motherboard: crwdns2935265:08crwdnd2935265:01crwdnd2935265:03crwdne2935265:0 HP 15-ay103dx Motherboard  Replacement, Motherboard: crwdns2935265:08crwdnd2935265:02crwdnd2935265:03crwdne2935265:0 HP 15-ay103dx Motherboard  Replacement, Motherboard: crwdns2935265:08crwdnd2935265:03crwdnd2935265:03crwdne2935265:0
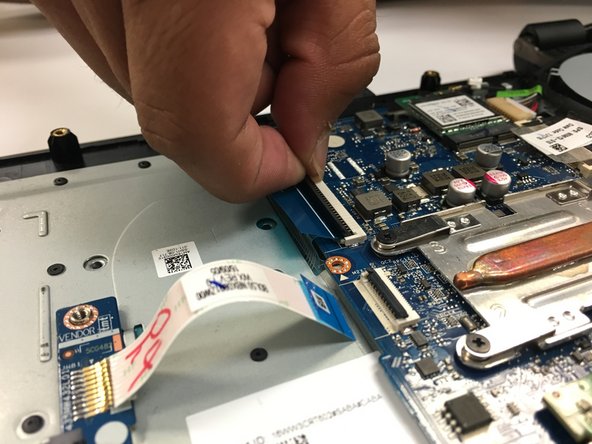
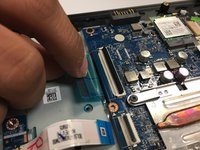
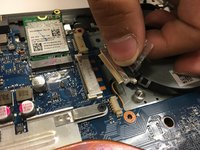
    • Disconnect the wires around the motherboard securing it to the device.

    • To do this, flip the black "switches" securing the wires into place upwards.

  9. HP 15-ay103dx Motherboard  Replacement: crwdns2935265:09crwdnd2935265:01crwdnd2935265:01crwdne2935265:0
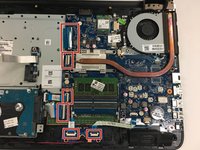
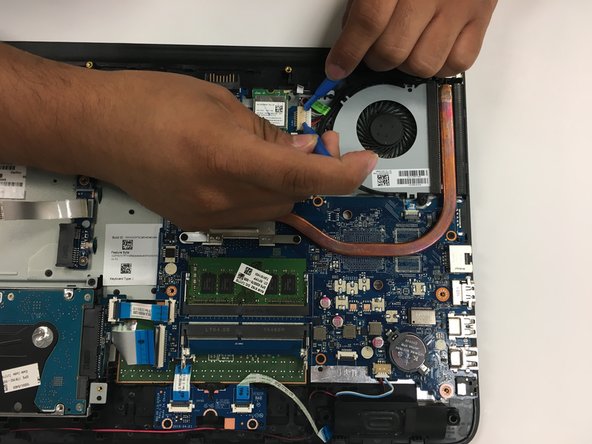
    • Remove the six 5/16 in. screws holding the motherboard onto the device using the P1 philips-head screwdriver.

    • Be sure to keep them together!

  10. HP 15-ay103dx Motherboard  Replacement: crwdns2935265:010crwdnd2935265:01crwdnd2935265:03crwdne2935265:0 HP 15-ay103dx Motherboard  Replacement: crwdns2935265:010crwdnd2935265:02crwdnd2935265:03crwdne2935265:0 HP 15-ay103dx Motherboard  Replacement: crwdns2935265:010crwdnd2935265:03crwdnd2935265:03crwdne2935265:0
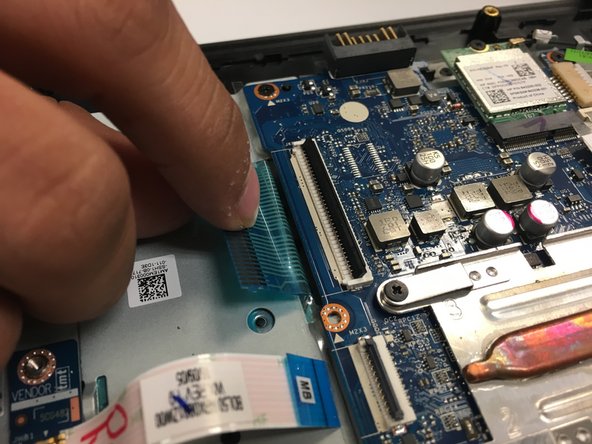
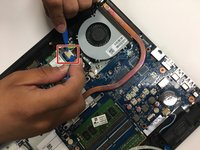
    • Disconnect the wire securing the whole motherboard located at the top to the motherboard.

    • This is possible with your fingers, but is easier to do using an iFixit opening tool.

  11. HP 15-ay103dx Motherboard  Replacement: crwdns2935265:011crwdnd2935265:01crwdnd2935265:01crwdne2935265:0
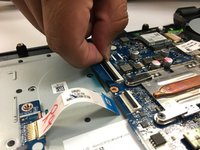
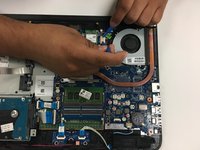
    • Carefully lift the motherboard to remove it from the device.

crwdns2915888:0crwdne2915888:0

To reassemble your device, follow these instructions in reverse order.

crwdns2935227:0crwdne2935227:0

Rafael Cardona Bautista

crwdns2935283:009/25/17crwdne2935283:0

104 crwdns2915208:0crwdne2915208:0

crwdns2935295:0crwdne2935295:0

crwdns2915084:0crwdne2915084:0

University of North Texas, Team S3-G3, Thompson Fall 2017 crwdns2935289:0University of North Texas, Team S3-G3, Thompson Fall 2017crwdne2935289:0

UNT-THOMPSON-F17S3G3

crwdns2931471:04crwdne2931471:0

crwdns2935297:06crwdne2935297:0

crwdns2944067:00crwdne2944067:0

crwdns2917038:0crwdne2917038:0

crwdns2936625:0crwdne2936625:0:

crwdns2936751:024crwdne2936751:0 0

crwdns2936753:07crwdne2936753:0 3

crwdns2936753:030crwdne2936753:0 8

crwdns2942667:0crwdne2942667:0 1,570