crwdns2915892:0crwdne2915892:0
This guide will show you how to replace the fan in an HP 15-ay078nr laptop. The fan cools the internals of a device, preventing it from overheating while in use. Over time, dust can block the exit path of the air, which may cause the device to overheat. The fan can also stop working as normal “wear and tear.” When a device overheats, it can pose not only a burn hazard in severe cases but will perform poorly. The response time will be noticeably slower. This is because the internal components of the device are sensitive to heat and can become damaged. Here is further information to determine if the fan is not spinning and or not adequately cooling the device due to dust or debris.
Before beginning, make sure the back of the device is cool to the touch. An overheated component can cause burns, therefore a cool to the touch device is ideal to work on.
crwdns2942213:0crwdne2942213:0
-
-
Orient the laptop so that the underside is facing up.
-
Rotate the device so that the CD slot is in the upper left corner.
-
-
-
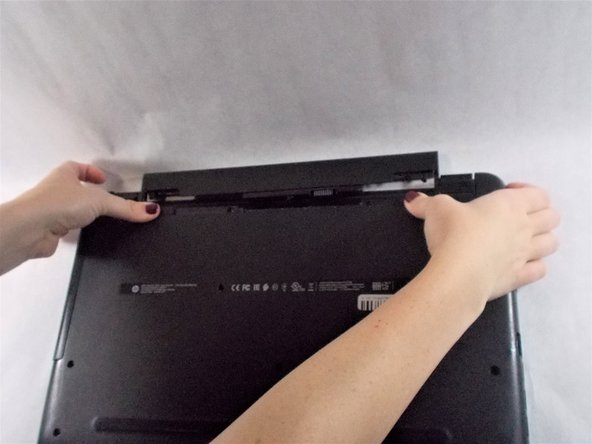
Put your fingers on the battery latch.
-
-
-
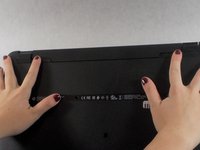
Using your fingers, push each battery latch simultaneously towards the middle.
-
Remove the battery from the laptop.
-
-
-
-
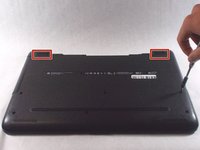
Pull off the two rubber feet on the underside of the device.
-
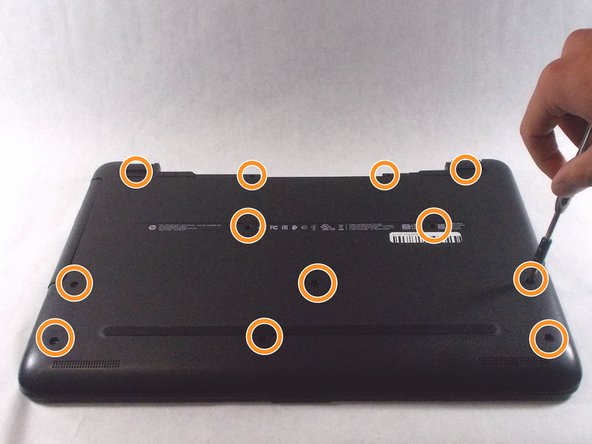
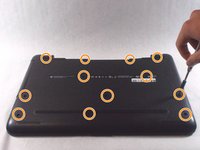
Remove the twelve 9.5 mm screws from the underside of the device using a Phillips #2 screwdriver.
-
-
-
Slide an opening pick around the edges between the back panel and the rest of the device to release the plastic retention clips that hold the panel in place.
-
-
-
Lift up on the panel to remove it completely from the device.
-
-
-
Unplug the fan cable from the connector on the motherboard.
-
-
-
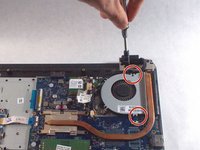
Remove two 3.4 mm screws from the fan using a Phillips #2 screwdriver.
-
-
-
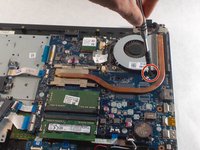
Lift up and remove the fan from the laptop.
-


To reassemble your device, follow these instructions in reverse order.
Turn on the device and use it for several minutes for the device to come to operating temperature. Note how the bottom of the device feels, as it will be cooler than before the replacement was preformed. The response time after continuous use will be improved as well.

crwdns2935287:0crwdne2935287:0

UMass Dartmouth, Team 3-1, Sinclaire Fall 2021 crwdns2935289:0UMass Dartmouth, Team 3-1, Sinclaire Fall 2021crwdne2935289:0
UMASSD-SINCLAIRE-F21S3G1
crwdns2931471:03crwdne2931471:0
crwdns2935297:07crwdne2935297:0