crwdns2915892:0crwdne2915892:0
This is a straightforward guide on how to replace the HP 15-ac121dx Screen. The tools needed are the Phillips #000 Screwdriver and the iFixit Opening Tool. It is essential that this procedure is completed with care and attention to detail, since there are many components at risk of being damaged. The time needed to complete this procedure is approximately five minutes.
crwdns2942213:0crwdne2942213:0
-
-
Remove all external devices from the computer.
-
Remove the charging cord from the computer.
-
-
-
Turn off the computer by holding the power button.
-
-
-
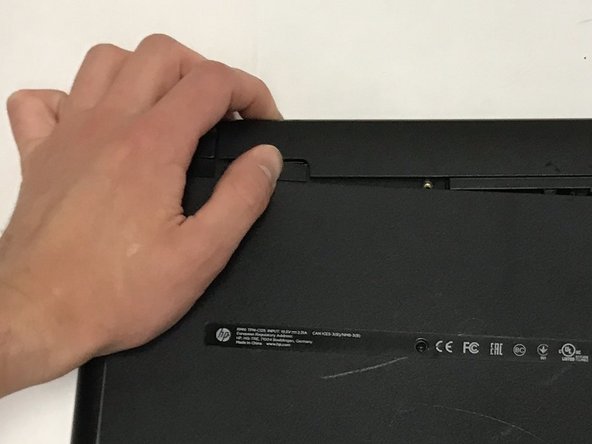
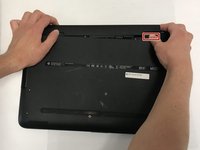
To remove the battery, slide the left slider on the back to the unlocked position.
-
-
-
-
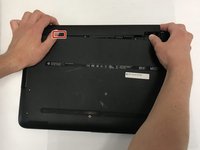
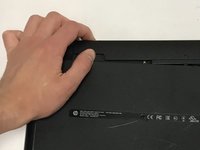
Push the right slider inwards.
-
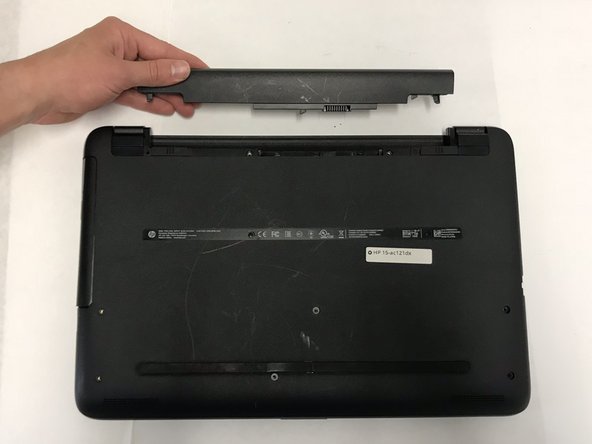
Remove the battery out by pulling straight out and to the right.
-
-
-
Open the laptop so that the screen is facing you.
-
-
-
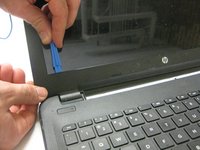
With the screen facing you, use the plastic opening tool to remove the liner around the screen
-
-
-
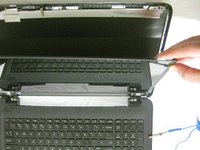
Using a Phillips #000 screwdriver, remove all four 2mm screws in each corner of the screen.
-
-
-
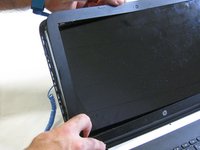
Carefully remove the screen and place it face down on the keyboard.
-
-
-
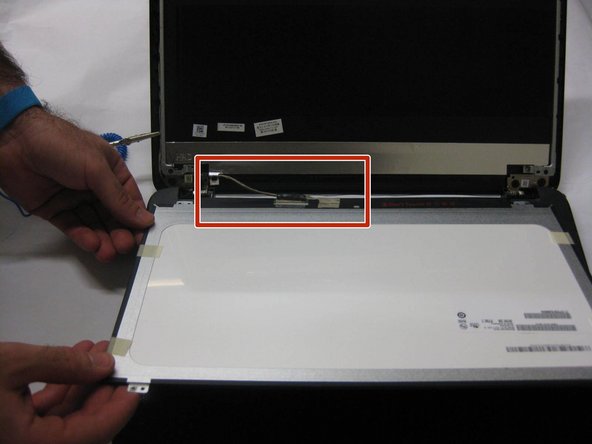
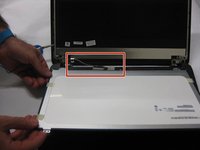
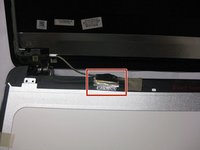
With the screen faced down on the keyboard, remove the grounding tape adhered to the back of the screen.
-
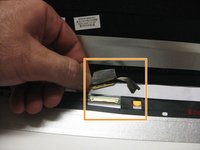
Carefully remove the 36-pin plug, not to damage the grounding tape or the plug.
-


To reassemble your device, follow these instructions in reverse order.
To reassemble your device, follow these instructions in reverse order.
crwdns2935221:0crwdne2935221:0
crwdns2935227:0crwdne2935227:0

crwdns2915084:0crwdne2915084:0

The Citadel Military College of South Carolina, Team S3-G9, Eggleston Fall 2019 crwdns2935289:0The Citadel Military College of South Carolina, Team S3-G9, Eggleston Fall 2019crwdne2935289:0
CMCSC-EGGLESTON-F19S3G9
crwdns2931471:03crwdne2931471:0
crwdns2935297:04crwdne2935297:0