crwdns2915892:0crwdne2915892:0
In this guide, you will learn how to remove a HP 14-fq1025nr motherboard and replace it with a new one. The motherboard houses all of the computer's main components such as the CPU, RAM, and storage. A faulty motherboard may result in a completely dead system due to the components not being able to communicate properly with each other.
WARNING: The computer uses a lithium-ion battery which contains toxic substances/flammable substances. Handle with caution.
crwdns2942213:0crwdne2942213:0
-
-
Flip the laptop upside down so the bottom cover is facing up.
-
-
crwdns2935267:0crwdne2935267:0Tweezers$4.99
-
Use a pair of tweezers to grab and pull the feet off of the cover.
-
-
-
Remove the two 4 mm screws using a Phillips #0 screwdriver.
-
Remove the six remaining 6 mm screws located around the edges and underneath the feet using a Phillips #0 screwdriver.
-
-
-
Flip the laptop right-side up and slide an iFixit opening tool and/or Jimmy inside of the bottom cover seam to pry it open.
-
-
-
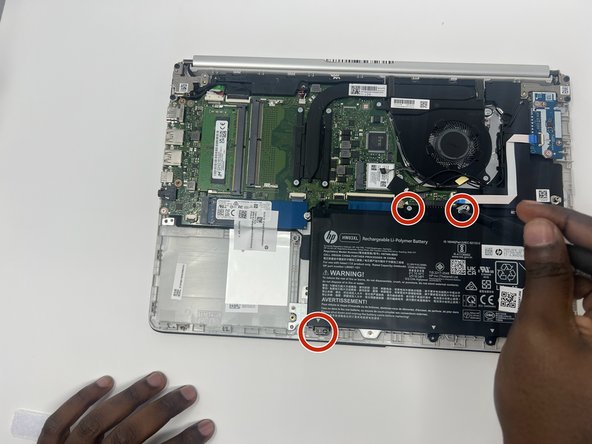
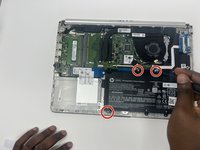
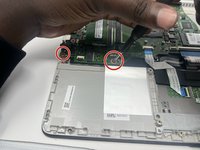
Remove the four gray 3 mm screws holding down the battery using a Phillips #0 screwdriver.
-
-
-
-
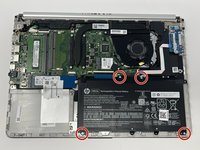
Remove the three silver screws (one 2 mm screw and two 4 mm screws) holding down the fan using a Phillips #0 screwdriver.
-
-
crwdns2935267:0crwdne2935267:0Tweezers$4.99
-
Unplug the fan’s power cord from the motherboard.
-
-
-
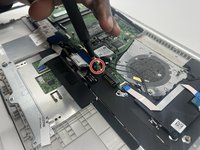
Remove the four gray 3 mm screws around the heat sink using a Phillips #0 screwdriver.
-
Remove the heat sink.
-
-
-
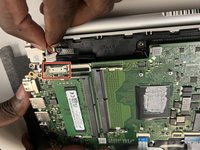
Remove the single 6 mm screw holding down the SSD using a Phillips #0 screwdriver.
-
-
-
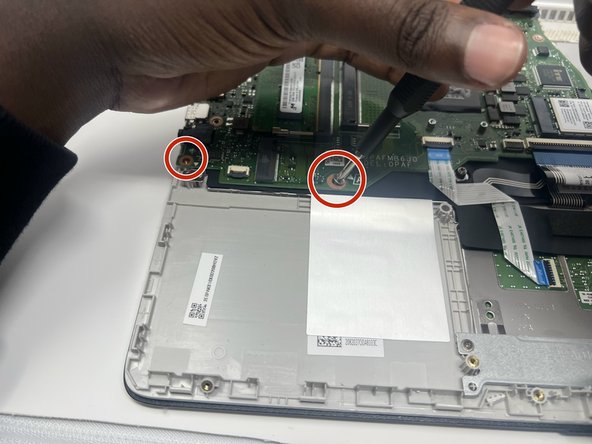
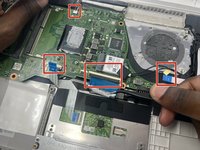
Remove the five 3 mm gray screws from around the motherboard using a Phillips #00 screwdriver.
-
-
crwdns2935267:0crwdne2935267:0Tweezers$4.99
-
Unplug the wire connections.
-


To reassemble your device, follow these instructions in reverse order.
To reassemble your device, follow these instructions in reverse order.

crwdns2915084:0crwdne2915084:0

Utah Tech University, Team 1-6, McMurrin Fall 2022 crwdns2935289:0Utah Tech University, Team 1-6, McMurrin Fall 2022crwdne2935289:0
UTAHTECH-MCMURRIN-F22S1G6
crwdns2931471:03crwdne2931471:0
crwdns2935297:09crwdne2935297:0