crwdns2933423:0crwdne2933423:0

HP 14-dq0052dx Screen Replacement

crwdns2942213:0crwdne2942213:0

  1. HP 14-dq0052dx Screen Replacement, Screen: crwdns2935265:01crwdnd2935265:01crwdnd2935265:01crwdne2935265:0
    • Using an opening tool, pry off the bar on the back of the laptop.

    • Standing the laptop up as shown makes it much easier.

  2. HP 14-dq0052dx Screen Replacement: crwdns2935265:02crwdnd2935265:01crwdnd2935265:02crwdne2935265:0 HP 14-dq0052dx Screen Replacement: crwdns2935265:02crwdnd2935265:02crwdnd2935265:02crwdne2935265:0
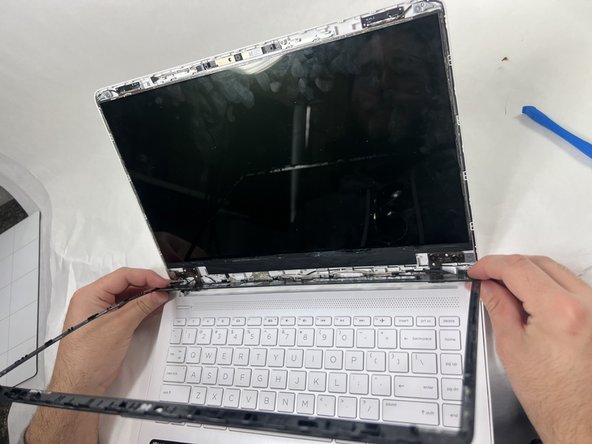
    • Using an opening tool, carefully pry off the thin black plastic around the edges of the screen.

    • There is some adhesive holding it in place as well as clips.

  3. HP 14-dq0052dx Screen Replacement: crwdns2935265:03crwdnd2935265:01crwdnd2935265:01crwdne2935265:0
    • Pull out the double sided tape holding the screen in place.

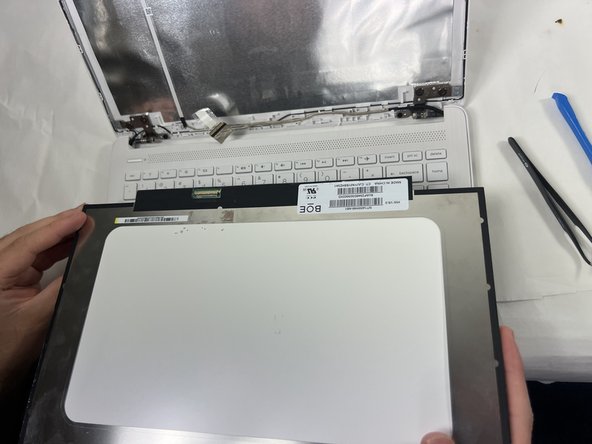
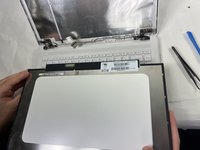
    • Lay the screen down on the keyboard.

  4. HP 14-dq0052dx Screen Replacement: crwdns2935265:04crwdnd2935265:01crwdnd2935265:03crwdne2935265:0 HP 14-dq0052dx Screen Replacement: crwdns2935265:04crwdnd2935265:02crwdnd2935265:03crwdne2935265:0 HP 14-dq0052dx Screen Replacement: crwdns2935265:04crwdnd2935265:03crwdnd2935265:03crwdne2935265:0
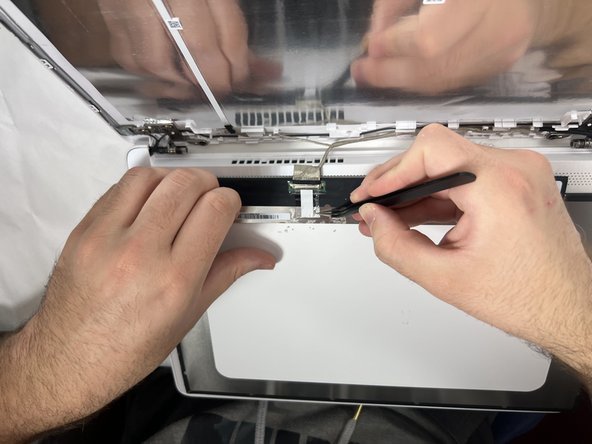
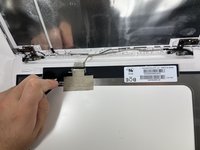
    • Peel off the tape and unplug the screen.

crwdns2915888:0crwdne2915888:0

To reassemble your device, follow these instructions in reverse order.

crwdns2935227:0crwdne2935227:0

Liam Harvey

crwdns2935283:010/18/24crwdne2935283:0

109 crwdns2915208:0crwdne2915208:0

crwdns2935295:0crwdne2935295:0

crwdns2915084:0crwdne2915084:0

UMass Dartmouth, Team 2-5, Konn Fall 2024 crwdns2935289:0UMass Dartmouth, Team 2-5, Konn Fall 2024crwdne2935289:0

UMASSD-KONN-F24S2G5

crwdns2931471:04crwdne2931471:0

crwdns2935297:05crwdne2935297:0

crwdns2947412:00crwdne2947412:0

crwdns2917038:0crwdne2917038:0

crwdns2936625:0crwdne2936625:0:

crwdns2936751:024crwdne2936751:0 1

crwdns2936753:07crwdne2936753:0 6

crwdns2936753:030crwdne2936753:0 16

crwdns2942667:0crwdne2942667:0 92