crwdns2915892:0crwdne2915892:0
The HP 14-ac151nr DC Power Jack won't charge and you have already ruled out any common problems, you can try replacing the computer power jack using these steps. The reason for why this repair is needed is to prevent the device from being more damaged over time and to keep it out of electronic waste. This repair guide will likely resolve any charging problems you might have. In the guide below, there aren't any unusual features or techniques to be used during the disassembling part nor the repair process within the repair guide. In these steps you will not need any special skills during the process; the only thing you will need is a steady hand and control of your strength. The reason why we recommend having a steady hand along with controlling your strength is because you will be using tools that rely on a steady hand for the strength; if not controlled properly, you may damage the device more
crwdns2942213:0crwdne2942213:0
-
-
Remove battery by pushing the two buttons inward.
-
-
-
Remove the two rubber feet next to the battery.
-
-
-
Remove all 14 Phillips head #0 screws.
-
-
-
Use a plastic opener tool to pry off the black backplate.
-
-
-
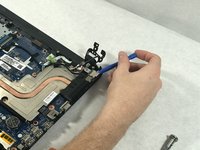
Remove the black tape near the power jack.
-
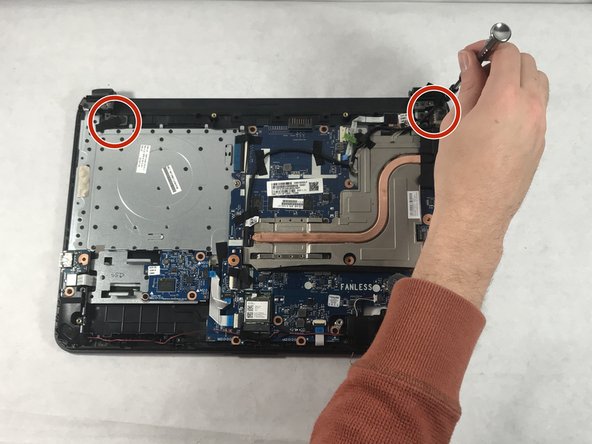
Remove the screws connecting monitor to the bottom of the computer.
-
-
-
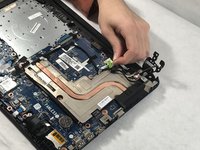
Position the metal fittings attached to the monitor out of the way.
-
-
-
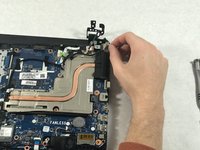
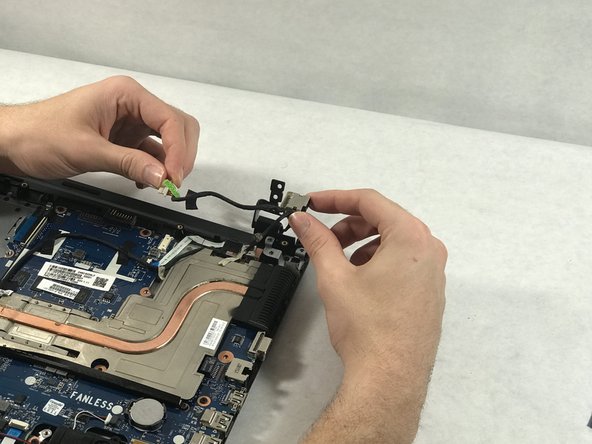
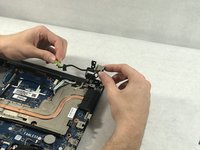
Disconnect the power jack from the motherboard.
-
Remove the power jack by lifting it up.
-


To reassemble your device, follow these instructions in reverse order.
crwdns2935221:0crwdne2935221:0
crwdns2935227:0crwdne2935227:0

crwdns2935287:0crwdne2935287:0

UMass Dartmouth, Team S1-G7, Simcock Fall 2018 crwdns2935289:0UMass Dartmouth, Team S1-G7, Simcock Fall 2018crwdne2935289:0
UMASSD-SIMCOCK-F18S1G7
crwdns2931471:03crwdne2931471:0
crwdns2935297:06crwdne2935297:0