crwdns2933423:0crwdne2933423:0

HMDX Jam Plus Speaker Replacement

crwdns2942213:0crwdne2942213:0

  1. HMDX Jam Plus Speaker Replacement, Battery: crwdns2935265:01crwdnd2935265:01crwdnd2935265:03crwdne2935265:0 HMDX Jam Plus Speaker Replacement, Battery: crwdns2935265:01crwdnd2935265:02crwdnd2935265:03crwdne2935265:0 HMDX Jam Plus Speaker Replacement, Battery: crwdns2935265:01crwdnd2935265:03crwdnd2935265:03crwdne2935265:0
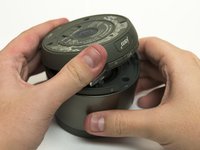
    • Flip the device over so the bottom is facing up.

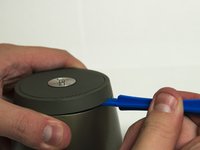
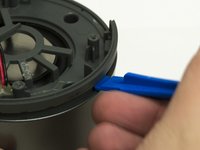
    • Use the large plastic opening tool to gently pry the rubber base from the device.

    • Slowly move the plastic opening tool around the edge of the rubber base to separate it from the plastic.

  2. HMDX Jam Plus Speaker Replacement: crwdns2935265:02crwdnd2935265:01crwdnd2935265:02crwdne2935265:0 HMDX Jam Plus Speaker Replacement: crwdns2935265:02crwdnd2935265:02crwdnd2935265:02crwdne2935265:0
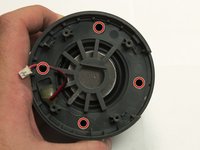
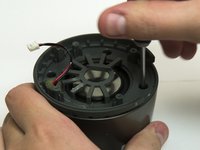
    • Use a Phillips #1 screwdriver to remove the four black 9mm screws from the device.

  3. HMDX Jam Plus Speaker Replacement: crwdns2935265:03crwdnd2935265:01crwdnd2935265:02crwdne2935265:0 HMDX Jam Plus Speaker Replacement: crwdns2935265:03crwdnd2935265:02crwdnd2935265:02crwdne2935265:0
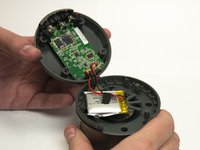
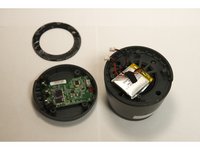
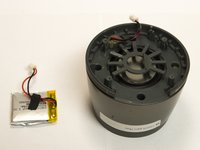
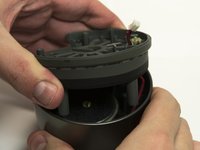
    • Gently separate the base from the rest of the device to reveal the battery and the main board.

  4. HMDX Jam Plus Speaker Replacement: crwdns2935265:04crwdnd2935265:01crwdnd2935265:03crwdne2935265:0 HMDX Jam Plus Speaker Replacement: crwdns2935265:04crwdnd2935265:02crwdnd2935265:03crwdne2935265:0 HMDX Jam Plus Speaker Replacement: crwdns2935265:04crwdnd2935265:03crwdnd2935265:03crwdne2935265:0
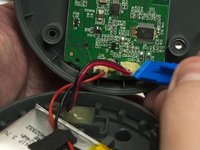
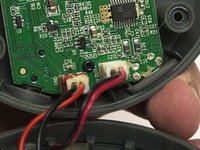
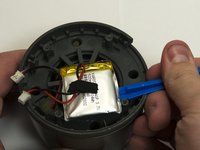
    • Carefully use the plastic opening tool to remove the glue around the battery and speaker connectors.

    • Pull gently on the connectors to separate each one from the main board.

    • The battery is connected to board in the red socket and the speaker is connected in the white socket.

  5. HMDX Jam Plus Speaker Replacement: crwdns2935265:05crwdnd2935265:01crwdnd2935265:03crwdne2935265:0 HMDX Jam Plus Speaker Replacement: crwdns2935265:05crwdnd2935265:02crwdnd2935265:03crwdne2935265:0 HMDX Jam Plus Speaker Replacement: crwdns2935265:05crwdnd2935265:03crwdnd2935265:03crwdne2935265:0
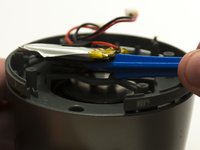
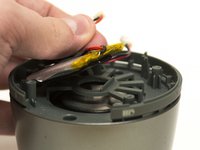
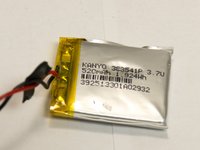
    • Batteries can be very dangerous if punctured. Use extra caution when using tools around the battery.

    • Use the plastic opening tool to gently pry the battery free from the rest of the device.

  6. HMDX Jam Plus Speaker Replacement: crwdns2935265:06crwdnd2935265:01crwdnd2935265:02crwdne2935265:0 HMDX Jam Plus Speaker Replacement: crwdns2935265:06crwdnd2935265:02crwdnd2935265:02crwdne2935265:0
    • Use new adhesive to secure battery back to the rest of the device.

  7. HMDX Jam Plus Speaker Replacement, Speaker: crwdns2935265:07crwdnd2935265:01crwdnd2935265:02crwdne2935265:0 HMDX Jam Plus Speaker Replacement, Speaker: crwdns2935265:07crwdnd2935265:02crwdnd2935265:02crwdne2935265:0
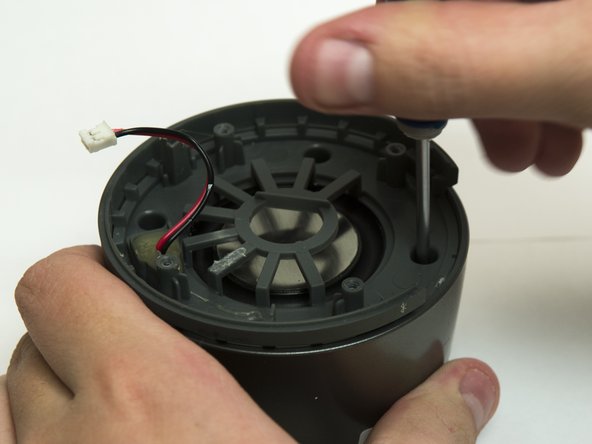
    • Use a Phillips #1 screwdriver to remove the four black 9mm screws from device.

  8. HMDX Jam Plus Speaker Replacement: crwdns2935265:08crwdnd2935265:01crwdnd2935265:01crwdne2935265:0
    • Use the plastic opening tool to pry the glue away from the wire. Be careful not to damage the wire.

  9. HMDX Jam Plus Speaker Replacement: crwdns2935265:09crwdnd2935265:01crwdnd2935265:02crwdne2935265:0 HMDX Jam Plus Speaker Replacement: crwdns2935265:09crwdnd2935265:02crwdnd2935265:02crwdne2935265:0
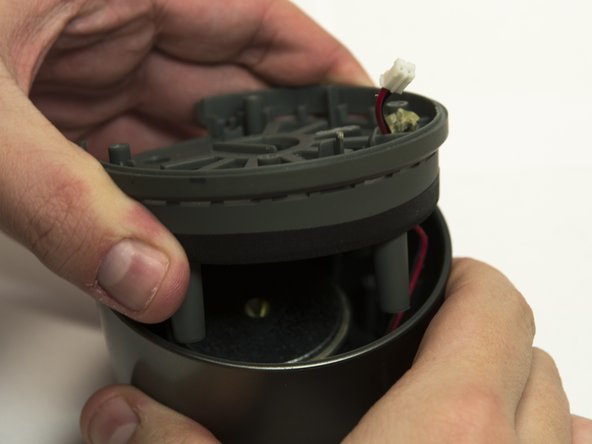
    • Use the plastic opening tool to separate the center plastic piece from the rest of the device.

    • Gently lift the center plastic piece and feed the speaker wire through the hole.

  10. HMDX Jam Plus Speaker Replacement: crwdns2935265:010crwdnd2935265:01crwdnd2935265:02crwdne2935265:0 HMDX Jam Plus Speaker Replacement: crwdns2935265:010crwdnd2935265:02crwdnd2935265:02crwdne2935265:0
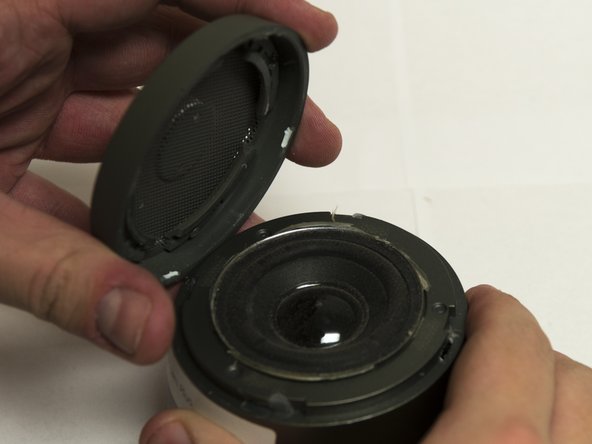
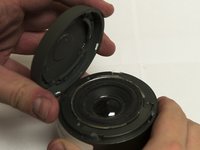
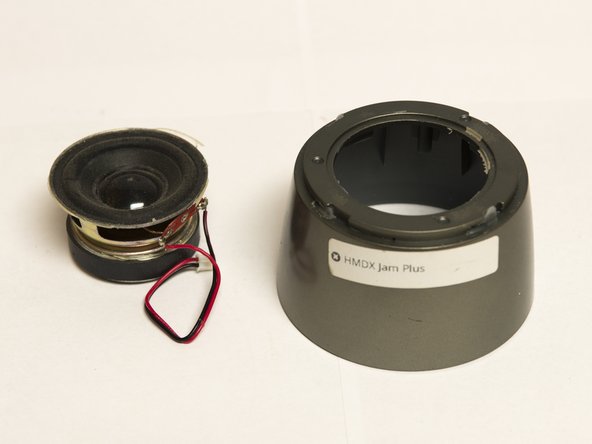
    • Use the plastic opening tool to separate the speaker grate from the rest of the device.

  11. HMDX Jam Plus Speaker Replacement: crwdns2935265:011crwdnd2935265:01crwdnd2935265:02crwdne2935265:0 HMDX Jam Plus Speaker Replacement: crwdns2935265:011crwdnd2935265:02crwdnd2935265:02crwdne2935265:0
    • Carefully remove the speaker through the top of the device.

    • Apply new adhesive to the edge of the replacement speaker and the edge of the speaker grate to ensure they do not wiggle loose.

crwdns2915888:0crwdne2915888:0

To reassemble your device, follow these instructions in reverse order.

crwdns2935227:0crwdne2935227:0

Maxwell Erickson

crwdns2935283:010/22/15crwdne2935283:0

587 crwdns2915208:0crwdne2915208:0

crwdns2935297:04crwdne2935297:0
crwdns2915084:0crwdne2915084:0
Montana Tech, Team 10-3, Shirk Fall 2015 crwdns2935289:0Montana Tech, Team 10-3, Shirk Fall 2015crwdne2935289:0
MTUM-SHIRK-F15S10G3

crwdns2931471:04crwdne2931471:0

crwdns2935297:04crwdne2935297:0

crwdns2944067:00crwdne2944067:0

crwdns2917038:0crwdne2917038:0

crwdns2936625:0crwdne2936625:0:

crwdns2936751:024crwdne2936751:0 1

crwdns2936753:07crwdne2936753:0 1

crwdns2936753:030crwdne2936753:0 9

crwdns2942667:0crwdne2942667:0 1,375