-
-
Remove the battery pack
-
Remove the two rubber pads on the display side
-
Remove 11 Philips screws framed in red
-
Remove DVD Drive
-
Remove the screw (maybe 2 screws) framed in green
-
-
-
Insert a thin tool or a flat screwdriver in the little slits on the upper side of the keyboard lift up, to unhook the locking clips.
-
Lift up the keyboard, being careful about the flat cable.
-
Lift up the connector and disconnect the flat removing the battery.
-
-
-
-
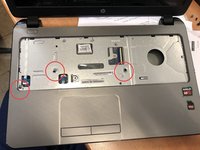
Remove the 3 screws marked in red
-
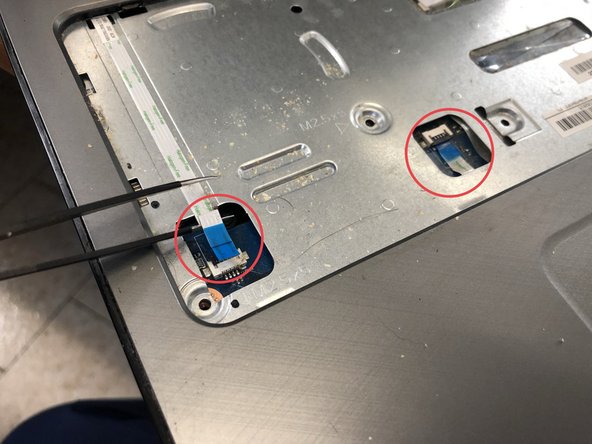
Unhook the 2 connector and unplug the flat cables
-
-
crwdns2935267:0crwdne2935267:0Jimmy$7.95
-
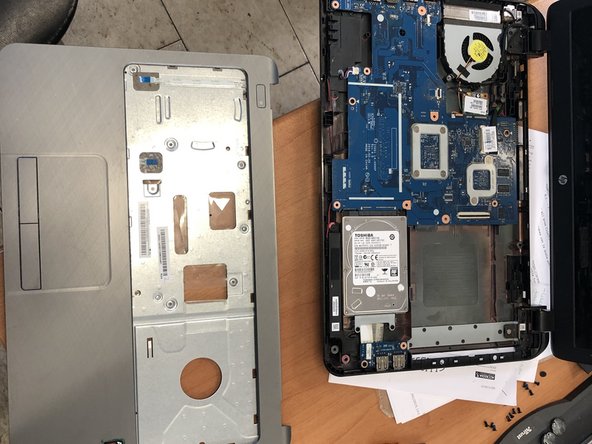
With a thin instrument, release the clips around the perimeter retaining the top cover, leaving the rear shell containing the motherboard etc. (The iFixit Jimmy is ideal for this.)
-
Remove the top cover, giving access to the hard disk.
-


To reassemble your device, follow these instructions in reverse order.
crwdns2935221:0crwdne2935221:0
crwdns2935227:0crwdne2935227:0
crwdns2934873:0crwdne2934873:0
100%


crwdns2934885:0crwdne2934885:0 crwdns2934875:0crwdne2934875:0
crwdns2934877:0crwdne2934877:0 ›
