crwdns2933423:0crwdne2933423:0

Graco Paint Sprayers 17C325 2015 Gun Rebuild

crwdns2942213:0crwdne2942213:0

  1. Graco Paint Sprayers 17C325 2015 Gun Rebuild, Remove the Spray Tip: crwdns2935265:01crwdnd2935265:01crwdnd2935265:02crwdne2935265:0 Graco Paint Sprayers 17C325 2015 Gun Rebuild, Remove the Spray Tip: crwdns2935265:01crwdnd2935265:02crwdnd2935265:02crwdne2935265:0
    • Before you begin, make sure to follow the pressure relief procedure documented in the user manual before disconnecting and disassembling the spray gun.

    • Pull the spray tip straight up and out of its housing near the front of the spray gun.

  2. Graco Paint Sprayers 17C325 2015 Gun Rebuild, Remove the Nozzle Guard: crwdns2935265:02crwdnd2935265:01crwdnd2935265:03crwdne2935265:0 Graco Paint Sprayers 17C325 2015 Gun Rebuild, Remove the Nozzle Guard: crwdns2935265:02crwdnd2935265:02crwdnd2935265:03crwdne2935265:0 Graco Paint Sprayers 17C325 2015 Gun Rebuild, Remove the Nozzle Guard: crwdns2935265:02crwdnd2935265:03crwdnd2935265:03crwdne2935265:0
    • Use your fingers to unscrew and remove the nozzle guard.

    • You may need to use an adjustable wrench to loosen the nut.

  3. Graco Paint Sprayers 17C325 2015 Gun Rebuild, Remove the End Cap Lock Nut: crwdns2935265:03crwdnd2935265:01crwdnd2935265:01crwdne2935265:0
    • Use a 5/16" socket and socket wrench to remove the lock nut securing the end cap on the back of the spray gun.

    • Replace the lock nut with the new lock nut included in the gun repair kit.

  4. Graco Paint Sprayers 17C325 2015 Gun Rebuild, Remove the End Cap: crwdns2935265:04crwdnd2935265:01crwdnd2935265:03crwdne2935265:0 Graco Paint Sprayers 17C325 2015 Gun Rebuild, Remove the End Cap: crwdns2935265:04crwdnd2935265:02crwdnd2935265:03crwdne2935265:0 Graco Paint Sprayers 17C325 2015 Gun Rebuild, Remove the End Cap: crwdns2935265:04crwdnd2935265:03crwdnd2935265:03crwdne2935265:0
    • Pull the end cap straight off the end of the spray gun.

    • Reassembly Tip: Make sure the holes on the end cap line up with the actuator pins and needle.

  5. Graco Paint Sprayers 17C325 2015 Gun Rebuild, Remove the Actuator Pins: crwdns2935265:05crwdnd2935265:01crwdnd2935265:03crwdne2935265:0 Graco Paint Sprayers 17C325 2015 Gun Rebuild, Remove the Actuator Pins: crwdns2935265:05crwdnd2935265:02crwdnd2935265:03crwdne2935265:0 Graco Paint Sprayers 17C325 2015 Gun Rebuild, Remove the Actuator Pins: crwdns2935265:05crwdnd2935265:03crwdnd2935265:03crwdne2935265:0
    • Pull the two actuator pins straight out of the spray gun.

  6. Graco Paint Sprayers 17C325 2015 Gun Rebuild, Loosen the Trigger Guard: crwdns2935265:06crwdnd2935265:01crwdnd2935265:03crwdne2935265:0 Graco Paint Sprayers 17C325 2015 Gun Rebuild, Loosen the Trigger Guard: crwdns2935265:06crwdnd2935265:02crwdnd2935265:03crwdne2935265:0 Graco Paint Sprayers 17C325 2015 Gun Rebuild, Loosen the Trigger Guard: crwdns2935265:06crwdnd2935265:03crwdnd2935265:03crwdne2935265:0
    • Push up on the trigger guard to unseat it from its clip at the bottom of the handle.

  7. Graco Paint Sprayers 17C325 2015 Gun Rebuild, Remove the Valve Seat and Trigger Guard: crwdns2935265:07crwdnd2935265:01crwdnd2935265:02crwdne2935265:0 Graco Paint Sprayers 17C325 2015 Gun Rebuild, Remove the Valve Seat and Trigger Guard: crwdns2935265:07crwdnd2935265:02crwdnd2935265:02crwdne2935265:0
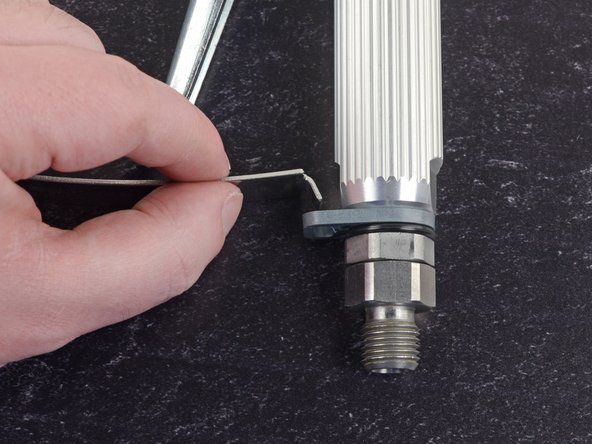
    • Use a 5/8" wrench to remove the valve seat from the front of the spray gun.

    • This will also allow you to completely remove the trigger guard.

    • Replace the valve seat with the new valve seat included in the gun repair kit. Torque the valve seat to 26-32 ft. lb during reinstallation.

  8. Graco Paint Sprayers 17C325 2015 Gun Rebuild, Remove the Gun Needle: crwdns2935265:08crwdnd2935265:01crwdnd2935265:02crwdne2935265:0 Graco Paint Sprayers 17C325 2015 Gun Rebuild, Remove the Gun Needle: crwdns2935265:08crwdnd2935265:02crwdnd2935265:02crwdne2935265:0
    • Grab the front tip of the gun needle and pull it straight out of the housing.

    • Replace the needle with the new needle included in the gun repair kit.

crwdns2915888:0crwdne2915888:0

To reassemble your device, follow these instructions in reverse order.

crwdns2935229:011crwdne2935229:0

Craig Lloyd

crwdns2935283:002/10/16crwdne2935283:0

35,423 crwdns2915208:0crwdne2915208:0

crwdns2935297:082crwdne2935297:0

crwdns2944067:06crwdne2944067:0

if you use this procedure you brake your gun

YURIY - crwdns2934203:0crwdne2934203:0

Hi YURIY,

To help us improve the guide, can you please elaborate what would break? Any specific steps? Any extra detail would help. Thanks!

Arthur Shi -

I can't break the tip loose. The piece that u screw the tip on to. I can't break it loose.

William Pinkston - crwdns2934203:0crwdne2934203:0

Amazing post. keep sharing

Laura M - crwdns2934203:0crwdne2934203:0

From factory, or after use, they are screwed in incredibaly tight. I coulnd't get the valve seat to budge. I'd avoid using an adjustable wrench since those sometimes come loose and strip the nut. The gun repair kit is about $70-$100. HD sells the entire gun for $150, which includes a 515 tip, orange spray tip guard, and new filter inside. Probably better to buy. Great guide though. If the needle can be cleaned to stop the post-release leak, then its probably OK to keep it. Else new gun may be a better option.

Y Woo - crwdns2934203:0crwdne2934203:0

crwdns2917038:0crwdne2917038:0

crwdns2936625:0crwdne2936625:0:

crwdns2936751:024crwdne2936751:0 6

crwdns2936753:07crwdne2936753:0 30

crwdns2936753:030crwdne2936753:0 160

crwdns2942667:0crwdne2942667:0 9,658