crwdns2915892:0crwdne2915892:0
This repair guide was authored by a member of the iFixit community and hasn’t been endorsed by Google. Learn more about our repair guides here.
If the device does not recognize fingers correctly, replacing the fingerprint scanner may solve this issue. Use this guide to replace a broken Pixel fingerprint scanner.
crwdns2942213:0crwdne2942213:0
-
-
Turn off the device.
-
Prepare an iOpener to heat the edges of the display and soften the adhesive underneath. Alternatively, you may use a heat gun or a hair dryer.
 crwdns2952109:0crwdne2952109:0
-
-
-
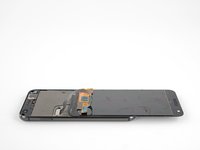
For reference, the back of the display panel is shown at left. Note the narrow clearance between the side of the display unit and the OLED panel. (The bezels indicate this spacing on the front.)
-
-
crwdns2935267:0crwdne2935267:0Suction Handle$2.95
-
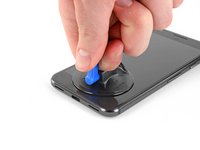
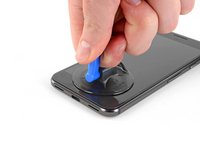
Use a suction handle to pull up on the display and create a slight gap between the display and the phone's chassis.
-
You may need to apply more heat if this doesn't come up. Don't be impatient, this will take time. Once you can gently insert a tool in the gap, move on to the next step.
-
-
-
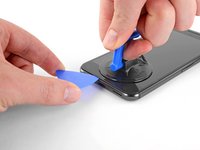
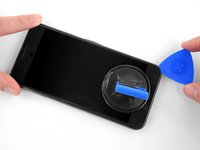
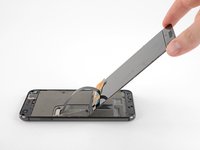
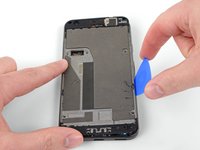
Insert an opening pick or a playing card into the gap between the chassis and the display assembly.
-
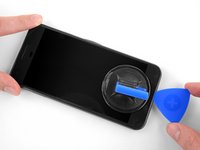
Begin to slide the opening pick around the edge of the display, cutting through the adhesive that secures it.
-
-
-
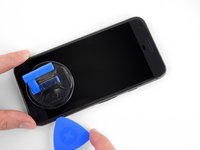
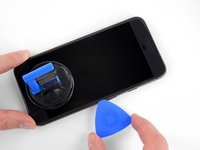
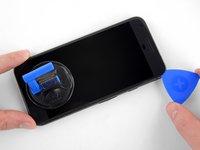
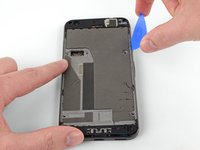
Continue carefully separating the adhesive around the rest of the device.
-
-
crwdns2935267:0crwdne2935267:0iFixit Opening Picks (Set of 6)$4.95
-
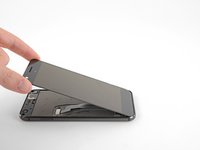
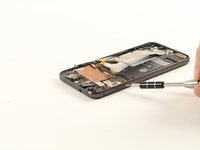
With the adhesive cut, slowly lift the display up from the top (the side with the speaker-grille cutout), carefully flip it over vertically toward the bottom of the device, and rest it on its face, as shown.
-
-
crwdns2935267:0crwdne2935267:0Magnetic Project Mat$19.95
-
Use a T5 Torx driver to remove the two black 3.5 mm T5 screws securing the display cable connector bracket.
-
-
crwdns2935267:0crwdne2935267:0Tweezers$4.99
-
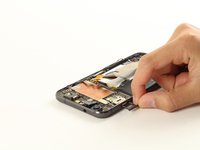
Use tweezers to remove the bracket that holds the display connector in place.
-
This is just a piece of metal, and should come up very easily. (The cable is removed in the next step.)
-
-
-
Use a spudger to pry up the display cable connector, freeing the display.
-
-
-
-
Use a T5 Torx driver to remove the nine 3.5 mm screws securing the midframe.
-
-
-
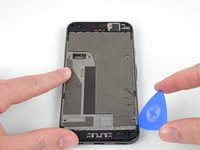
The midframe is held tightly in place by five clips. To release these clips, apply inward pressure with an opening tool as shown in the steps below.
-
-
-
Wedge an opening pick into the notch that is located at the bottom right corner of the phone.
-
-
-
Slide the opening pick up both sides of the device in the small space between the midframe and the rear case to release the clips holding it in place.
-
-
-
Use a spudger to pry the earpiece speaker cable connector straight up, disconnecting it from the motherboard.
-
Remove the mid-frame from the device.
-
-
-
Use a SIM ejection tool to remove the SIM card tray located at the top left of the device.
-
-
-
Using a spudger, disconnect the battery ribbon cable from the motherboard.
-
-
crwdns2935267:0crwdne2935267:0Tweezers$4.99
-
Use tweezers to lift up the adhesive strip at the top of the battery, and peel it back to expose the connector underneath.
-
-
-
Use a spudger to disconnect the charging port ribbon cable from the motherboard.
-
-
-
Use a spudger to disconnect the thin, black ribbon cable connecting the power and volume buttons to the motherboard.
-
-
-
Use a spudger to pry up the black and white coaxial cables attached to the upper right and left-hand sides of the motherboard.
-
-
-
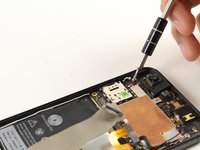
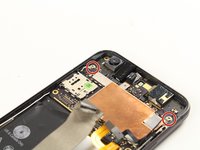
Remove the two silver 2.5 mm T5 screws holding the motherboard in place.
-
-
-
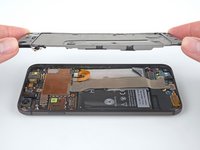
Use tweezers to carefully lift the top (the camera side) of the motherboard out of the device.
-
-
-
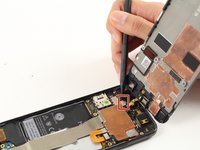
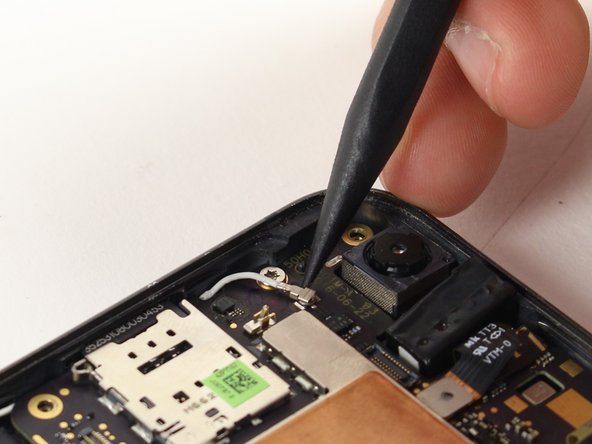
While holding the motherboard up with tweezers, use a spudger to disconnect the fingerprint sensor cable from the motherboard.
-
Remove the motherboard completely from the device.
-
-
-
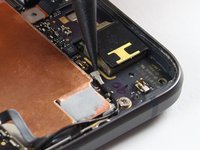
Pull the fingerprint scanner out of its housing.
-


To reassemble your device, follow these instructions in reverse order.
crwdns2935221:0crwdne2935221:0
crwdns2935229:05crwdne2935229:0
crwdns2935287:0crwdne2935287:0

Cal Poly, Team S23-G1, Livingston Spring 2017 crwdns2935289:0Cal Poly, Team S23-G1, Livingston Spring 2017crwdne2935289:0
CPSU-LIVINGSTON-S17S23G1
crwdns2931471:04crwdne2931471:0
crwdns2935297:019crwdne2935297:0
crwdns2947410:01crwdne2947410:0
Do I need fresh adhesivd when reattaching the screen? Can I just heat up the old adhesive in-place and re-use it? Incomplete guide.
Andrew Bowman - crwdns2934203:0crwdne2934203:0 crwdns2950251:0crwdne2950251:0