crwdns2915892:0crwdne2915892:0
This guide will outline how to fix the keyboard in the event that it is nonresponsive.
crwdns2942213:0crwdne2942213:0
-
-
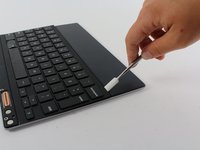
Heat the black plastic strip on the front lower edge of the keyboard with an iOpener to weaken the adhesive holding it down.
 crwdns2952109:0crwdne2952109:0
-
-
-
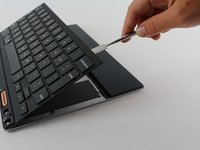
Use a medium plastic opening tool to lift the black plastic strip from the lower edge of the keyboard.
-
-
-
-
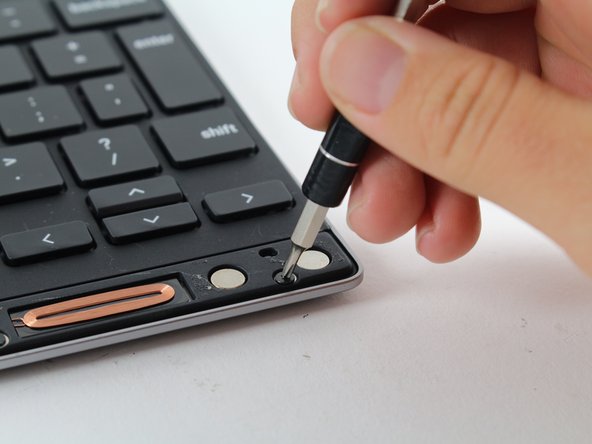
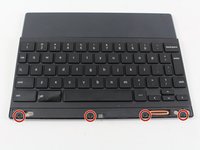
Locate the four 3.1mm Phillips #000 screws that hold the keyboard to the back plate.
-
Using the Phillips #000 Screwdriver, remove the screws from the keyboard.
-
-
-
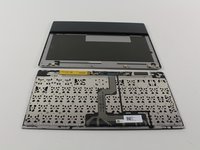
Orient the keyboard so that the side with the keys is facedown on the table.
-
Use either an iFixit iOpener OR a heat gun to melt the adhesive that holds the top half of the keyboard to the bottom.
-
-
-
Using a plastic or nylon spudger, pry the two halves of the keyboard apart.
-
If the plastic spudger doesn’t work, it is okay to use a metal spudger, but take care not to scratch or damage the device.
-


To reassemble your device, follow these instructions in reverse order.
crwdns2935221:0crwdne2935221:0
crwdns2935229:02crwdne2935229:0
crwdns2935287:0crwdne2935287:0

Cal Poly, Team S21-G4, Livingston Spring 2017 crwdns2935289:0Cal Poly, Team S21-G4, Livingston Spring 2017crwdne2935289:0
CPSU-LIVINGSTON-S17S21G4
crwdns2931471:04crwdne2931471:0
crwdns2935297:011crwdne2935297:0
crwdns2947410:01crwdne2947410:0
Uninstall a Pixel c's keyboard case's battery system,The Battery is out of life, but the case cost Pixel c's power while closed. No suitable battery to replace temporarily. Use a Hot Gun with higher temparature but control the temparature not too high then you will easily peal off the skin but no any broken and finally you can adhere it back to normal.Finished and accept. Now I just use the case as a case only and no need consider it cost the power.
bgzhang - crwdns2934203:0crwdne2934203:0 crwdns2950251:0crwdne2950251:0