crwdns2933423:0crwdne2933423:0

Google Pixel 9a Rear Cameras Removal/Installation (Logic Board)

crwdns2862623:0crwdne2862623:0
crwdns2942641:0crwdne2942641:0

crwdns2942213:0crwdne2942213:0

  1. Google Pixel 9a Rear Cameras Removal/Installation (Logic Board), Remove the rear cameras: crwdns2935265:01crwdnd2935265:01crwdnd2935265:03crwdne2935265:0 Google Pixel 9a Rear Cameras Removal/Installation (Logic Board), Remove the rear cameras: crwdns2935265:01crwdnd2935265:02crwdnd2935265:03crwdne2935265:0 Google Pixel 9a Rear Cameras Removal/Installation (Logic Board), Remove the rear cameras: crwdns2935265:01crwdnd2935265:03crwdnd2935265:03crwdne2935265:0
    • Be careful not to smudge the camera lenses when removing and installing them. If you accidentally do, wipe them with a clean cloth.

    • Hold the logic board slightly above your work surface while working on the cameras—don't press the board against your work surface, or you may damage fragile components.

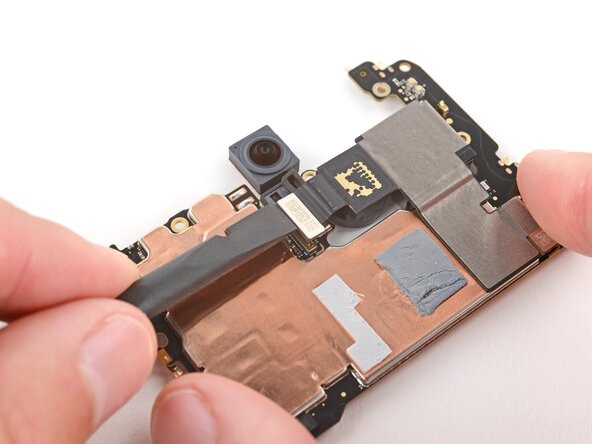
    • Use the flat end of a spudger to pry up and disconnect the ultrawide camera press connector.

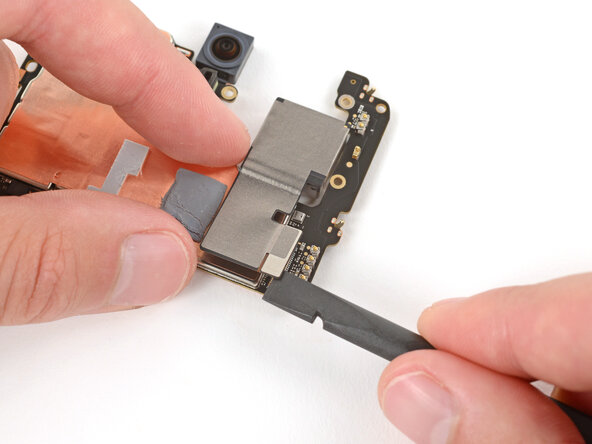
    • Remove the ultrawide camera.

  2. Google Pixel 9a Rear Cameras Removal/Installation (Logic Board): crwdns2935265:02crwdnd2935265:01crwdnd2935265:03crwdne2935265:0 Google Pixel 9a Rear Cameras Removal/Installation (Logic Board): crwdns2935265:02crwdnd2935265:02crwdnd2935265:03crwdne2935265:0 Google Pixel 9a Rear Cameras Removal/Installation (Logic Board): crwdns2935265:02crwdnd2935265:03crwdnd2935265:03crwdne2935265:0
    • Repeat the previous step to disconnect and remove the wide camera.

  3. Google Pixel 9a Rear Cameras Removal/Installation (Logic Board), The logic board remains: crwdns2935265:03crwdnd2935265:01crwdnd2935265:01crwdne2935265:0
    • Congratulations on completing disassembly! The remaining steps will show how to reassemble your phone.

    • You'll need to transfer the cameras to your replacement logic board.

    • Compare your replacement logic board to the original—you may need to transfer remaining components (such as the black and white coaxial cables) or remove adhesive backings from the new part before you install it.

  4. Google Pixel 9a Rear Cameras Removal/Installation (Logic Board), Install the rear cameras: crwdns2935265:04crwdnd2935265:01crwdnd2935265:03crwdne2935265:0 Google Pixel 9a Rear Cameras Removal/Installation (Logic Board), Install the rear cameras: crwdns2935265:04crwdnd2935265:02crwdnd2935265:03crwdne2935265:0 Google Pixel 9a Rear Cameras Removal/Installation (Logic Board), Install the rear cameras: crwdns2935265:04crwdnd2935265:03crwdnd2935265:03crwdne2935265:0
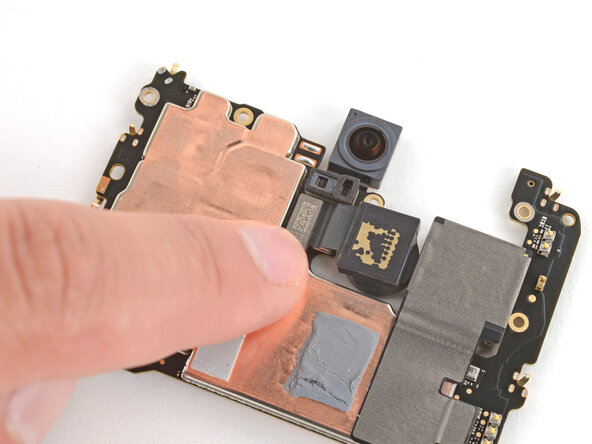
    • Put the wide camera into place on the logic board, being careful not to smudge the lens.

    • Align the press connector over its socket and press down with your fingertip—first on one side, then the other—until it clicks into place.

  5. Google Pixel 9a Rear Cameras Removal/Installation (Logic Board): crwdns2935265:05crwdnd2935265:01crwdnd2935265:03crwdne2935265:0 Google Pixel 9a Rear Cameras Removal/Installation (Logic Board): crwdns2935265:05crwdnd2935265:02crwdnd2935265:03crwdne2935265:0 Google Pixel 9a Rear Cameras Removal/Installation (Logic Board): crwdns2935265:05crwdnd2935265:03crwdnd2935265:03crwdne2935265:0
    • Repeat the previous step to install the ultrawide camera.

crwdns2935217:0crwdne2935217:0

Spencer Day

crwdns2935283:009/14/22crwdne2935283:0

112,112 crwdns2915208:0crwdne2915208:0

crwdns2935297:0811crwdne2935297:0

crwdns2915084:0crwdne2915084:0

iFixit crwdns2935289:0iFixitcrwdne2935289:0

Staff

crwdns2931471:0120crwdne2931471:0

crwdns2935297:020,057crwdne2935297:0

crwdns2947412:00crwdne2947412:0

crwdns2917038:0crwdne2917038:0

crwdns2936625:0crwdne2936625:0:

crwdns2936751:024crwdne2936751:0 0

crwdns2936753:07crwdne2936753:0 8

crwdns2936753:030crwdne2936753:0 9

crwdns2942667:0crwdne2942667:0 11