crwdns2933423:0crwdne2933423:0

Google Pixel 9a Battery Installation

crwdns2862623:0crwdne2862623:0
crwdns2942641:0crwdne2942641:0
  1. Google Pixel 9a Battery Installation, Remove the old battery adhesive: crwdns2935265:01crwdnd2935265:01crwdnd2935265:03crwdne2935265:0 Google Pixel 9a Battery Installation, Remove the old battery adhesive: crwdns2935265:01crwdnd2935265:02crwdnd2935265:03crwdne2935265:0 Google Pixel 9a Battery Installation, Remove the old battery adhesive: crwdns2935265:01crwdnd2935265:03crwdnd2935265:03crwdne2935265:0
    • Use a spudger and tweezers to remove all the old battery adhesive from the frame.

    • The adhesive can be tricky to remove. Use your spudger to roll the adhesive into bigger clumps that you can peel up slowly with tweezers.

  2. Google Pixel 9a Battery Installation, Clean the frame: crwdns2935265:02crwdnd2935265:01crwdnd2935265:01crwdne2935265:0
    • Use high‑concentration (>90%) isopropyl alcohol and a lint‑free cloth (or coffee filters) to clean up and remove all the old adhesive residue from the frame.

    • Apply isopropyl alcohol sparingly—too much can damage the display.

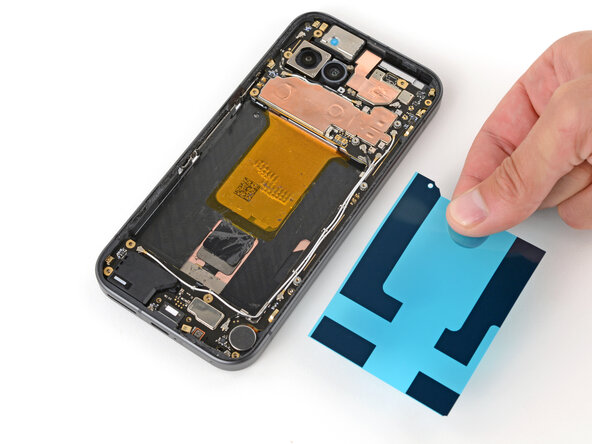
  3. Google Pixel 9a Battery Installation, Apply the battery adhesive: crwdns2935265:03crwdnd2935265:01crwdnd2935265:03crwdne2935265:0 Google Pixel 9a Battery Installation, Apply the battery adhesive: crwdns2935265:03crwdnd2935265:02crwdnd2935265:03crwdne2935265:0 Google Pixel 9a Battery Installation, Apply the battery adhesive: crwdns2935265:03crwdnd2935265:03crwdnd2935265:03crwdne2935265:0
    • Remove the larger, clear liner from your replacement battery adhesive.

    • Lay the adhesive into the battery recess so the strips align with their contours on the frame.

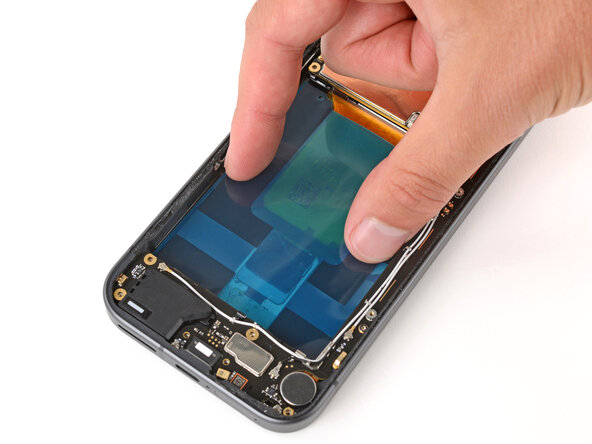
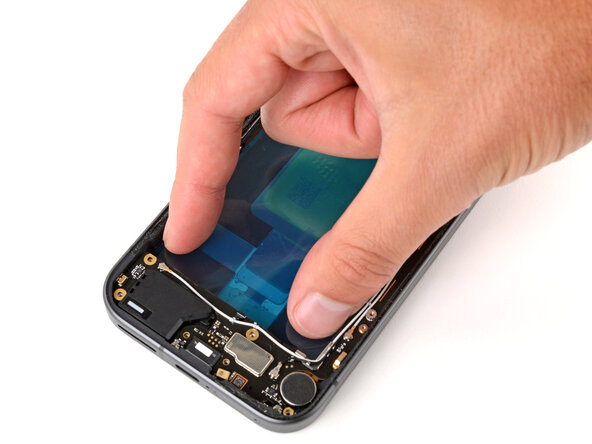
  4. Google Pixel 9a Battery Installation: crwdns2935265:04crwdnd2935265:01crwdnd2935265:03crwdne2935265:0 Google Pixel 9a Battery Installation: crwdns2935265:04crwdnd2935265:02crwdnd2935265:03crwdne2935265:0 Google Pixel 9a Battery Installation: crwdns2935265:04crwdnd2935265:03crwdnd2935265:03crwdne2935265:0
    • Use your fingers or a spudger to firmly press the adhesive into place, securing it to the frame.

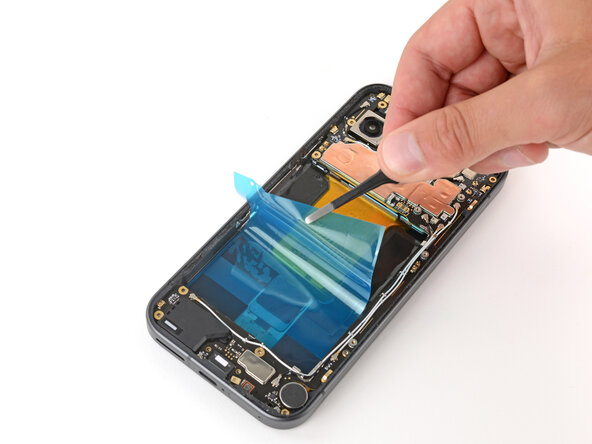
  5. Google Pixel 9a Battery Installation, Remove the plastic liner: crwdns2935265:05crwdnd2935265:01crwdnd2935265:03crwdne2935265:0 Google Pixel 9a Battery Installation, Remove the plastic liner: crwdns2935265:05crwdnd2935265:02crwdnd2935265:03crwdne2935265:0 Google Pixel 9a Battery Installation, Remove the plastic liner: crwdns2935265:05crwdnd2935265:03crwdnd2935265:03crwdne2935265:0
    • Peel up and remove the remaining liner.

  6. Google Pixel 9a Battery Installation, Move the side button cable: crwdns2935265:06crwdnd2935265:01crwdnd2935265:01crwdne2935265:0
    • The side button cable is delicate—be careful not to damage it.

    • Gently flip the side button cable over the frame so it doesn't get stuck between the side of the battery and the frame in the next step.

  7. Google Pixel 9a Battery Installation, Install the battery: crwdns2935265:07crwdnd2935265:01crwdnd2935265:03crwdne2935265:0 Google Pixel 9a Battery Installation, Install the battery: crwdns2935265:07crwdnd2935265:02crwdnd2935265:03crwdne2935265:0 Google Pixel 9a Battery Installation, Install the battery: crwdns2935265:07crwdnd2935265:03crwdnd2935265:03crwdne2935265:0
    • Hold the battery above its recess and use your finger to push down and reconnect the battery press connector.

    • Temporarily reconnecting the battery ensures that it's sitting properly in its recess.

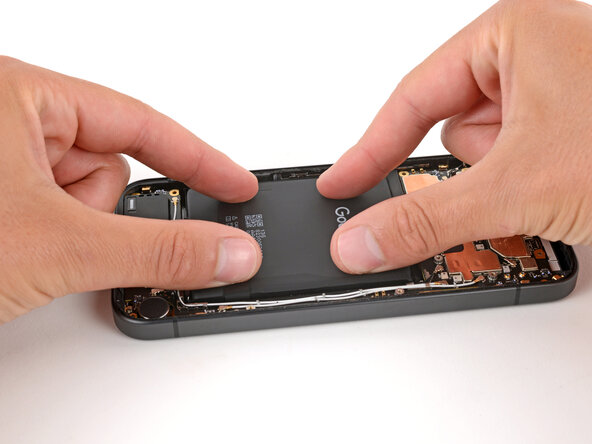
    • Lay the battery into its recess and press down firmly to secure it to the adhesive.

    • Once the battery's in place, disconnect it while you continue reassembly.

  8. Google Pixel 9a Battery Installation, Secure the side button cable: crwdns2935265:08crwdnd2935265:01crwdnd2935265:03crwdne2935265:0 Google Pixel 9a Battery Installation, Secure the side button cable: crwdns2935265:08crwdnd2935265:02crwdnd2935265:03crwdne2935265:0 Google Pixel 9a Battery Installation, Secure the side button cable: crwdns2935265:08crwdnd2935265:03crwdnd2935265:03crwdne2935265:0
    • Use your finger to flip the side button cable onto the battery and gently press down to secure it with its tape.

crwdns2935217:0crwdne2935217:0

Spencer Day

crwdns2935283:009/14/22crwdne2935283:0

112.112 crwdns2915208:0crwdne2915208:0

crwdns2935297:0811crwdne2935297:0

crwdns2915084:0crwdne2915084:0

iFixit crwdns2935289:0iFixitcrwdne2935289:0

Staff

crwdns2931471:0120crwdne2931471:0

crwdns2935297:020.056crwdne2935297:0

crwdns2947412:00crwdne2947412:0

crwdns2917038:0crwdne2917038:0

crwdns2936625:0crwdne2936625:0:

crwdns2936751:024crwdne2936751:0 0

crwdns2936753:07crwdne2936753:0 13

crwdns2936753:030crwdne2936753:0 17

crwdns2942667:0crwdne2942667:0 20