crwdns2933423:0crwdne2933423:0

Google Pixel 5a Screen Adhesive Installation

crwdns2942213:0crwdne2942213:0

  1. Google Pixel 5a Screen Adhesive Installation, Remove adhesive residue from the frame: crwdns2935265:01crwdnd2935265:01crwdnd2935265:03crwdne2935265:0 Google Pixel 5a Screen Adhesive Installation, Remove adhesive residue from the frame: crwdns2935265:01crwdnd2935265:02crwdnd2935265:03crwdne2935265:0 Google Pixel 5a Screen Adhesive Installation, Remove adhesive residue from the frame: crwdns2935265:01crwdnd2935265:03crwdnd2935265:03crwdne2935265:0
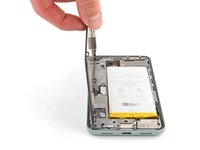
    • Peel off as much adhesive as you can with a pair of tweezers.

    • Use a spudger to scrape away any lingering adhesive.

    • Don't use metal tools to scrape away adhesive as this will damage the frame.

    • For best results, clean the area underneath the removed adhesive with 90% or greater isopropyl alcohol to prep the surface for the new adhesive.

  2. Google Pixel 5a Screen Adhesive Installation, Remove adhesive residue from the screen: crwdns2935265:02crwdnd2935265:01crwdnd2935265:03crwdne2935265:0 Google Pixel 5a Screen Adhesive Installation, Remove adhesive residue from the screen: crwdns2935265:02crwdnd2935265:02crwdnd2935265:03crwdne2935265:0 Google Pixel 5a Screen Adhesive Installation, Remove adhesive residue from the screen: crwdns2935265:02crwdnd2935265:03crwdnd2935265:03crwdne2935265:0
    • Repeat the previous step for the screen adhesive.

    • Don't use metal tools to scrape away adhesive as this will damage the screen.

    • Don't use isopropyl alcohol near the front camera bracket as it will loosen its adhesive.

  3. Google Pixel 5a Screen Adhesive Installation, Align the adhesive: crwdns2935265:03crwdnd2935265:01crwdnd2935265:01crwdne2935265:0
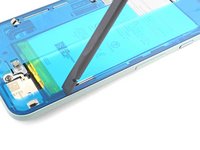
    • Use the front camera and corners of the frame to correctly align the adhesive.

  4. Google Pixel 5a Screen Adhesive Installation, Prepare the adhesive: crwdns2935265:04crwdnd2935265:01crwdnd2935265:01crwdne2935265:0
    • Peel away the clear plastic lining to expose the frame side of the adhesive.

  5. Google Pixel 5a Screen Adhesive Installation, Apply the adhesive: crwdns2935265:05crwdnd2935265:01crwdnd2935265:02crwdne2935265:0 Google Pixel 5a Screen Adhesive Installation, Apply the adhesive: crwdns2935265:05crwdnd2935265:02crwdnd2935265:02crwdne2935265:0
    • Be very careful during this step! The adhesive is very sticky and can't be repositioned once it sticks. Misaligned adhesive can lead to an improper seal.

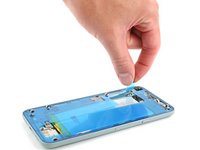
    • Lower the adhesive onto the frame.

    • Use the front camera and corners to help align the adhesive during installation.

  6. Google Pixel 5a Screen Adhesive Installation, Secure the adhesive to the frame: crwdns2935265:06crwdnd2935265:01crwdnd2935265:02crwdne2935265:0 Google Pixel 5a Screen Adhesive Installation, Secure the adhesive to the frame: crwdns2935265:06crwdnd2935265:02crwdnd2935265:02crwdne2935265:0
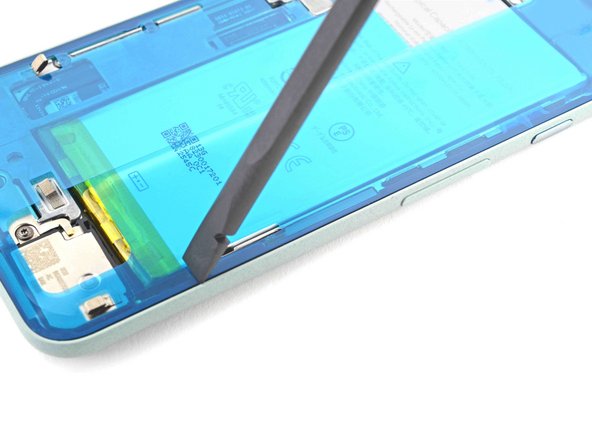
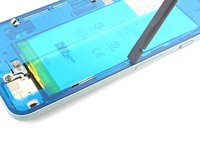
    • Use the flat end of a spudger or your fingernail to press down on the adhesive.

    • Slide along the perimeter to secure the adhesive to the frame.

  7. Google Pixel 5a Screen Adhesive Installation, Peel away the outer plastic lining: crwdns2935265:07crwdnd2935265:01crwdnd2935265:02crwdne2935265:0 Google Pixel 5a Screen Adhesive Installation, Peel away the outer plastic lining: crwdns2935265:07crwdnd2935265:02crwdnd2935265:02crwdne2935265:0
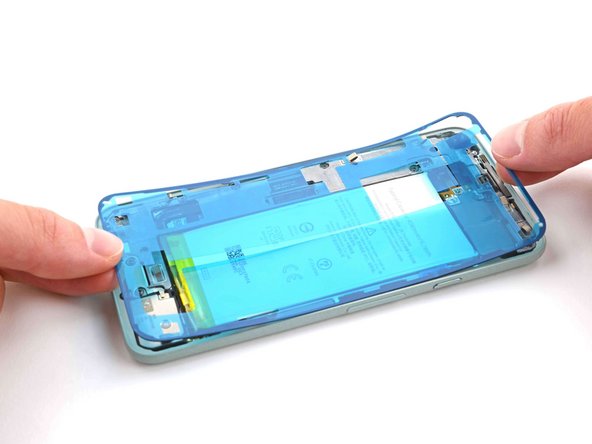
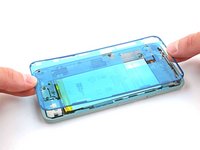
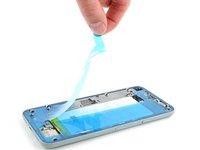
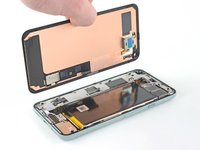
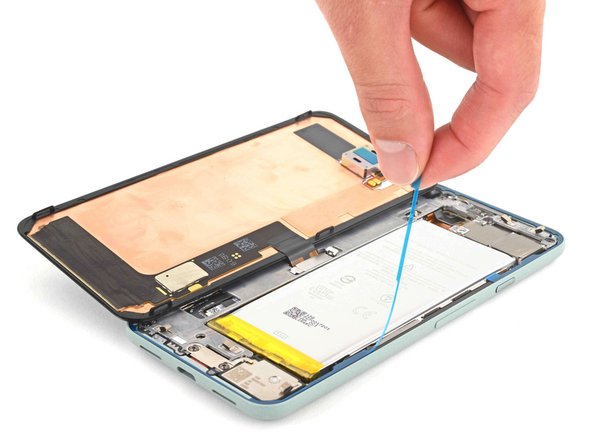
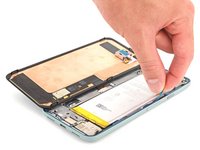
    • Use your fingers to grasp the blue plastic lining near the center and peel it away from the phone.

    • This should leave a thin perimeter of adhesive still covered by blue plastic lining.

  8. Google Pixel 5a Screen Adhesive Installation, Connect the screen: crwdns2935265:08crwdnd2935265:01crwdnd2935265:02crwdne2935265:0 Google Pixel 5a Screen Adhesive Installation, Connect the screen: crwdns2935265:08crwdnd2935265:02crwdnd2935265:02crwdne2935265:0
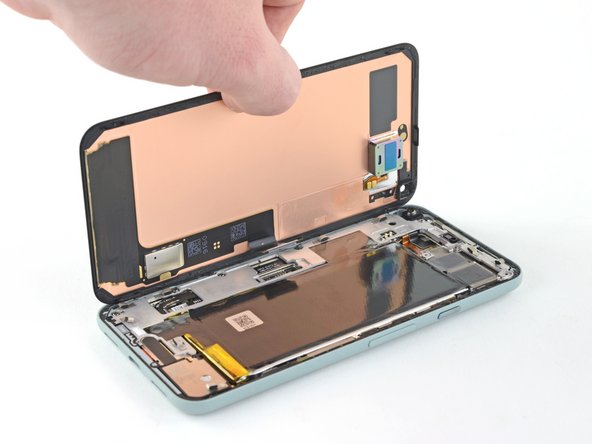
    • Follow the screen replacement guide in reverse order and connect the screen to your pixel.

    • Remember to reinstall the screen connector bracket.

    • If you replaced the screen, check the screen's front-facing camera hole and remove any protective liners covering it.

  9. Google Pixel 5a Screen Adhesive Installation, Peel away the remaining plastic lining: crwdns2935265:09crwdnd2935265:01crwdnd2935265:02crwdne2935265:0 Google Pixel 5a Screen Adhesive Installation, Peel away the remaining plastic lining: crwdns2935265:09crwdnd2935265:02crwdnd2935265:02crwdne2935265:0
    • Peel away the blue plastic lining to expose the perimeter adhesive.

  10. Google Pixel 5a Screen Adhesive Installation, Position the screen: crwdns2935265:010crwdnd2935265:01crwdnd2935265:03crwdne2935265:0 Google Pixel 5a Screen Adhesive Installation, Position the screen: crwdns2935265:010crwdnd2935265:02crwdnd2935265:03crwdne2935265:0 Google Pixel 5a Screen Adhesive Installation, Position the screen: crwdns2935265:010crwdnd2935265:03crwdnd2935265:03crwdne2935265:0
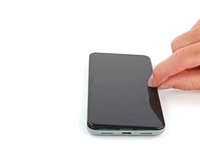
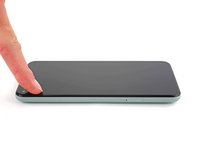
    • Position the screen so it lays on the frame.

  11. Google Pixel 5a Screen Adhesive Installation, Press down the screen corners: crwdns2935265:011crwdnd2935265:01crwdnd2935265:02crwdne2935265:0 Google Pixel 5a Screen Adhesive Installation, Press down the screen corners: crwdns2935265:011crwdnd2935265:02crwdnd2935265:02crwdne2935265:0
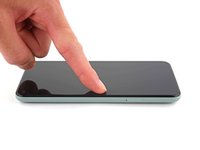
    • Press down the corners of the screen to secure them to the frame.

  12. Google Pixel 5a Screen Adhesive Installation, Secure the screen to the frame: crwdns2935265:012crwdnd2935265:01crwdnd2935265:03crwdne2935265:0 Google Pixel 5a Screen Adhesive Installation, Secure the screen to the frame: crwdns2935265:012crwdnd2935265:02crwdnd2935265:03crwdne2935265:0 Google Pixel 5a Screen Adhesive Installation, Secure the screen to the frame: crwdns2935265:012crwdnd2935265:03crwdnd2935265:03crwdne2935265:0
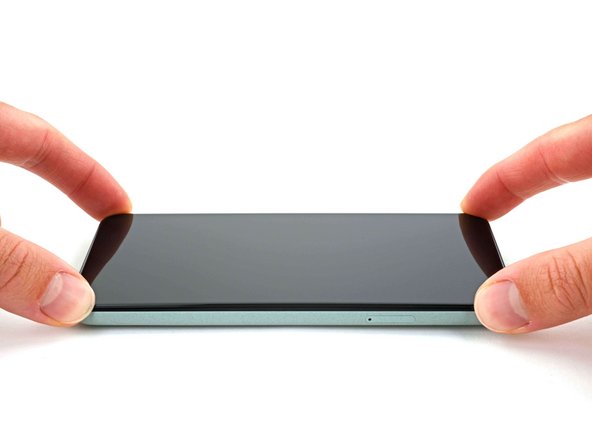
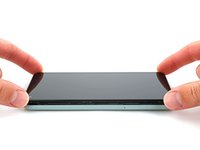
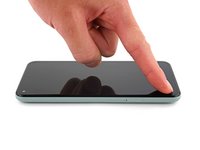
    • Press down on the edges of the screen.

    • Slide along the perimeter to secure it to the frame.

    • You can heat the perimeter of the screen to soften the adhesive and help it bond more securely.

crwdns2915888:0crwdne2915888:0

Repair didn’t go as planned? Try some basic troubleshooting, or ask our Pixel 5a Answers community for help.

crwdns2935229:014crwdne2935229:0

Chayton Ritter

crwdns2935283:008/21/20crwdne2935283:0

18,004 crwdns2915208:0crwdne2915208:0

crwdns2935297:099crwdne2935297:0

crwdns2915084:0crwdne2915084:0

Guide Team crwdns2935289:0Guide Teamcrwdne2935289:0

Staff

crwdns2931471:06crwdne2931471:0

crwdns2935297:07,252crwdne2935297:0

crwdns2944067:03crwdne2944067:0

Pretty easy. Maybe 20 mins job. Nice guide.

Toby Phillippe - crwdns2934203:0crwdne2934203:0

What is the stack of books for?

ccc - crwdns2934203:0crwdne2934203:0

Excellent instructions. I was able to get through this no problem.

Chrystian - crwdns2934203:0crwdne2934203:0

crwdns2917038:0crwdne2917038:0

crwdns2936625:0crwdne2936625:0:

crwdns2936751:024crwdne2936751:0 3

crwdns2936753:07crwdne2936753:0 40

crwdns2936753:030crwdne2936753:0 183

crwdns2942667:0crwdne2942667:0 5,498