crwdns2931315:0crwdnd2931315:0crwdne2931315:0
crwdns2942213:0crwdne2942213:0
-
crwdns2935201:0crwdne2935201:0 crwdns2935203:0crwdne2935203:0
-
Insert a SIM eject tool, bit, or a straightened paper clip into the small hole on the SIM card tray on the left edge of the phone.
-
Press firmly to eject the tray.
-
Remove the SIM card tray.
-
-
crwdns2935201:0crwdne2935201:0 crwdns2935203:0crwdne2935203:0
-
Prepare an iOpener and apply it to the bottom edge of the back panel for one minute.
-
-
crwdns2935201:0crwdne2935201:0 crwdns2935203:0crwdne2935203:0
-
Apply a suction cup to the heated edge of the back panel by pressing down on it to create suction, as close to the edge as possible.
-
-
crwdns2935201:0crwdne2935201:0 crwdns2935203:0crwdne2935203:0
-
Pull up on the suction cup with strong, steady force to create a gap between the back panel and the frame.
-
Insert the point of an opening pick into the gap.
-
-
crwdns2935201:0crwdne2935201:0 crwdns2935203:0crwdne2935203:0
-
Slide the opening pick across the bottom towards the left corner to slice the adhesive.
-
With the pick still inserted, slide it from the bottom left corner over to the bottom right corner to completely slice the bottom side adhesive.
-
Leave the pick inserted in the bottom right corner to prevent the adhesive from re-sealing.
-
-
crwdns2935201:0crwdne2935201:0 crwdns2935203:0crwdne2935203:0
-
Prepare an iOpener and apply it on the left edge of the phone for one minute.
-
-
crwdns2935201:0crwdne2935201:0 crwdns2935203:0crwdne2935203:0
-
Insert a second opening pick underneath the back panel directly over the charge port.
-
Slide the opening pick to the bottom left corner of the phone.
-
-
crwdns2935201:0crwdne2935201:0 crwdns2935203:0crwdne2935203:0
-
Slide the opening pick around the bottom left corner and across the left side of the phone to slice the adhesive.
-
Stop when you reach the top left corner, near the camera, and leave the pick inserted.
-
-
crwdns2935201:0crwdne2935201:0 crwdns2935203:0crwdne2935203:0
-
Prepare an iOpener and apply it on the right edge of the phone for one minute.
-
-
crwdns2935201:0crwdne2935201:0 crwdns2935203:0crwdne2935203:0
-
With the first two opening picks still in place, insert a third pick on the lower part of the righthand side.
-
Slide the opening pick up towards the top of the phone, slicing the right side's adhesive.
-
Stop when you reach the top right corner, and leave the pick inserted.
-
-
-
crwdns2935201:0crwdne2935201:0 crwdns2935203:0crwdne2935203:0
-
Slide the third opening pick around the top right corner and across the top side of the phone, slicing the final strip of adhesive.
-
-
crwdns2935201:0crwdne2935201:0 crwdns2935203:0crwdne2935203:0
-
Once you have sliced around the perimeter of the phone, carefully lift the right edge of the back cover, opening it like a book.
-
Do not try to pull the panel all the way off yet, as it is still connected to the phone.
-
-
crwdns2935201:0crwdne2935201:0 crwdns2935203:0crwdne2935203:0
-
Continue swinging open the back panel until you can rest it on the left edge the phone, being careful not to put any stress on the attached ribbon cable.
-
-
crwdns2935201:0crwdne2935201:0 crwdns2935203:0crwdne2935203:0
-
Remove the five T3 Torx screws securing the battery connector shield:
-
Four 4.0 mm screws
-
One 2.1 mm screw
-
-
crwdns2935201:0crwdne2935201:0 crwdns2935203:0crwdne2935203:0
-
Use a pair of tweezers to remove the battery connector shield.
-
-
crwdns2935201:0crwdne2935201:0 crwdns2935203:0crwdne2935203:0
-
Using the pointed end of a spudger, pry the battery connector straight up from the motherboard to disconnect the battery.
-
-
crwdns2935201:0crwdne2935201:0 crwdns2935203:0crwdne2935203:0
-
Using the flat end of a spudger, gently fold the battery cable over so it doesn't accidentally make contact during the rest of your repairs.
-
-
crwdns2935201:0crwdne2935201:0 crwdns2935203:0crwdne2935203:0
-
Use a T3 Torx driver to remove the two 4 mm screws securing the back panel connector cover.
-
-
crwdns2935201:0crwdne2935201:0 crwdns2935203:0crwdne2935203:0
-
Use a pair of tweezers to remove the back panel connector cover.
-
-
crwdns2935201:0crwdne2935201:0 crwdns2935203:0crwdne2935203:0
-
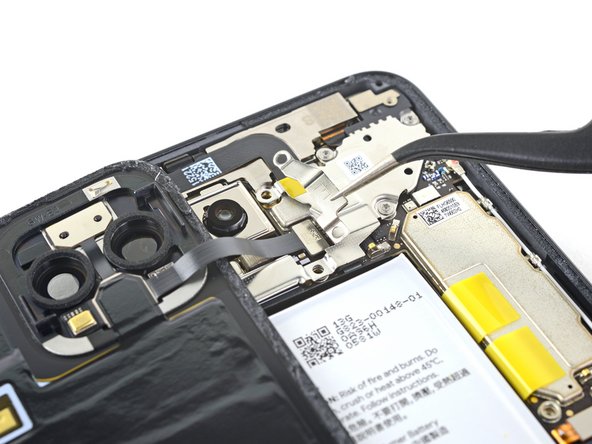
Using the pointed end of a spudger, pry up and disconnect the back panel connector.
-
-
crwdns2935201:0crwdne2935201:0 crwdns2935203:0crwdne2935203:0
-
Pull on the yellow pull tab of the adhesive strip with steady force.
-
Continue firmly pulling up on the adhesive strip with constant force. If you're using a spudger, spin it every so often to keep the exposed section of the pull tab as short as possible.
-
Continue this process for each of the three pull tabs, until all are either out or have snapped in half.
-
-
crwdns2935201:0crwdne2935201:0 crwdns2935203:0crwdne2935203:0
-
If the battery tabs snapped during removal, insert an opening pick on the upper right edge of the battery, slicing the adhesive underneath.
-
-
crwdns2935201:0crwdne2935201:0 crwdns2935203:0crwdne2935203:0
-
Lift the battery up and away from the phone to remove it. You may need to peel the battery away from any leftover adhesive tabs.
-
If you're using stretch release adhesive, apply them onto the battery. Otherwise, apply some double-sided tape, or pre-cut adhesive strips in the phone's battery well, being careful not to cover the charge port flex cable. Peel away any tape liners to expose the adhesive.
-
Temporarily re-connect the battery's connector to the motherboard socket. This ensures that the battery is properly positioned.
-
Lay the battery in place and press firmly.
-
Disconnect the battery connector from its motherboard socket and resume re-assembly.
-
-
crwdns2935201:0crwdne2935201:0 crwdns2935203:0crwdne2935203:0
-
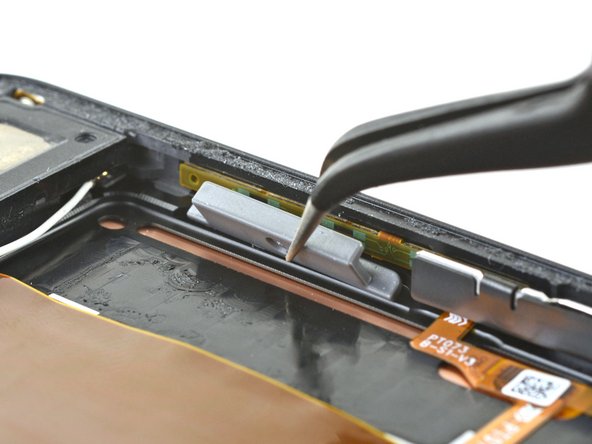
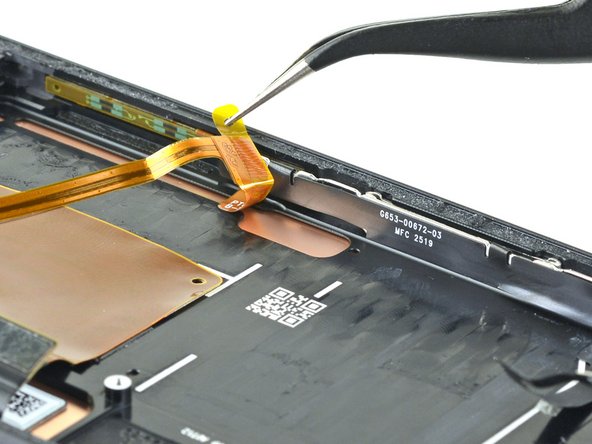
Use a pair of tweezers to tilt the grey plastic grip sensor guard away from the edge of the frame.
-
Pull the guard straight up off of the phone's frame. It is secured with some light adhesive.
-
-
crwdns2935201:0crwdne2935201:0 crwdns2935203:0crwdne2935203:0
-
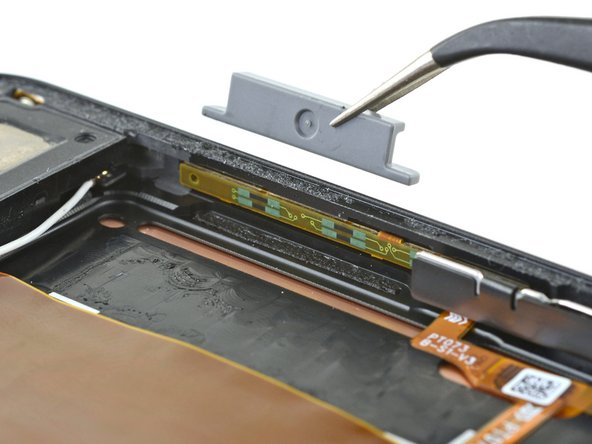
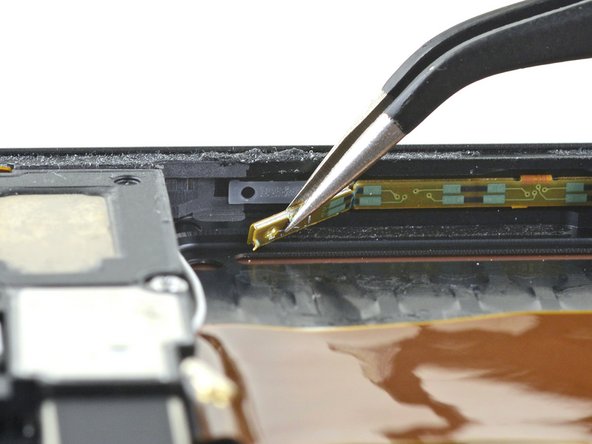
Use a pair of tweezers to peel the grip sensor flex cable off of the phone's frame. It is secured with some light adhesive.
-
-
crwdns2935201:0crwdne2935201:0 crwdns2935203:0crwdne2935203:0
-
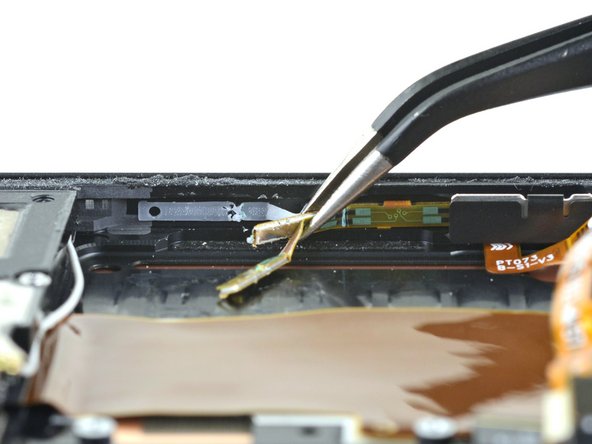
Continue peeling the flex cable until it is no longer adhered to the back side of the phone.
-
-
crwdns2935201:0crwdne2935201:0 crwdns2935203:0crwdne2935203:0
-
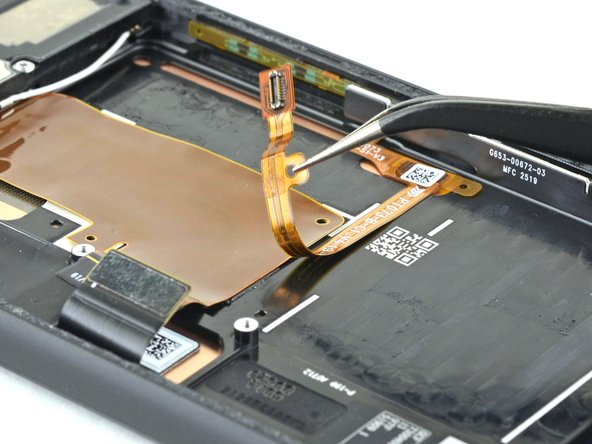
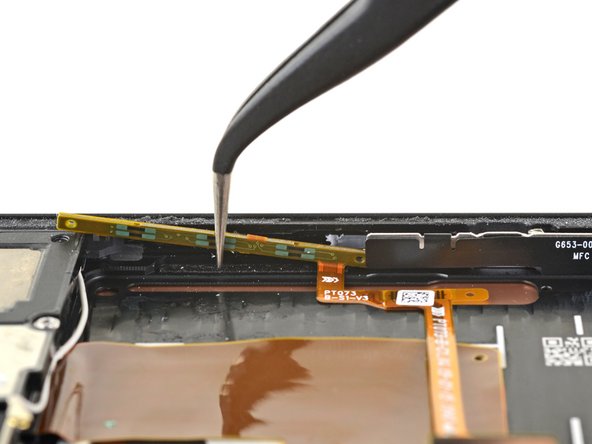
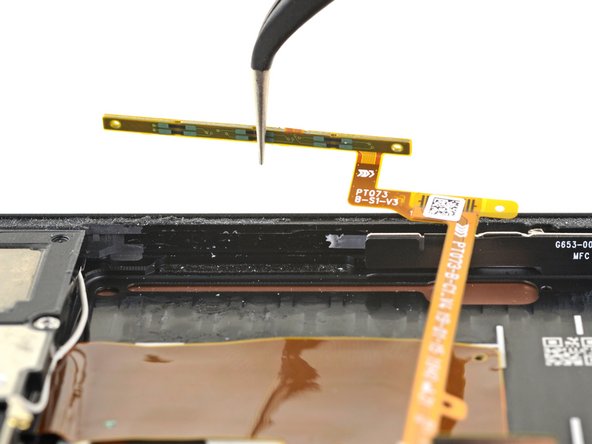
Use a pair of tweezers to peel away the grip sensor from the inside edge of the phone's frame.
-
Continue to peel away the grip sensor until it is no longer adhered to the inside frame.
-
-
crwdns2935201:0crwdne2935201:0 crwdns2935203:0crwdne2935203:0
-
With the grip sensor peeled away from the inside edge, completely remove it from behind the side button assembly.
-


crwdns2935221:0crwdne2935221:0
crwdns2935227:0crwdne2935227:0

