crwdns2915892:0crwdne2915892:0
This is an outdated guide—the newest version is available here.
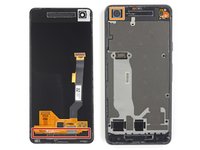
If your Google Pixel 2 loudspeaker is blown, or making a crackling noise, this replacement guide will show you how to replace it.
crwdns2942213:0crwdne2942213:0
-
-
If your display glass is cracked, keep further breakage contained and prevent bodily harm during your repair by taping the glass. This also makes a smooth surface allowing the suction cup to bond.
-
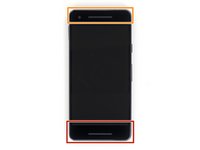
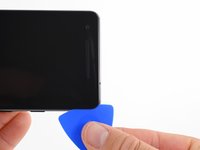
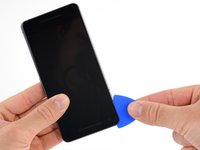
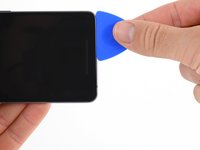
Apply a suction cup as close to the volume button edge of the phone as you can while avoiding the curved edge.
-
-
-
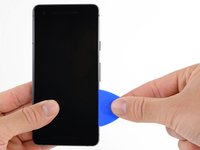
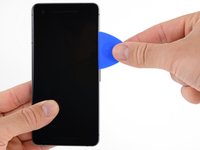
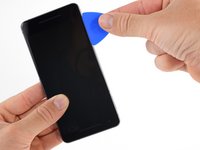
Pull up on the suction cup with firm, constant pressure and insert an opening pick between the front panel and rear case.
-
-
-
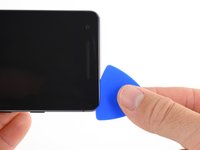
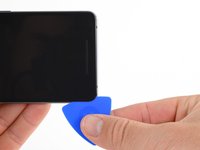
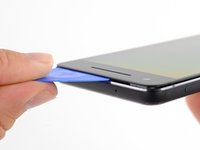
Do not insert the pick more than 9 mm into the bottom edge of the phone. If the pick contacts the folded portion of the OLED panel it can damage the display.
-
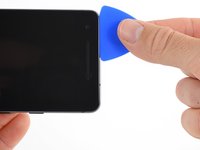
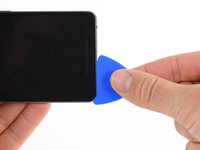
Only make very shallow cuts in the upper left corner, prying deeply can damage the front-facing camera.
-
-
-
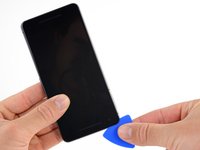
Slide the opening pick up the right side of the phone to separate the display adhesive.
-
-
-
Slide the opening pick around the upper-right corner and along the top edge of the phone.
-
-
-
Slide the pick around the upper-left corner of the phone and down the left edge of the phone.
-
-
-
Slide the pick around the bottom-left corner and along the bottom of the phone. Keep pick at a slight angle away from the screen to avoid damage to the OLED corners.
-
-
-
-
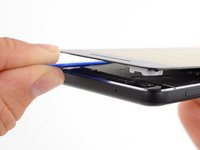
Reinsert the pick at the top edge of the phone and gently pry up the display.
-
-
crwdns2935267:0crwdne2935267:0Magnetic Project Mat$19.95
-
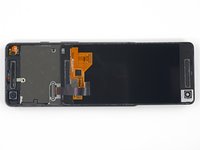
Carefully lay the display down on top of the rear case as shown, making sure not to crease or tear the display ribbon cable.
-
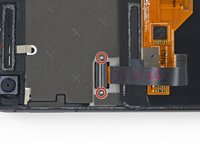
Remove the two 4.0 mm T5 Torx screws securing the display cable bracket.
-
-
-
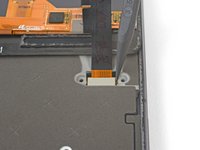
Use the point of a spudger to lift the display cable connector up and out of its socket on the motherboard.
-
-
-
Apply a heated iOpener to the proximity sensor on the top edge of the midframe for two minutes to soften its adhesive.
-
-
-
Slide the point of a spudger under the proximity sensor cable, starting from the side closest to the front-facing camera.
-
Gently lift the edge of the sensor cable until the sensor is perpendicular to the midframe.
-
-
crwdns2935267:0crwdne2935267:0Magnetic Project Mat$19.95
-
Peel back the small piece of tape covering the screw below the earpiece speaker. Peel back any tape covering other screws as well.
-
Remove the following screws securing the midframe:
-
Eleven 3.7 mm Phillips screws
-
One 4 mm T5 Torx screw
-
-
-
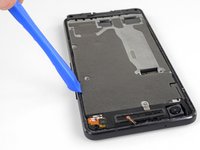
Insert an opening tool into the notch in the midframe near the hold button.
-
Pry the midframe up enough to create a gap between it and the phone case. The midframe cannot yet be completely removed.
-
-
-
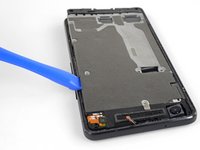
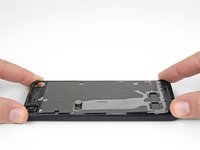
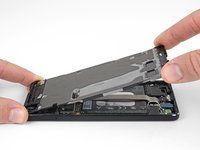
Lift the midframe up starting from the bottom edge.
-
When the midframe starts to make about a 45° with the rest of the phone, lift the midframe straight up and away from the phone.
-
As you lift the midfame, carefully guide the proximity sensor through the small slot in the midframe.
-
-
-
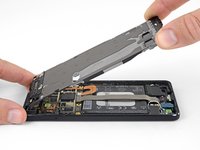
Use the flat end of a spudger to disconnect the battery connector.
-
-
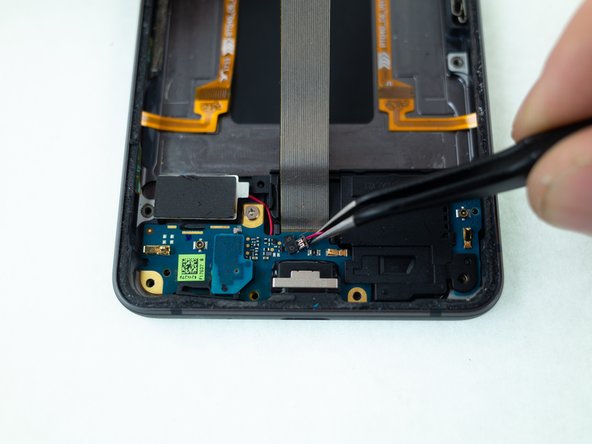
crwdns2935267:0crwdne2935267:0Tweezers$4.99
-
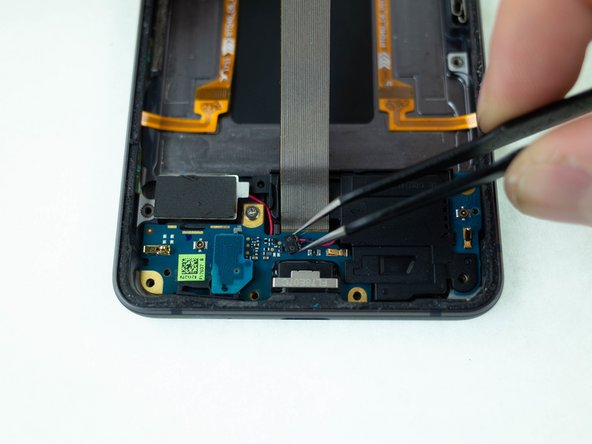
Disconnect the speaker from the motherboard with a pair of tweezers.
-
-
-
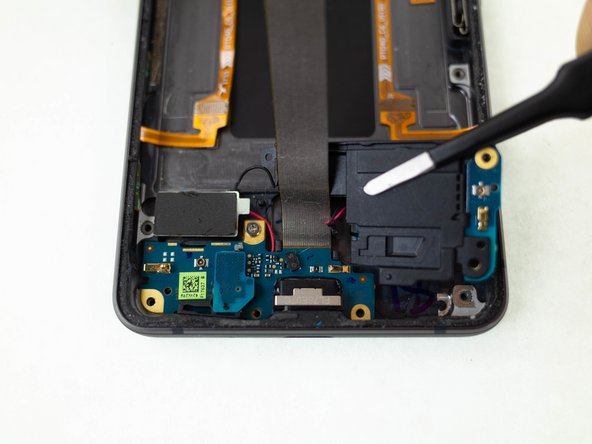
Wedge a spudger between the speaker and frame of the phone.
-
Pry upwards on the speaker to release it from the phone.
-
Remove the speaker.
-


To reassemble your device, follow these instructions in reverse order.
To reassemble your device, follow these instructions in reverse order.
