crwdns2933423:0crwdne2933423:0

GoPro Hero5 Black Motherboard Replacement

crwdns2942213:0crwdne2942213:0

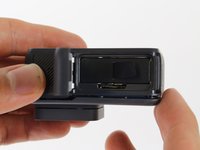
  1. GoPro Hero5 Black Motherboard Replacement, Battery: crwdns2935265:01crwdnd2935265:01crwdnd2935265:03crwdne2935265:0 GoPro Hero5 Black Motherboard Replacement, Battery: crwdns2935265:01crwdnd2935265:02crwdnd2935265:03crwdne2935265:0 GoPro Hero5 Black Motherboard Replacement, Battery: crwdns2935265:01crwdnd2935265:03crwdnd2935265:03crwdne2935265:0
    • While pressing the button on the bottom of the GoPro, slide the battery door to the side to pop it open.

  2. GoPro Hero5 Black Motherboard Replacement: crwdns2935265:02crwdnd2935265:01crwdnd2935265:03crwdne2935265:0 GoPro Hero5 Black Motherboard Replacement: crwdns2935265:02crwdnd2935265:02crwdnd2935265:03crwdne2935265:0 GoPro Hero5 Black Motherboard Replacement: crwdns2935265:02crwdnd2935265:03crwdnd2935265:03crwdne2935265:0
    • Grab the plastic flap on the battery and pull the battery out.

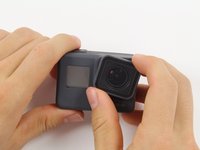
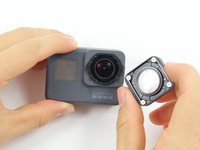
  3. GoPro Hero5 Black Motherboard Replacement, Back Housing: crwdns2935265:03crwdnd2935265:01crwdnd2935265:02crwdne2935265:0 GoPro Hero5 Black Motherboard Replacement, Back Housing: crwdns2935265:03crwdnd2935265:02crwdnd2935265:02crwdne2935265:0
    • Pull and twist the lens cover right or left until it pops off.

    • The lens cover is secured tightly and might be difficult to twist off.

  4. GoPro Hero5 Black Motherboard Replacement: crwdns2935265:04crwdnd2935265:01crwdnd2935265:01crwdne2935265:0
    • This step is not necessary but will make the process of removing the faceplate much easier.

    • Refer to the iOpener instructions for how to heat up and use the iOpener.

    • Apply the heated iOpener to the front of the GoPro for a few minutes to melt the adhesive under the faceplate.

    • The heated iOpener is very hot and can burn your hands. Avoid burns by using towels or gloves to hold the iOpener.

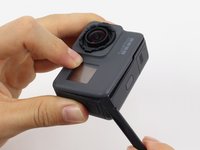
  5. GoPro Hero5 Black Motherboard Replacement: crwdns2935265:05crwdnd2935265:01crwdnd2935265:03crwdne2935265:0 GoPro Hero5 Black Motherboard Replacement: crwdns2935265:05crwdnd2935265:02crwdnd2935265:03crwdne2935265:0 GoPro Hero5 Black Motherboard Replacement: crwdns2935265:05crwdnd2935265:03crwdnd2935265:03crwdne2935265:0
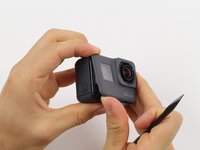
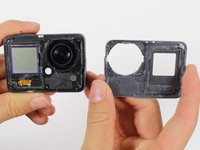
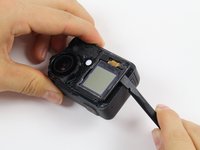
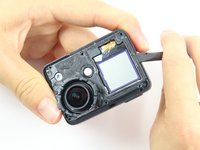
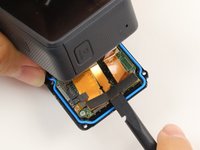
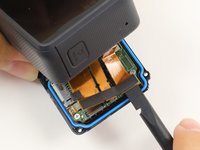
    • Starting with the edges, use the spudger to pry off the faceplate.

    • The faceplate is held down with adhesive and may take a while to get off.

  6. GoPro Hero5 Black Motherboard Replacement: crwdns2935265:06crwdnd2935265:01crwdnd2935265:02crwdne2935265:0 GoPro Hero5 Black Motherboard Replacement: crwdns2935265:06crwdnd2935265:02crwdnd2935265:02crwdne2935265:0
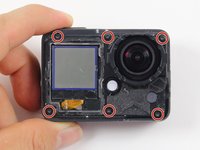
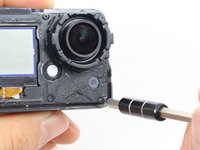
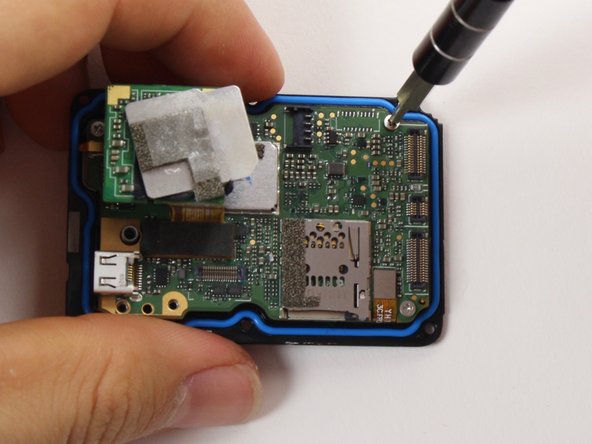
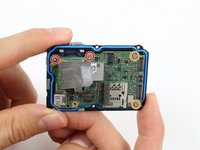
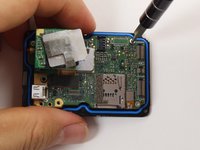
    • Remove the six T3 Torx screws.

  7. GoPro Hero5 Black Motherboard Replacement: crwdns2935265:07crwdnd2935265:01crwdnd2935265:03crwdne2935265:0 GoPro Hero5 Black Motherboard Replacement: crwdns2935265:07crwdnd2935265:02crwdnd2935265:03crwdne2935265:0 GoPro Hero5 Black Motherboard Replacement: crwdns2935265:07crwdnd2935265:03crwdnd2935265:03crwdne2935265:0
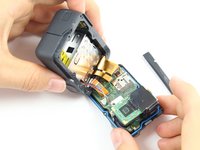
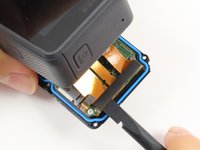
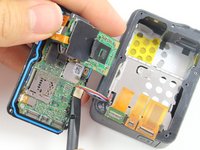
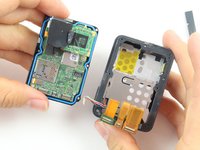
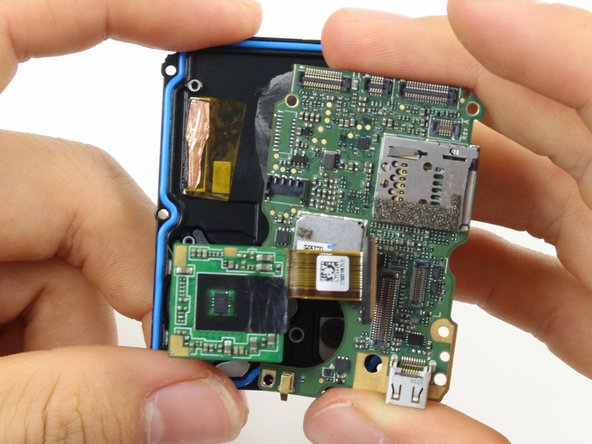
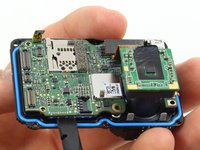
    • Be careful when pulling open the motherboard assembly as it is still connected to the back housing by four cables. The cables may break if stretched.

    • Using the spudger, slowly pry open the motherboard assembly from the LCD side of the GoPro.

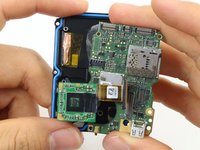
  8. GoPro Hero5 Black Motherboard Replacement: crwdns2935265:08crwdnd2935265:01crwdnd2935265:03crwdne2935265:0 GoPro Hero5 Black Motherboard Replacement: crwdns2935265:08crwdnd2935265:02crwdnd2935265:03crwdne2935265:0 GoPro Hero5 Black Motherboard Replacement: crwdns2935265:08crwdnd2935265:03crwdnd2935265:03crwdne2935265:0
    • Use the flat end of a spudger to pry the three ribbon cables connected to the side of the motherboard.

  9. GoPro Hero5 Black Motherboard Replacement: crwdns2935265:09crwdnd2935265:01crwdnd2935265:02crwdne2935265:0 GoPro Hero5 Black Motherboard Replacement: crwdns2935265:09crwdnd2935265:02crwdnd2935265:02crwdne2935265:0
    • Use the flat end of the spudger to pry the battery housing power cable straight up from its socket on the motherboard.

  10. GoPro Hero5 Black Motherboard Replacement, Motherboard: crwdns2935265:010crwdnd2935265:01crwdnd2935265:01crwdne2935265:0
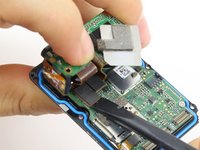
    • Use the flat end of the spudger to pry the black cover plate straight up from its socket on the motherboard.

  11. GoPro Hero5 Black Motherboard Replacement: crwdns2935265:011crwdnd2935265:01crwdnd2935265:01crwdne2935265:0
    • Use the tweezers to pull the ribbon cable connector out of its white socket on the charging assembly board.

  12. GoPro Hero5 Black Motherboard Replacement: crwdns2935265:012crwdnd2935265:01crwdnd2935265:02crwdne2935265:0 GoPro Hero5 Black Motherboard Replacement: crwdns2935265:012crwdnd2935265:02crwdnd2935265:02crwdne2935265:0
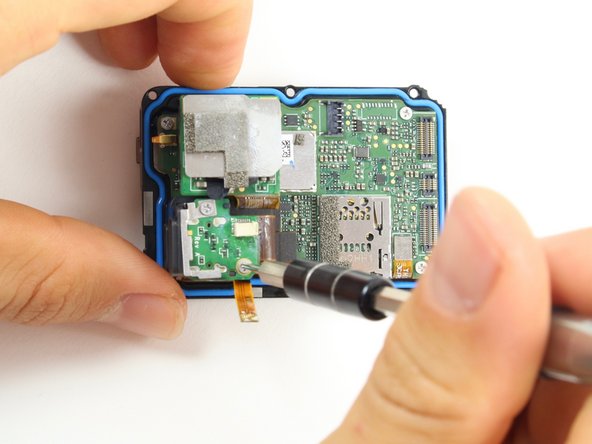
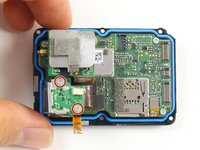
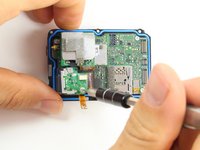
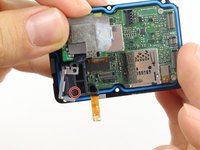
    • Remove the two #000 Phillips screw.

  13. GoPro Hero5 Black Motherboard Replacement: crwdns2935265:013crwdnd2935265:01crwdnd2935265:02crwdne2935265:0 GoPro Hero5 Black Motherboard Replacement: crwdns2935265:013crwdnd2935265:02crwdnd2935265:02crwdne2935265:0
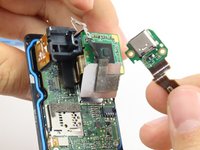
    • Use the flat end of the spudger to pry the charging port ribbon cable connector straight up from its socket on the motherboard.

    • Once the ribbon cable is disconnected from the motherboard. The charging port assembly should come right off.

  14. GoPro Hero5 Black Motherboard Replacement: crwdns2935265:014crwdnd2935265:01crwdnd2935265:02crwdne2935265:0 GoPro Hero5 Black Motherboard Replacement: crwdns2935265:014crwdnd2935265:02crwdnd2935265:02crwdne2935265:0
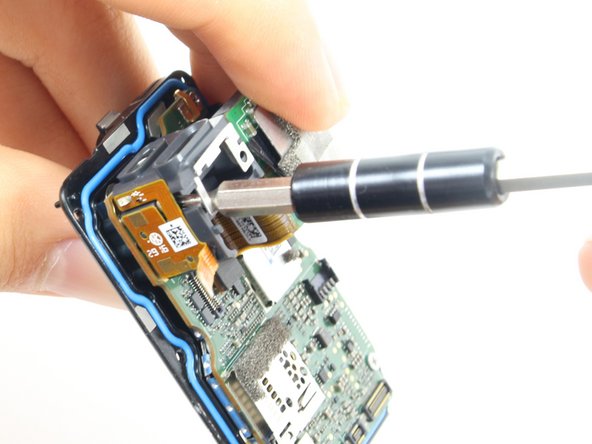
    • Remove the 10mm #000 Phillips screw.

  15. GoPro Hero5 Black Motherboard Replacement: crwdns2935265:015crwdnd2935265:01crwdnd2935265:01crwdne2935265:0
    • Remove the charging assembly housing by pulling it straight up off the motherboard.

  16. GoPro Hero5 Black Motherboard Replacement: crwdns2935265:016crwdnd2935265:01crwdnd2935265:02crwdne2935265:0 GoPro Hero5 Black Motherboard Replacement: crwdns2935265:016crwdnd2935265:02crwdnd2935265:02crwdne2935265:0
    • Remove the two 6mm #000 Phillips screws.

    • Remove the two 2mm #000 Phillips screws.

  17. GoPro Hero5 Black Motherboard Replacement: crwdns2935265:017crwdnd2935265:01crwdnd2935265:01crwdne2935265:0
    • Use the flat end of the spudger to pry the lens assembly ribbon cable connector straight up from its socket on the motherboard.

  18. GoPro Hero5 Black Motherboard Replacement: crwdns2935265:018crwdnd2935265:01crwdnd2935265:01crwdne2935265:0
    • Use the flat end of the spudger to pry the LCD screen ribbon cable connector straight up from its socket on the motherboard.

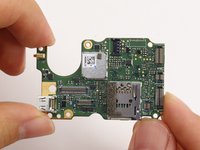
  19. GoPro Hero5 Black Motherboard Replacement: crwdns2935265:019crwdnd2935265:01crwdnd2935265:03crwdne2935265:0 GoPro Hero5 Black Motherboard Replacement: crwdns2935265:019crwdnd2935265:02crwdnd2935265:03crwdne2935265:0 GoPro Hero5 Black Motherboard Replacement: crwdns2935265:019crwdnd2935265:03crwdnd2935265:03crwdne2935265:0
    • Use the flat end of the spudger to pry the motherboard off the midframe.

    • The motherboard is held onto the midframe with light adhesive and should come right off with a little force.

crwdns2915888:0crwdne2915888:0

To reassemble your device, follow these instructions in reverse order.

crwdns2935229:020crwdne2935229:0

Christopher Adams

crwdns2935283:010/03/16crwdne2935283:0

2,112 crwdns2915208:0crwdne2915208:0

crwdns2935297:05crwdne2935297:0

crwdns2915084:0crwdne2915084:0

Cal Poly, Team 18-6, Forte Fall 2016 crwdns2935289:0Cal Poly, Team 18-6, Forte Fall 2016crwdne2935289:0

CPSU-FORTE-F16S18G6

crwdns2931471:04crwdne2931471:0

crwdns2935297:022crwdne2935297:0

crwdns2944067:011crwdne2944067:0

Hi

I took off only faceplate. Do you guys have an idea how to make it waterproof again? What can be used as an adhesive? Thanks

ramone4 - crwdns2934203:0crwdne2934203:0

you can try silicone glue, although obviously there is no guarantee to what extent it would be waterproof.

mattatron4 -

I think you better use an extra waterproof case to put your GP5 in it

Loic - crwdns2934203:0crwdne2934203:0

I used this guide to replace the USB port in my GP5. Does anyone know of a good way to hold the face plate down once it’s been removed? Not looking to make it waterproof again, just trying to hold the faceplate down a little better.

Mario Wong - crwdns2934203:0crwdne2934203:0

I would try either a silicone- or cyanoacrylate- (super glue) based adhesive. You can try to peel off the blue gasket and/or sand where the two pieces meet for better adhesion.

mattatron4 -

crwdns2917038:0crwdne2917038:0

crwdns2936625:0crwdne2936625:0:

crwdns2936751:024crwdne2936751:0 4

crwdns2936753:07crwdne2936753:0 40

crwdns2936753:030crwdne2936753:0 157

crwdns2942667:0crwdne2942667:0 26,033