crwdns2915892:0crwdne2915892:0
If the pictures or video are fuzzy or unable to focus, the lens may need replacement. Follow this guide to do so.
crwdns2942213:0crwdne2942213:0
-
crwdns2935267:0crwdne2935267:0Tweezers$4.99
-
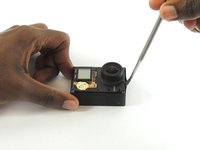
Remove the faceplate by carefully prying around the edge using a plastic opening tool. Loosen the clips on the edge, then pull the faceplate off.
-
Use the tweezers to lift the faceplate from the rest of the device.
-
-
-
Using a #00 Phillips head screwdriver, remove the following screws:
-
One 4.6 mm screw
-
Three 8.2 mm screws
-
Two 6.1 mm screws
-
-
-
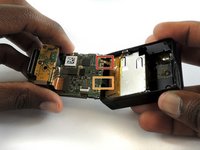
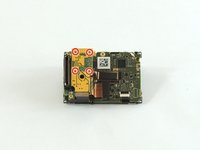
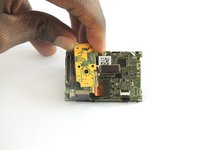
Insert a metal spudger between the back plastic housing and the camera board assembly. Working around the edge to be careful of the inner components, carefully remove the camera.
-
-
-
-
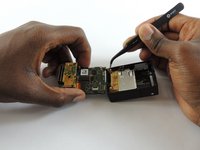
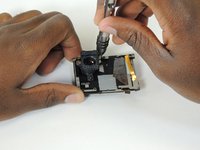
Using tweezers, remove the ribbon strip by pulling on it. This will remove the connection.
-
Push down on the three wires with the metal spudger and the clip will disconnect from the motherboard.
-
-
-
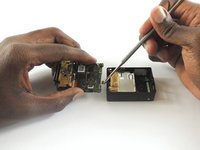
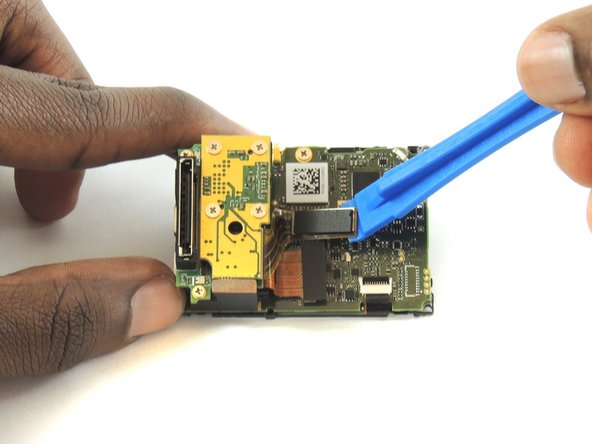
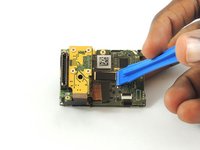
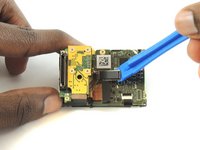
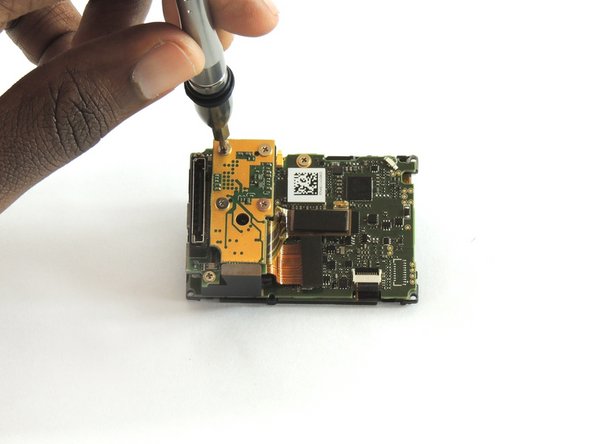
Using a plastic opening tool, separate the camera sensor's connector from the motherboard.
-
-
-
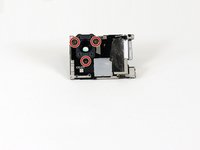
Using a #00 Phillips head screwdriver, remove the four 3.0mm screws holding the camera sensor.
-
-
-
Using a #00 Phillips head screwdriver, remove the following screws:
-
Three 2 mm screw
-
-
-
Lift the lens from the front housing.
-


To reassemble your device, follow these instructions in reverse order.
crwdns2935221:0crwdne2935221:0
crwdns2935229:05crwdne2935229:0
crwdns2935287:0crwdne2935287:0

USF Tampa, Team S2-G1, Sullivan Spring 2017 crwdns2935289:0USF Tampa, Team S2-G1, Sullivan Spring 2017crwdne2935289:0
USFT-SULLIVAN-S17S2G1
crwdns2931471:04crwdne2931471:0
crwdns2935297:012crwdne2935297:0
crwdns2947410:01crwdne2947410:0
Between step 6 and step 7, you skipped a really important step…
Matthew Mulholland - crwdns2934203:0crwdne2934203:0 crwdns2950251:0crwdne2950251:0