crwdns2933423:0crwdne2933423:0
crwdns2947577:0crwdnd2947577:0crwdne2947577:0

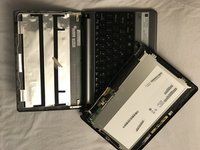
Gateway LT41P10u Webcam Replacement

crwdns2942213:0crwdne2942213:0

  1. Gateway LT41P10u Webcam Replacement, Battery: crwdns2935265:01crwdnd2935265:01crwdnd2935265:01crwdne2935265:0
    • Place the laptop upside down on a flat surface so you can see the battery.

    crwdns2952109:0crwdne2952109:0

    crwdns2917038:0crwdne2917038:0

  2. Gateway LT41P10u Webcam Replacement: crwdns2935265:02crwdnd2935265:01crwdnd2935265:01crwdne2935265:0
    • Pull the two marked tabs towards the outside of the computer to unlock them.

    crwdns2952109:0crwdne2952109:0

    crwdns2917038:0crwdne2917038:0

  3. Gateway LT41P10u Webcam Replacement: crwdns2935265:03crwdnd2935265:01crwdnd2935265:01crwdne2935265:0
    • While keeping both of the tabs in the unlocked position, grab the battery and pull outwards, until the battery slides out from the rest of the computer.

    crwdns2952109:0crwdne2952109:0

    crwdns2917038:0crwdne2917038:0

  4. Gateway LT41P10u Webcam Replacement, Monitor: crwdns2935265:04crwdnd2935265:01crwdnd2935265:02crwdne2935265:0 Gateway LT41P10u Webcam Replacement, Monitor: crwdns2935265:04crwdnd2935265:02crwdnd2935265:02crwdne2935265:0
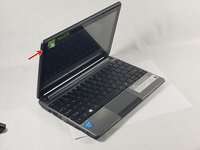
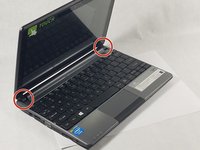
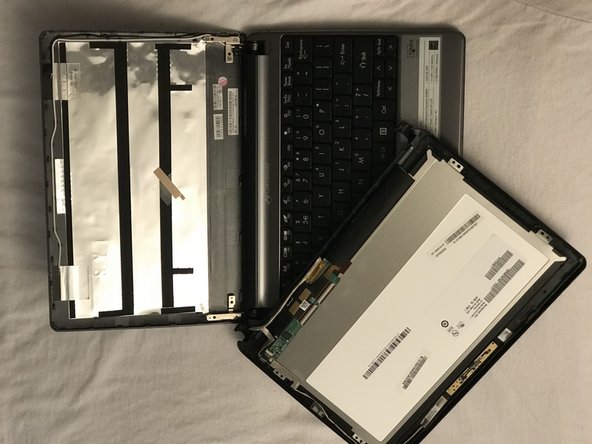
    • Carefully use a spudger to separate the monitor from top panel.

    • Gently remove lower hooks from the hinges. (see second image)

    crwdns2952109:0crwdne2952109:0

    crwdns2917038:0crwdne2917038:0

  5. Gateway LT41P10u Webcam Replacement: crwdns2935265:05crwdnd2935265:01crwdnd2935265:02crwdne2935265:0 Gateway LT41P10u Webcam Replacement: crwdns2935265:05crwdnd2935265:02crwdnd2935265:02crwdne2935265:0
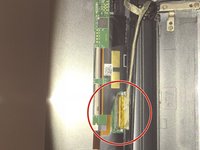
    • Once you completed separating the monitor from the top panel disconnect the cable shown here in red by raising the cable lock and pulling the wires away.

    • The second image is how it should look once completely disconnected.

    crwdns2952109:0crwdne2952109:0

    crwdns2917038:0crwdne2917038:0

  6. Gateway LT41P10u Webcam Replacement, Webcam: crwdns2935265:06crwdnd2935265:01crwdnd2935265:01crwdne2935265:0
    • Using a plastic spudger or fingers gently remove webcam hardware from front screen. A gentle heat source can be used to easily remove glued down parts.

    • Once webcam hardware is removed from front screen, it can be removed by hand from the wiring and replaced.

    • Perform these steps carefully as smaller parts are more likely to break.

    crwdns2952109:0crwdne2952109:0

    crwdns2917038:0crwdne2917038:0

crwdns2915888:0crwdne2915888:0

To reassemble your device, follow these instructions in reverse order.

crwdns2935221:0crwdne2935221:0

Patrick Raposo

crwdns2935283:010/21/17crwdne2935283:0

201 crwdns2915208:0crwdne2915208:0

crwdns2935297:02crwdne2935297:0

crwdns2935287:0crwdne2935287:0

UMass Dartmouth, Team S66-G8, Rockett Fall 2017 crwdns2935289:0UMass Dartmouth, Team S66-G8, Rockett Fall 2017crwdne2935289:0

UMASSD-ROCKETT-F17S66G8

crwdns2931471:03crwdne2931471:0

crwdns2935297:012crwdne2935297:0

crwdns2947412:00crwdne2947412:0

crwdns2917038:0crwdne2917038:0

crwdns2936625:0crwdne2936625:0:

crwdns2936751:024crwdne2936751:0 2

crwdns2936753:07crwdne2936753:0 7

crwdns2936753:030crwdne2936753:0 23

crwdns2942667:0crwdne2942667:0 363