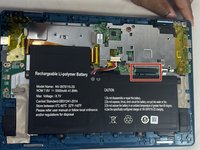
crwdns2933423:0crwdne2933423:0

Gateway GWTC116-2BL Display Replacement

crwdns2942213:0crwdne2942213:0

  1. Gateway GWTC116-2BL Display Replacement, Back Panel: crwdns2935265:01crwdnd2935265:01crwdnd2935265:01crwdne2935265:0
    • Ground yourself before disassembling and handling the computer.

    • Remove the ten 3.0 mm Phillips #00 screws from the back panel of the laptop.

  2. Gateway GWTC116-2BL Display Replacement: crwdns2935265:02crwdnd2935265:01crwdnd2935265:02crwdne2935265:0 Gateway GWTC116-2BL Display Replacement: crwdns2935265:02crwdnd2935265:02crwdnd2935265:02crwdne2935265:0
    • Use the spudger to pry the back panel away from the body of the laptop.

  3. Gateway GWTC116-2BL Display Replacement, Battery: crwdns2935265:03crwdnd2935265:01crwdnd2935265:01crwdne2935265:0
    • Remove the five 3.0 mm Phillips #00 screws.

  4. Gateway GWTC116-2BL Display Replacement: crwdns2935265:04crwdnd2935265:01crwdnd2935265:02crwdne2935265:0 Gateway GWTC116-2BL Display Replacement: crwdns2935265:04crwdnd2935265:02crwdnd2935265:02crwdne2935265:0
    • Using your fingers, flick open the battery connector bracket.

    • Remove the connector from bracket.

  5. Gateway GWTC116-2BL Display Replacement: crwdns2935265:05crwdnd2935265:01crwdnd2935265:01crwdne2935265:0
    • Pull up the battery to remove from the base.

  6. Gateway GWTC116-2BL Display Replacement, Motherboard: crwdns2935265:06crwdnd2935265:01crwdnd2935265:01crwdne2935265:0
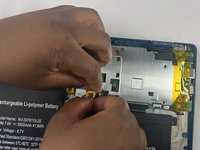
    • Using your fingers, flick the cable connector bracket open.

    • Remove the cable from the connector.

  7. Gateway GWTC116-2BL Display Replacement: crwdns2935265:07crwdnd2935265:01crwdnd2935265:02crwdne2935265:0 Gateway GWTC116-2BL Display Replacement: crwdns2935265:07crwdnd2935265:02crwdnd2935265:02crwdne2935265:0
    • Using your fingers, disconnect the black and white connector brackets underneath the gray cable.

  8. Gateway GWTC116-2BL Display Replacement: crwdns2935265:08crwdnd2935265:01crwdnd2935265:02crwdne2935265:0 Gateway GWTC116-2BL Display Replacement: crwdns2935265:08crwdnd2935265:02crwdnd2935265:02crwdne2935265:0
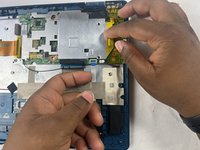
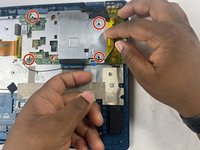
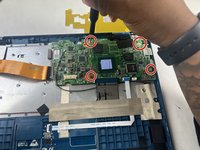
    • Remove the four 3.0 mm Phillips #00 screws located on the motherboard casing.

  9. Gateway GWTC116-2BL Display Replacement: crwdns2935265:09crwdnd2935265:01crwdnd2935265:03crwdne2935265:0 Gateway GWTC116-2BL Display Replacement: crwdns2935265:09crwdnd2935265:02crwdnd2935265:03crwdne2935265:0 Gateway GWTC116-2BL Display Replacement: crwdns2935265:09crwdnd2935265:03crwdnd2935265:03crwdne2935265:0
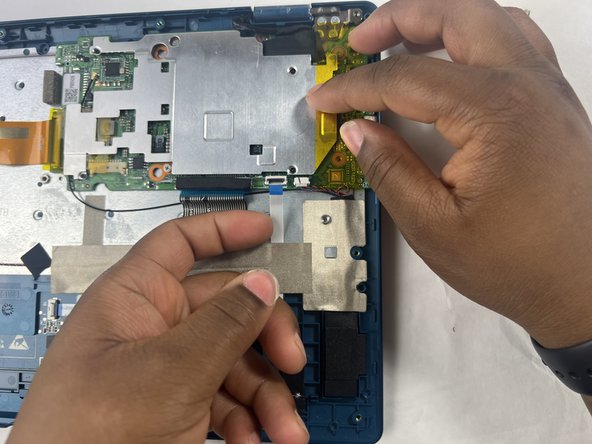
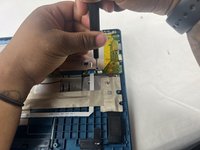
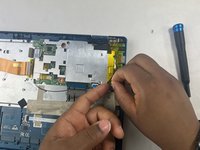
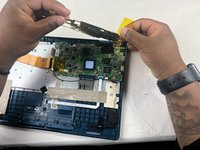
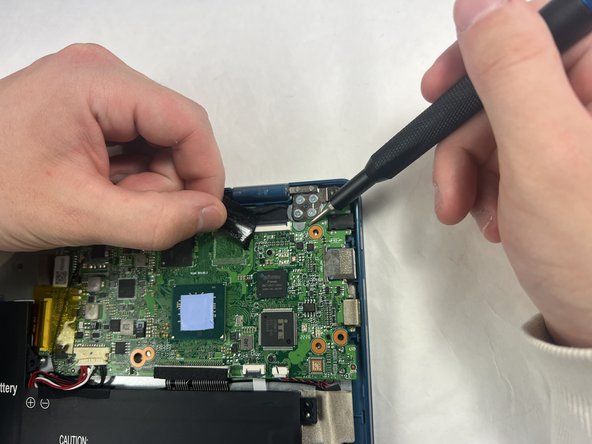
    • Peel the yellow tape off of the casing.

    • Lift the casing off of the motherboard.

  10. Gateway GWTC116-2BL Display Replacement: crwdns2935265:010crwdnd2935265:01crwdnd2935265:02crwdne2935265:0 Gateway GWTC116-2BL Display Replacement: crwdns2935265:010crwdnd2935265:02crwdnd2935265:02crwdne2935265:0
    • Peel off the yellow tape.

    • Remove four 3.0 mm Phillips #00 screws.

  11. Gateway GWTC116-2BL Display Replacement: crwdns2935265:011crwdnd2935265:01crwdnd2935265:02crwdne2935265:0 Gateway GWTC116-2BL Display Replacement: crwdns2935265:011crwdnd2935265:02crwdnd2935265:02crwdne2935265:0
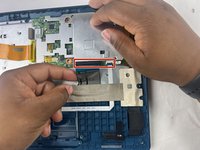
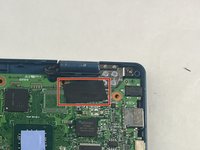
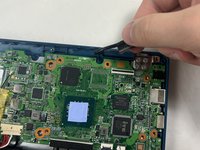
    • Peel off the black piece of tape covering the display cable.

  12. Gateway GWTC116-2BL Display Replacement: crwdns2935265:012crwdnd2935265:01crwdnd2935265:02crwdne2935265:0 Gateway GWTC116-2BL Display Replacement: crwdns2935265:012crwdnd2935265:02crwdnd2935265:02crwdne2935265:0
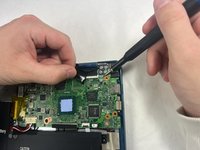
    • Flick open the bracket securing the display cable and disconnect the cable from the motherboard.

  13. Gateway GWTC116-2BL Display Replacement: crwdns2935265:013crwdnd2935265:01crwdnd2935265:01crwdne2935265:0
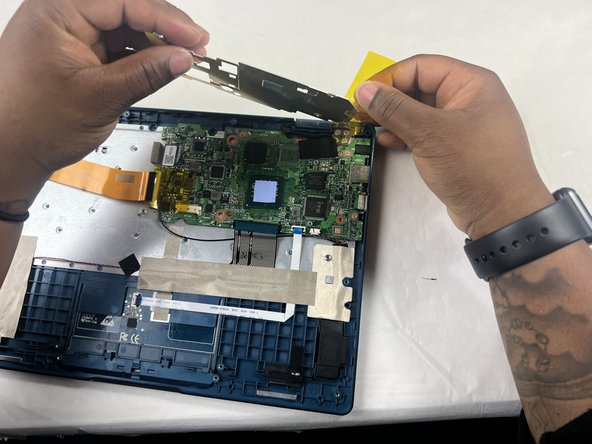
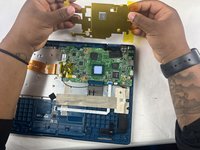
    • Remove the motherboard from the device.

  14. Gateway GWTC116-2BL Display Replacement, Display: crwdns2935265:014crwdnd2935265:01crwdnd2935265:01crwdne2935265:0
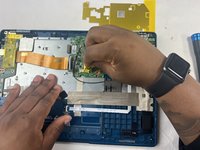
    • Remove seven 3.0 mm Phillips #00 screws from the laptop.

  15. Gateway GWTC116-2BL Display Replacement: crwdns2935265:015crwdnd2935265:01crwdnd2935265:01crwdne2935265:0
    • Applying some force, use your hands to pry the display of the laptop away from the base.

crwdns2915888:0crwdne2915888:0

To reassemble your device, follow these instructions in reverse order.

Kailey Sousa

crwdns2935283:003/22/24crwdne2935283:0

513 crwdns2915208:0crwdne2915208:0

crwdns2935297:04crwdne2935297:0

crwdns2915084:0crwdne2915084:0

UMass Dartmouth, Team 6-2, Botvin Spring 2024 crwdns2935289:0UMass Dartmouth, Team 6-2, Botvin Spring 2024crwdne2935289:0

UMASSD-BOTVIN-S24S6G2

crwdns2931471:03crwdne2931471:0

crwdns2935297:05crwdne2935297:0

crwdns2947410:01crwdne2947410:0

Mon écran ne s'allume pas au démarrage. Que faire ?

Youssouf SAWADOGO - crwdns2934203:0crwdne2934203:0

crwdns2917038:0crwdne2917038:0

crwdns2936625:0crwdne2936625:0:

crwdns2936751:024crwdne2936751:0 1

crwdns2936753:07crwdne2936753:0 12

crwdns2936753:030crwdne2936753:0 53

crwdns2942667:0crwdne2942667:0 474