crwdns2933423:0crwdne2933423:0
crwdns2947577:0crwdnd2947577:0crwdne2947577:0

Gateway GWTC116-2BL Display Replacement

crwdns2869540:0crwdne2869540:0: 1,7 k

crwdns2959988:0crwdne2959988:0

crwdns2959990:0crwdne2959990:0
5
crwdns2959992:0crwdne2959992:0
24
crwdns2959994:0crwdne2959994:0
109
crwdns2959996:0crwdne2959996:0
1 664
crwdns2955950:0crwdne2955950:0: 1

crwdns2960006:01crwdne2960006:0

crwdns2960000:0crwdne2960000:0
crwdns2959984:0crwdne2959984:0: 1

crwdns2959972:01crwdne2959972:0

crwdns2959986:0crwdne2959986:0: 0

crwdns2959958:0crwdne2959958:0

crwdns2955944:0crwdne2955944:0: crwdns2931287:03crwdne2931287:0
crwdns2955970:0crwdne2955970:0: crwdns2937799:0crwdne2937799:0
crwdns2862597:0crwdne2862597:0

crwdns2862598:0crwdne2862598:0

Gateway GWTC116-2BL Display Replacement

crwdns2915892:0crwdne2915892:0

crwdns2959928:0crwdne2959928:0 ↓

Replacing the display of your Gateway GWTC116-2BL laptop can be a daunting task, but with the right tools and a little bit of patience, it is doable. The first step is ensuring you have the correct replacement screen for your specific laptop model. Then, you must remove the old screen and install the new one. This process may vary slightly depending on the particular model of your laptop, but in general, it involves removing the bezel, disconnecting the old screen, and installing the new one. In this guide, we'll outline the steps you need to take to replace the Gateway GWTC116-2BL laptop screen.

crwdns2959930:0crwdne2959930:0

crwdns2943215:0crwdne2943215:0

    1. Gateway GWTC116-2BL Display Replacement, Back Panel: crwdns2935265:01crwdnd2935265:01crwdnd2935265:01crwdne2935265:0
      • Ground yourself before disassembling and handling the computer.

      • Remove the ten 3.0 mm Phillips #00 screws from the back panel of the laptop.

      crwdns2952109:0crwdne2952109:0

      crwdns2917038:0crwdne2917038:0

    2. Gateway GWTC116-2BL Display Replacement: crwdns2935265:02crwdnd2935265:01crwdnd2935265:02crwdne2935265:0 Gateway GWTC116-2BL Display Replacement: crwdns2935265:02crwdnd2935265:02crwdnd2935265:02crwdne2935265:0
      • Use the spudger to pry the back panel away from the body of the laptop.

      crwdns2952109:0crwdne2952109:0

      crwdns2917038:0crwdne2917038:0

    1. Gateway GWTC116-2BL Display Replacement, Battery: crwdns2935265:03crwdnd2935265:01crwdnd2935265:01crwdne2935265:0
      • Remove the five 3.0 mm Phillips #00 screws.

      crwdns2952109:0crwdne2952109:0

      crwdns2917038:0crwdne2917038:0

    2. Gateway GWTC116-2BL Display Replacement: crwdns2935265:04crwdnd2935265:01crwdnd2935265:02crwdne2935265:0 Gateway GWTC116-2BL Display Replacement: crwdns2935265:04crwdnd2935265:02crwdnd2935265:02crwdne2935265:0
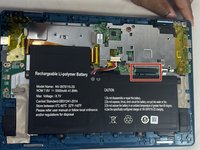
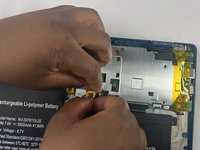
      • Using your fingers, flick open the battery connector bracket.

      • Remove the connector from bracket.

      crwdns2952109:0crwdne2952109:0

      crwdns2917038:0crwdne2917038:0

    3. Gateway GWTC116-2BL Display Replacement: crwdns2935265:05crwdnd2935265:01crwdnd2935265:01crwdne2935265:0
      • Pull up the battery to remove from the base.

      crwdns2952109:0crwdne2952109:0

      crwdns2917038:0crwdne2917038:0

    1. Gateway GWTC116-2BL Display Replacement, Motherboard: crwdns2935265:06crwdnd2935265:01crwdnd2935265:01crwdne2935265:0
      • Using your fingers, flick the cable connector bracket open.

      • Remove the cable from the connector.

      crwdns2952109:0crwdne2952109:0

      crwdns2917038:0crwdne2917038:0

    2. Gateway GWTC116-2BL Display Replacement: crwdns2935265:07crwdnd2935265:01crwdnd2935265:02crwdne2935265:0 Gateway GWTC116-2BL Display Replacement: crwdns2935265:07crwdnd2935265:02crwdnd2935265:02crwdne2935265:0
      • Using your fingers, disconnect the black and white connector brackets underneath the gray cable.

      crwdns2952109:0crwdne2952109:0

      crwdns2917038:0crwdne2917038:0

    3. Gateway GWTC116-2BL Display Replacement: crwdns2935265:08crwdnd2935265:01crwdnd2935265:02crwdne2935265:0 Gateway GWTC116-2BL Display Replacement: crwdns2935265:08crwdnd2935265:02crwdnd2935265:02crwdne2935265:0
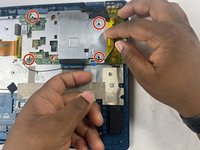
      • Remove the four 3.0 mm Phillips #00 screws located on the motherboard casing.

      crwdns2952109:0crwdne2952109:0

      crwdns2917038:0crwdne2917038:0

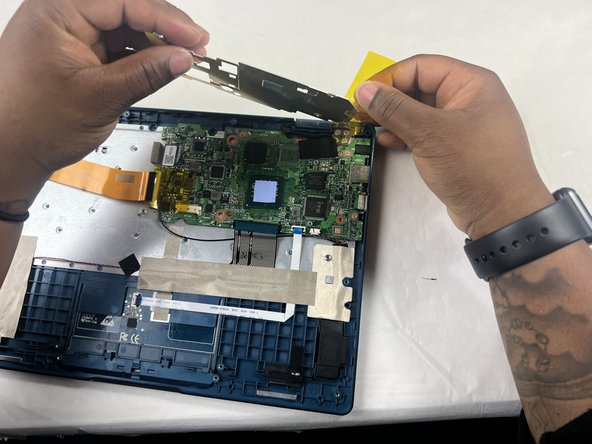
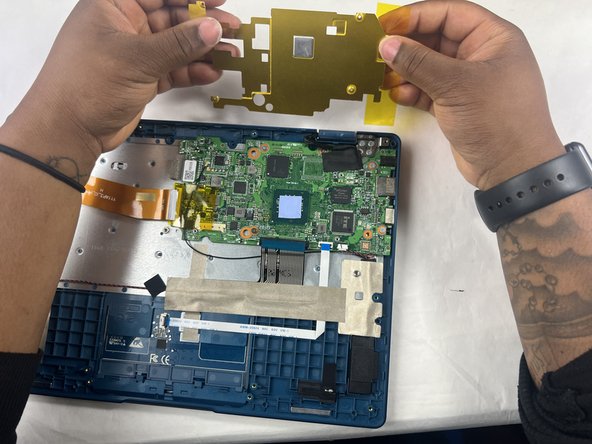
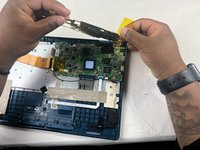
    4. Gateway GWTC116-2BL Display Replacement: crwdns2935265:09crwdnd2935265:01crwdnd2935265:03crwdne2935265:0 Gateway GWTC116-2BL Display Replacement: crwdns2935265:09crwdnd2935265:02crwdnd2935265:03crwdne2935265:0 Gateway GWTC116-2BL Display Replacement: crwdns2935265:09crwdnd2935265:03crwdnd2935265:03crwdne2935265:0
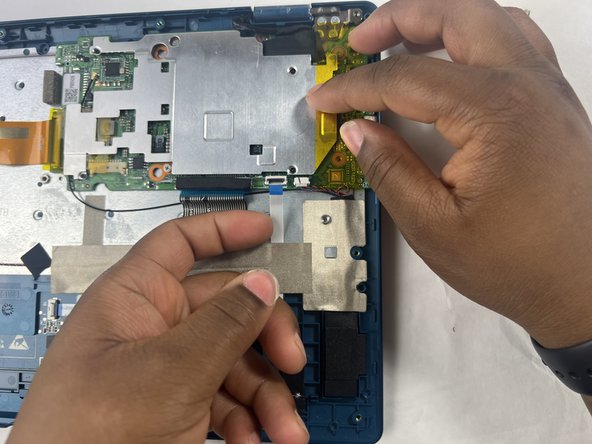
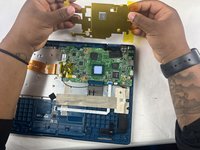
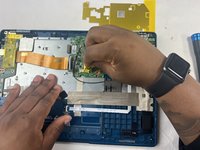
      • Peel the yellow tape off of the casing.

      • Lift the casing off of the motherboard.

      crwdns2952109:0crwdne2952109:0

      crwdns2917038:0crwdne2917038:0

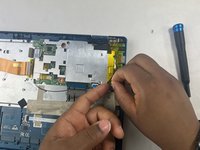
    5. Gateway GWTC116-2BL Display Replacement: crwdns2935265:010crwdnd2935265:01crwdnd2935265:02crwdne2935265:0 Gateway GWTC116-2BL Display Replacement: crwdns2935265:010crwdnd2935265:02crwdnd2935265:02crwdne2935265:0
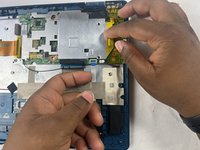
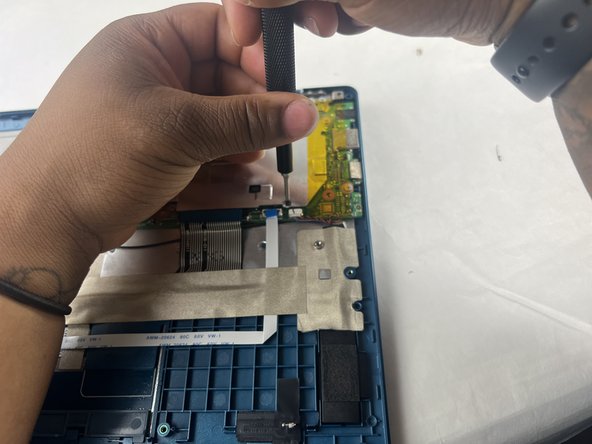
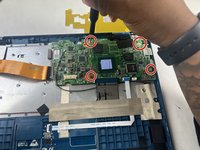
      • Peel off the yellow tape.

      • Remove four 3.0 mm Phillips #00 screws.

      crwdns2952109:0crwdne2952109:0

      crwdns2917038:0crwdne2917038:0

    6. Gateway GWTC116-2BL Display Replacement: crwdns2935265:011crwdnd2935265:01crwdnd2935265:02crwdne2935265:0 Gateway GWTC116-2BL Display Replacement: crwdns2935265:011crwdnd2935265:02crwdnd2935265:02crwdne2935265:0
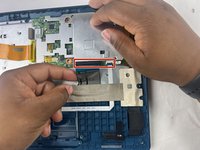
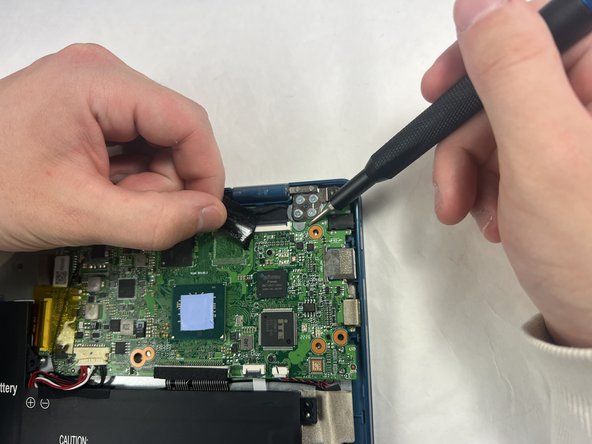
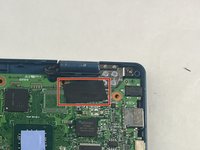
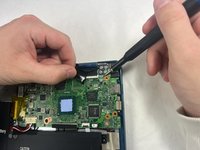
      • Peel off the black piece of tape covering the display cable.

      crwdns2952109:0crwdne2952109:0

      crwdns2917038:0crwdne2917038:0

    7. Gateway GWTC116-2BL Display Replacement: crwdns2935265:012crwdnd2935265:01crwdnd2935265:02crwdne2935265:0 Gateway GWTC116-2BL Display Replacement: crwdns2935265:012crwdnd2935265:02crwdnd2935265:02crwdne2935265:0
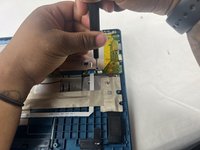
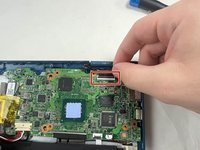
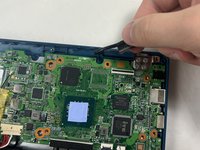
      • Flick open the bracket securing the display cable and disconnect the cable from the motherboard.

      crwdns2952109:0crwdne2952109:0

      crwdns2917038:0crwdne2917038:0

    8. Gateway GWTC116-2BL Display Replacement: crwdns2935265:013crwdnd2935265:01crwdnd2935265:01crwdne2935265:0
      • Remove the motherboard from the device.

      crwdns2952109:0crwdne2952109:0

      crwdns2917038:0crwdne2917038:0

    1. Gateway GWTC116-2BL Display Replacement, Display: crwdns2935265:014crwdnd2935265:01crwdnd2935265:01crwdne2935265:0
      • Remove seven 3.0 mm Phillips #00 screws from the laptop.

      crwdns2952109:0crwdne2952109:0

      crwdns2917038:0crwdne2917038:0

    2. Gateway GWTC116-2BL Display Replacement: crwdns2935265:015crwdnd2935265:01crwdnd2935265:01crwdne2935265:0
      • Applying some force, use your hands to pry the display of the laptop away from the base.

      crwdns2952109:0crwdne2952109:0

      crwdns2917038:0crwdne2917038:0

crwdns2915888:0crwdne2915888:0

To reassemble your device, follow these instructions in reverse order.

crwdns2935221:0crwdne2935221:0

crwdns2935227:0crwdne2935227:0

Kailey Sousa

crwdns2935283:003/22/24crwdne2935283:0

522 crwdns2915208:0crwdne2915208:0

crwdns2935297:04crwdne2935297:0

crwdns2935287:0crwdne2935287:0

UMass Dartmouth, Team 6-2, Botvin Spring 2024 crwdns2935289:0UMass Dartmouth, Team 6-2, Botvin Spring 2024crwdne2935289:0

UMASSD-BOTVIN-S24S6G2

crwdns2931471:03crwdne2931471:0

crwdns2935297:060crwdne2935297:0

crwdns2947410:01crwdne2947410:0

Mon écran ne s'allume pas au démarrage. Que faire ?

Youssouf SAWADOGO - crwdns2934203:0crwdne2934203:0 crwdns2950251:0crwdne2950251:0
crwdns2917038:0crwdne2917038:0

crwdns2936625:0crwdne2936625:0:

crwdns2936751:024crwdne2936751:0 5

crwdns2936753:07crwdne2936753:0 24

crwdns2936753:030crwdne2936753:0 109

crwdns2959996:0crwdne2959996:0 1,664