crwdns2915892:0crwdne2915892:0
This guide provides a quick and simple fix to one of the most common problems concerning this device. Before continuing it should be noted that this battery is a lithium ion battery. Any puncturing to the outer shell of the battery could risk a corrosive hazard as well as releasing flammable vapors.
crwdns2942213:0crwdne2942213:0
-
-
There are four 11.0 mm screws located at each corner on the back of the device.
-
With the T5 torx screwdriver, remove these screws and set aside in a safe place.
-
-
-
Using the plastic opening tool, pry apart the device around the seam.
-
-
-
-
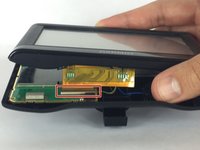
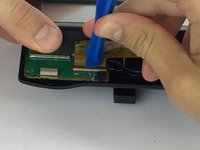
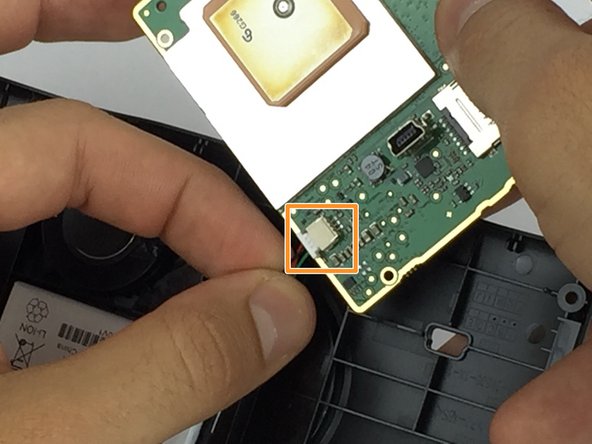
Observe the ribbon connecting the screen to the circuit board.
-
Detach the clip using the plastic opening tool and set aside the screen.
-
-
-
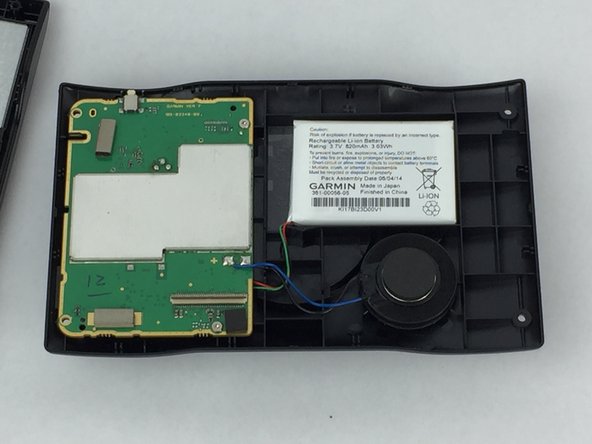
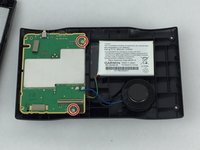
Using the T5 Torx screwdriver, remove the two remaining 5.0 mm screws.
-
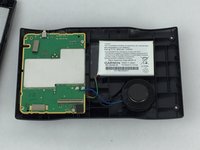
Lift the board from its housing and then detach the plug coming from the battery.
-
-
-
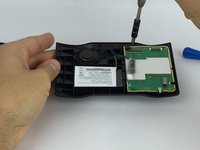
If the battery is glued in place use the plastic opening tool to remove it.
-
Finally, exchange the old battery with the replacement.
-


To reassemble your device, follow these instructions in reverse order.
To reassemble your device, follow these instructions in reverse order.
crwdns2915084:0crwdne2915084:0

USF Tampa, Team S3-G5, Nance Fall 2017 crwdns2935289:0USF Tampa, Team S3-G5, Nance Fall 2017crwdne2935289:0
USFT-NANCE-F17S3G5
crwdns2931471:03crwdne2931471:0
crwdns2935297:04crwdne2935297:0