crwdns2915892:0crwdne2915892:0
Use this guide to replace the battery in the Garmin Nuvi 255W.
crwdns2942213:0crwdne2942213:0
-
-
Remove the barcode sticker at the bottom of the device.
-
-
-
Remove two 8.4 mm T5 screws from the bottom of the device.
-
-
-
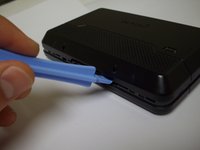
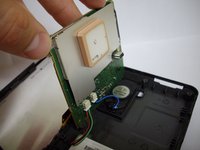
Using a plastic opening tool, carefully pry open the device.
-
-
-
-
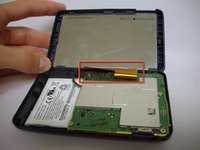
Unscrew the four 6.70 mm screws holding the motherboard in place using a philips #0 screw driver.
-
-
-
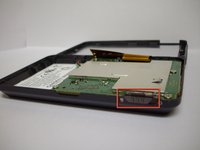
Lift up the motherboard.
-
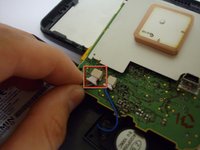
Carefully disconnect the battery and motherboard. Slowly wiggling the connection makes it easier to disconnect the battery from the motherboard.
-
-
-
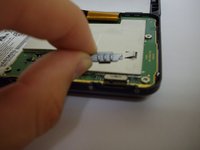
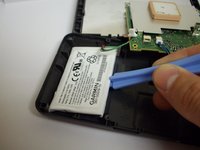
Using the plastic opening tool as a wedge, pry the battery from the case. This can be fairly tough as the battery is glued to the case. Don't be afraid to use force and some good leverage.
-


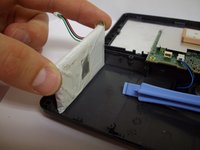
To reassemble your device, follow these instructions in reverse order.
crwdns2935221:0crwdne2935221:0
crwdns2935229:016crwdne2935229:0
crwdns2935287:0crwdne2935287:0

Cal Poly, Team 9-3, Regan Winter 2012 crwdns2935289:0Cal Poly, Team 9-3, Regan Winter 2012crwdne2935289:0
CPSU-REGAN-W12S9G3
crwdns2931471:05crwdne2931471:0
crwdns2935297:04crwdne2935297:0
crwdns2947412:09crwdne2947412:0
Thanks for this very nicely illustrated guide.
Thanks for the guide. Used it to open up a Nuvi 265 because the battery had been left to discharge below the protection circuit's limit. Connected the battery leads (Green = ground, Red = voltage, Black = temperature) to a 5v USB charger for ~20 seconds to revive the protection circuit, and the unit is now charging again. If you're going to do this, know the risks. Thermal runaways in lithium batteries can be extremely volatile.
Used these instructions to replace battery in my 5-year old Garmin nuvi 205W (which has the same access and internal geometry).
Thanks, great demonstration.
This is great! I have run into a big problem, though. One of the screws is "unthreaded." The head has become smooth, and I can't unscrew it to get the cover off. Is there any way to get it off???