crwdns2915892:0crwdne2915892:0
This guide will show you how to access, remove, and replace the battery of a Garmin Edge 530 device.
It may be necessary to replace the battery if the device is not turning on, or if the device has been damaged. You should troubleshoot to determine that the screen is operating properly before resorting to battery replacement.
The Garmin Edge 530 operates using a lithium-ion battery. This battery part can come as an individual battery or pre-packaged in a back case. If the part you order includes a back case, you should refer to the back case replacement guide for further instruction.
In this guide, you will have to pry up the glass panel with a metal spudger. It is important to note the potential broken glass hazard when prying the screen from the back cover. After this step, use ESD-safe tools to avoid damage to the rest of the device and protect it from electrostatic discharge.
A punctured battery can cause a fire. If the battery is swollen, it should be handled properly.
Before beginning, power down the device and disconnect from any external power sources.
crwdns2942213:0crwdne2942213:0
-
-
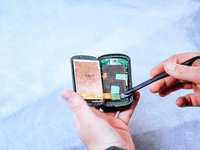
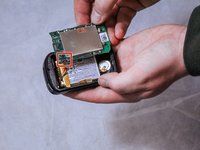
Insert the metal spudger between the edge of the device screen and back cover.
-
Begin to pry along the perimeter between the device screen and back cover.
-
-
crwdns2935267:0crwdne2935267:0Halberd Spudger$2.99
-
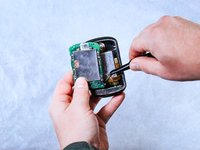
Use the nylon halberd spudger to lift the edge of the screen and begin separating it from the back cover.
-
-
-
Peel back the tape holding down the orange ribbon cables with the nylon halberd spudger.
-
-
-
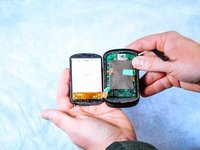
Completely detach the screen from the back cover by disconnecting the orange ribbon cables.
-
-
-
crwdns2935267:0crwdne2935267:0Halberd Spudger$2.99
-
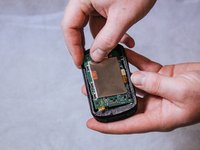
Detach the press-fit connector from the motherboard using the nylon halberd spudger.
-
-
-
Remove the three 6 mm screws connecting the motherboard to the back panel using the T5 Torx screwdriver.
-
-
-
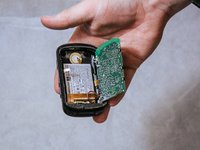
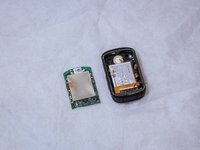
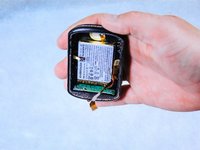
Take the motherboard out of the back cover.
-
-
crwdns2935267:0crwdne2935267:0Tweezers$3.99
-
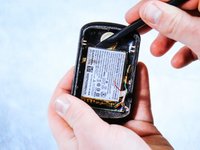
Remove the wire harness that connects the motherboard to the battery using the angled tweezers by pulling it out of the compartment.
-
-
crwdns2935267:0crwdne2935267:0Halberd Spudger$2.99
-
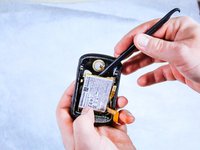
Use a nylon halberd spudger to pry up the orange ribbon cable connecting the battery to the charging port.
-
Fully remove the orange ribbon cable from the charging port.
-
-
-
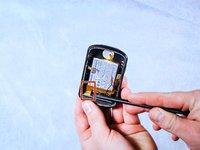
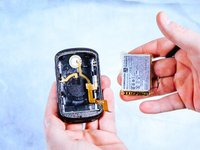
Use the nylon halberd spudger to peel the battery from the adhesive holding it into the back case.
-
Gently pry up the edges of the battery.
-
Once the adhesive has been separated from the battery, carefully lift it out of the back case.
-


To reassemble your device, follow these instructions in reverse order.
To reassemble your device, follow these instructions in reverse order.
crwdns2935221:0crwdne2935221:0
crwdns2935229:06crwdne2935229:0

crwdns2915084:0crwdne2915084:0

Clemson, Team 2-1, Hunter Spring 2022 crwdns2935289:0Clemson, Team 2-1, Hunter Spring 2022crwdne2935289:0
CLEM-HUNTER-S22S2G1
crwdns2931471:05crwdne2931471:0
crwdns2935297:017crwdne2935297:0
crwdns2947412:06crwdne2947412:0
how is the screen glued back in?
You might use the T-8000 glue
How do those 3 cables get reattached? Do they need to be soldered or are they just pushed back into the black clip?
How do those 3 cables go back in, just push into bracket? Do they need to be soldered?
Why you need motherboard?