crwdns2915892:0crwdne2915892:0
If your joystick has broken over time, this guide will help you replace these parts. This repair can take anywhere from 4 to 5 minutes and only requires a Phillips #1 screwdriver and the iFixit opening tool. A good replacement for this device is the Dual Shock 4 joystick.
crwdns2942213:0crwdne2942213:0
-
-
Using the Phillips 1 screwdriver, gently turn the screw to the left (repeat this step until all four screws are taken out).
-
-
-
Use your iFixit opening tool to break the seam of the back of your controller.
-
-
-
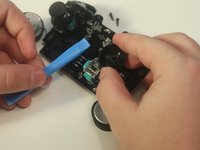
Using the plastic spudger, wiggle the connection out of place.
-
-
-
-
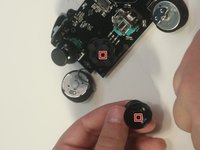
Apply a slow, but consistent pull to the old 600 maH battery.
-
Attach new battery onto the pad.
-
-
-
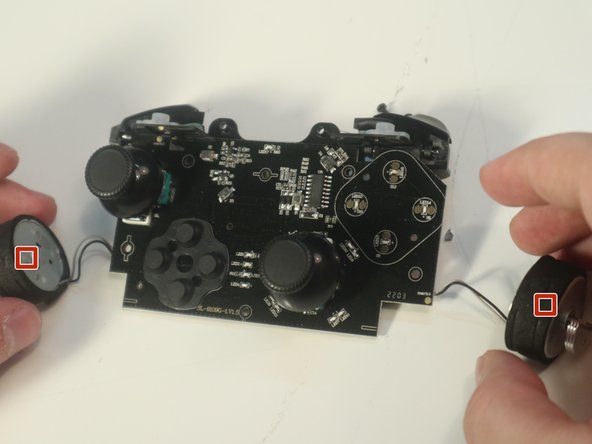
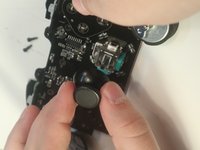
Disconnect the rumblers from the motherboard
-
-
-
Using the screwdriver, remove the 5 mm screws from the motherboard
-
-
-
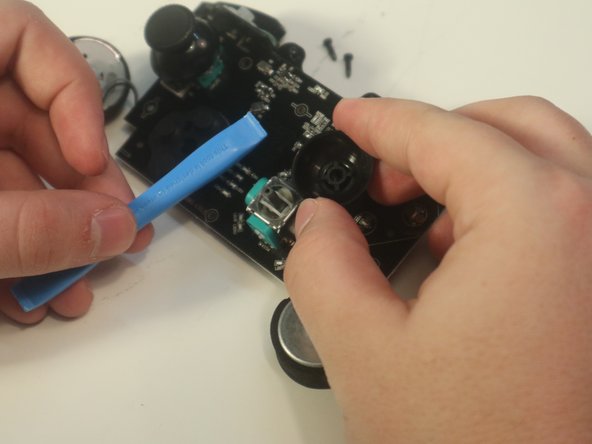
Using the wedge tool, pop the joystick out
-
-
-
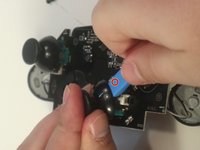
Make sure the square of the joystick matches the square of the pad and pop it in place.
-


To reassemble your device, follow these instructions in reverse order.
To reassemble your device, follow these instructions in reverse order.
crwdns2935221:0crwdne2935221:0
crwdns2935227:0crwdne2935227:0
crwdns2915084:0crwdne2915084:0

Western Carolina University, Team 1-4, Virtue Fall 2022 crwdns2935289:0Western Carolina University, Team 1-4, Virtue Fall 2022crwdne2935289:0
WCU-VIRTUE-F22S1G4
crwdns2931471:04crwdne2931471:0
crwdns2935297:010crwdne2935297:0
crwdns2947412:06crwdne2947412:0
I bought ps4 joysticks for the repair, but ps4 joysticks seems larger so it's stuck
PlayStation4 stick is not compatible with GameSir T4 Pro. The stick for the Nintendo Switch PRO controller does not interfere, but this also requires processing for installation.
It appears that you will need to remove the light diffuser(white tubular plastic sleeve) from the case to make the parts fit.
NAKIRI -
Los stick del control de ps4 no son compatibles no entiendo por qué está esta quia de reparación si es falsa compre los stick de ps4 y no fueron compatibles tuve que modificar el control con un dremel muy delicadamente, ya que los stick de ps4 son ligeramente mas anchos y se atascan al girar se tiene que comer la carcasa del mando unos 2mm en cada agujero donde van los stick asi que no sigan las recomendaciones de esta guia al menos que tengan pensado modificar su control
On a real note. Has anyone found any thumb covers that fit out of the box without mods? The default T4 pro ones seem smaller than both PS4 and Xbox 360 so far that I've checked.