crwdns2915892:0crwdne2915892:0
Use this guide to replace the charging port of your gameSit T4 Pro with a compatible replacement.
Only replace the charging port of your gameSit T4 Pro if the controller is not registering that it is plugged in and you have ruled out the possibility that the charging cord or power supply are the problem.
crwdns2942213:0crwdne2942213:0
-
-
Using the Phillips 1 screwdriver, gently turn the screw to the left (repeat this step until all four screws are taken out).
-
-
-
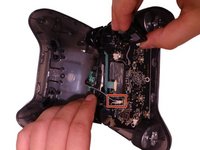
Use your iFixit opening tool to break the seam of the back of your controller.
-
-
-
Using the plastic spudger, wiggle the connection out of place.
-
-
-
-
Apply a slow, but consistent pull to the old 600 maH battery.
-
Attach new battery onto the pad.
-
-
-
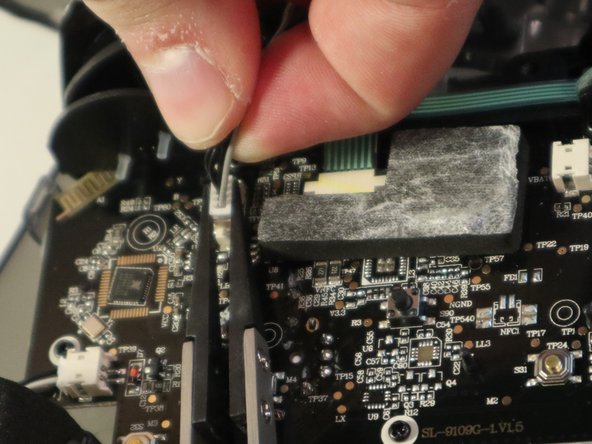
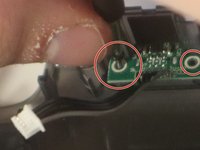
Use the needle nose pliers to remove the plastic connection from the motherboard.
-
-
-
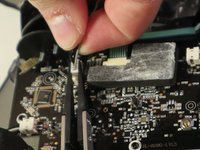
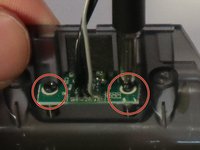
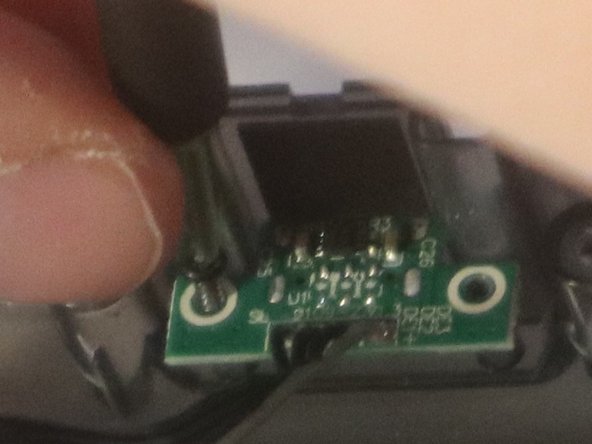
Remove the two 5mm screws on the charging port and take out the old charging port.
-
-
-
Put your new compatible charging port in place.
-


To reassemble your device, follow these instructions in reverse order.
To reassemble your device, follow these instructions in reverse order.
crwdns2915084:0crwdne2915084:0

Western Carolina University, Team 1-4, Virtue Fall 2022 crwdns2935289:0Western Carolina University, Team 1-4, Virtue Fall 2022crwdne2935289:0
WCU-VIRTUE-F22S1G4
crwdns2931471:04crwdne2931471:0
crwdns2935297:010crwdne2935297:0
crwdns2947410:01crwdne2947410:0
Where i can buy the charging port? Some buttons isnt working so when i was trying to solve the problem with contact cleaner i ended up breaking the soldered connection