crwdns2915892:0crwdne2915892:0
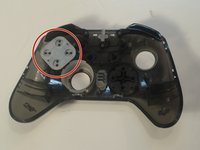
This guide helps you replace the actions buttons in your GameSir Pro T4 controller. This guide can also be used to simply remove and clean sticking or unresponsive action buttons.
Sticky or unresponsive GameSir Pro T4 buttons are often the result of the accumulation of dirt or grime in the button's crevices.
crwdns2942213:0crwdne2942213:0
-
-
Using the Phillips 1 screwdriver, gently turn the screw to the left (repeat this step until all four screws are taken out).
-
-
-
Use your iFixit opening tool to break the seam of the back of your controller.
-
-
-
Using the plastic spudger, wiggle the connection out of place.
-
-
-
-
Apply a slow, but consistent pull to the old 600 maH battery.
-
Attach new battery onto the pad.
-
-
-
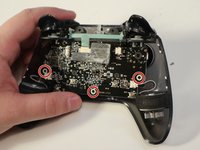
Remove the three 5mm screws on the motherboard.
-
-
-
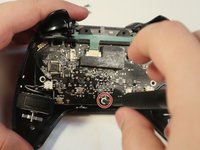
Disconnect all white connectors from the motherboard.
-
-
-
Carefully pull the motherboard away to reveal the front panel.
-
-
-
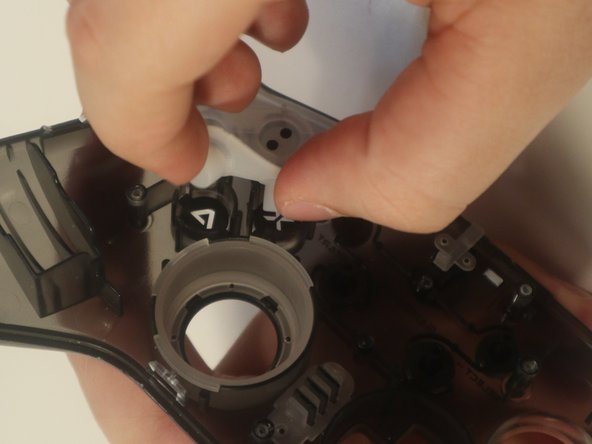
Remove the white rubber panel to get access to the buttons.
-


To reassemble your device, follow these instructions in reverse order.
crwdns2935221:0crwdne2935221:0
crwdns2935229:05crwdne2935229:0
crwdns2935287:0crwdne2935287:0

Western Carolina University, Team 1-4, Virtue Fall 2022 crwdns2935289:0Western Carolina University, Team 1-4, Virtue Fall 2022crwdne2935289:0
WCU-VIRTUE-F22S1G4
crwdns2931471:04crwdne2931471:0
crwdns2935297:010crwdne2935297:0