crwdns2915892:0crwdne2915892:0
Use this guide to replace your cracked or broken LCD screen or front case.
crwdns2942213:0crwdne2942213:0
crwdns2936621:0crwdne2936621:0
-
-
Take the battery cover off by releasing the locking tab and hinging the cover away. Remove the batteries inside the cover
-
-
-
Remove the six back panel screws using a Tri-wing Screwdriver.
-
Remove bottom back panel screw with a Phillips #1 screw driver. (Image #2)
-
-
-
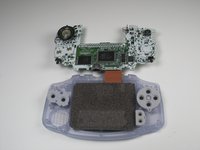
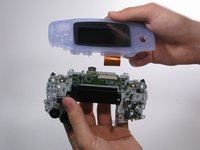
Remove the back panel by pulling away with one hand and the front secured in the other hand.
-
-
-
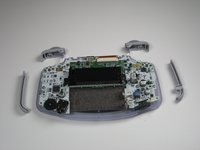
Remove left and right triggers by lifting and pulling them away from the system.
-
Do the same for side panels
-
-
-
-
Remove the gray On/Off Switch by pulling up and away from the unit. Replace with another switch if necessary.
-
-
-
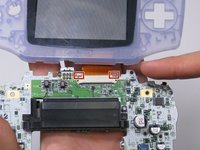
Remove the three screws on the circuit board with a Phillips #1 screw driver.
-
-
-
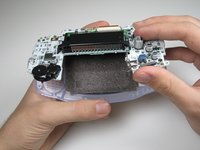
Pull circuit board away from the front panel by pulling up at the bottom of the circuit board, keeping the top ribbon still connected.
-
-
crwdns2935267:0crwdne2935267:0Tweezers$4.99
-
Remove the rubber button pads from their pockets.
-
Remove the plastic buttons and the D-pad from beneath the rubber pads with tweezers or by hand.
-
-
crwdns2935267:0crwdne2935267:0Tweezers$4.99
-
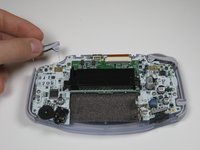
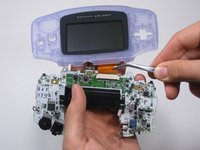
Use a spudger/tweezers/fingernail to unlatch the LCD ribbon port by pulling the grey tabs on the sides upwards (towards the top edge of the PCB).
-
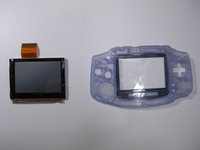
Once the LCD ribbon port has been unlatched, the LCD ribbon should very easily slide out and can be removed with zero force using fingers or tweezers.
-
-
-
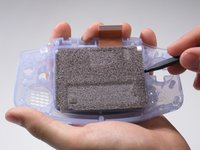
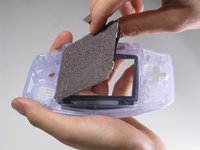
Use the spudger to lift the screen from the front panel. Place the spudger in the space directly left of the D-pad.
-


crwdns2935221:0crwdne2935221:0
crwdns2935229:06crwdne2935229:0
crwdns2915084:0crwdne2915084:0

Cal Poly, Team 16-29, Maness Winter 2010 crwdns2935289:0Cal Poly, Team 16-29, Maness Winter 2010crwdne2935289:0
CPSU-MANESS-W10S16G29
crwdns2931471:05crwdne2931471:0
crwdns2935297:062crwdne2935297:0
crwdns2947410:01crwdne2947410:0
I think the rating for this is too high. As long as you keep track of small screws and buttons & be wary of the ribbon cable, it's an easy replacement. But thank you for the detailed guide!