crwdns2915892:0crwdne2915892:0
This guide provides instructions on how to replace the outer case of a GE 7-4836B Alarm Clock AM-FM Radio. This guide may be helpful if your outer case is cracked or scratched or if you need to access the internal components of your alarm clock.
Outer cases are used to protect the alarm clock and keep the alarm intact. The clock should still work if cracked or scratched, so this is a cosmetic replacement.
Before you begin, make sure that the replacement outer case is compatible with your alarm clock.
Caution: Make sure radio is unplugged from a power source before starting.
crwdns2942213:0crwdne2942213:0
-
-
Find the battery compartment on the bottom of the clock radio.
-
Using your thumb, push the compartment cover latch toward the battery.
-
With the latch pushed in, pull the compartment cover upward to remove it..
-
-
-
Lift the battery from the compartment.
-
Pull the battery up and gently disconnect it from the battery connector.
-
-
-
-
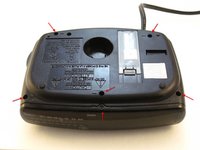
Using a Phillips #00 Screwdriver, unscrew the six 12mm screws from around the bottom of the clock radio.
-
-
-
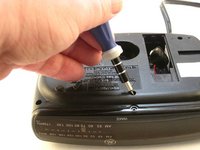
Gently pull the liquid crystal display (LCD) cover off.
-
-
-
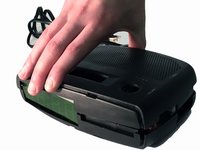
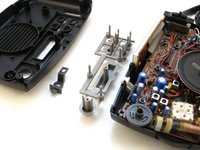
Lift the top off. Two gray, plastic internal pieces will fall out when you do this; set them aside.
-


To reassemble your device, follow these instructions in reverse order.
To reassemble your device, follow these instructions in reverse order.
crwdns2935221:0crwdne2935221:0
crwdns2935229:02crwdne2935229:0